Reftab offers an integration with Google Data Studio using our API Keys. Google Data Studio allows you to turn your assets into customizable informative reports and dashboards. In this guide we will walk through the process of:
- How to Connect Google Data Studio with Reftab
- How to Properly Map Fields
- How to Create Your First Dashboard
How to Connect Google Data Studio with Reftab
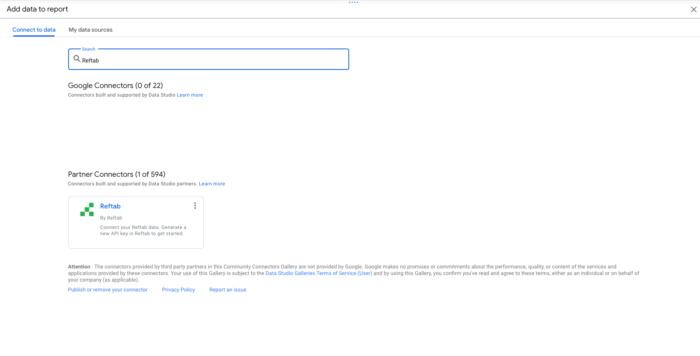
Login to your Data Studio account and head to Create a Report. This will give you the prompt to Add data to report. You will want to search for Reftab and click Authorize to begin connecting your account.
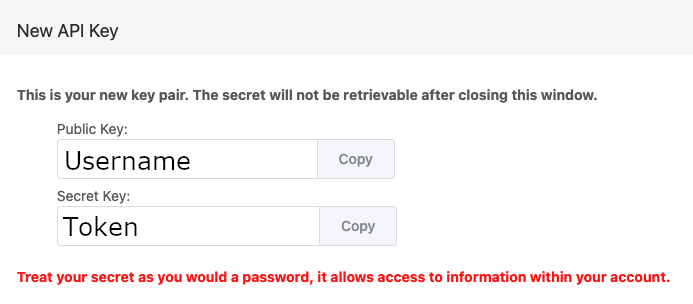
You will be prompted to input a Reftab Username and Token. This will not be your Reftab Username.
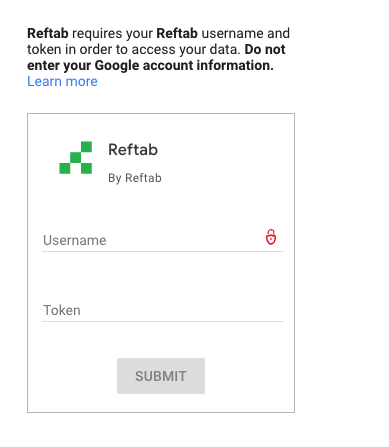
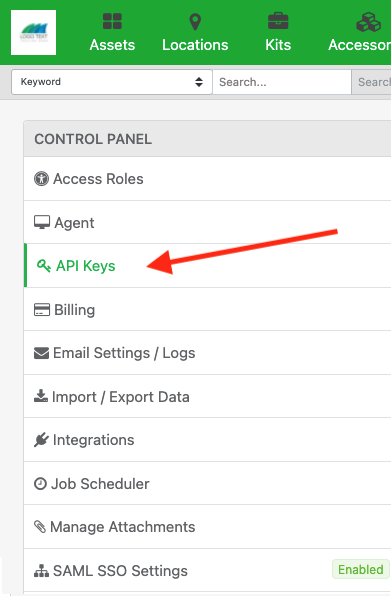
You will need to generate a new API Key in the Reftab Control Panel. Open a new tab and log into Reftab. Click settings in the upper right and head to API Keys.
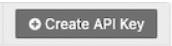
In the Upper Right corner you will want to click Create API Key.
This will generate a New Key Pair. The Secret Key will not be retrievable once this window is closed. The Public Key should be input in the Username field and the Secret Key is your token.
Click Submit to begin mapping your fields.
How to Properly Map Fields
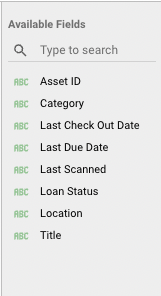
For the purpose of this How-To we are going to want add a few more fields. The fields that are synced automatically are:
- Asset ID
- Category
- Last Check Out Date
- Last Due Date
- Last Scanned
- Loan Status
- Location
- Title
We are going to add Warranty Start Date and Warranty Expires. Each field needs to be typed exactly as it is written in Reftab. One field per line with no extra characters.
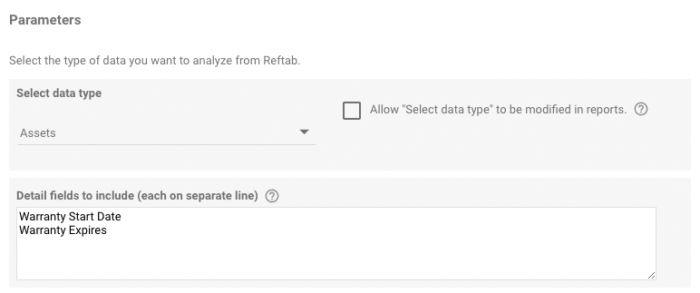
You are able to add an unlimited number fields. However, Google Data Studio is only able to accept Text fields. Pre-populated lists and Geolocation fields will not sync properly. Click Add at the bottom right and we can start building our first Report.
How to Map Date fields
It is worth noting, Reftab sends dates as a timestamp. We are going to need to parse this data to make it readable to Google Data Studio.
Located to the right of your screen you will see Available Fields. At the bottom of this menu there is an option to ADD A FIELD.
Add a field and we can begin parsing the Warranty Expires field. I have chosen the name “Expires Date” and have kept the Field ID the same.
The formula for this field is:
PARSE_DATETIME(“%Y-%m-%dT%H:%M:%E*S”, Warranty Expires)
I do not need timestamps for this particular dashboard so I have chosen to go one step further and extract the date from this result. The formula to extract the date only would be:
EXTRACT(DATE from (PARSE_DATETIME(“%Y-%m-%dT%H:%M:%E*S”, Warranty Expires)))
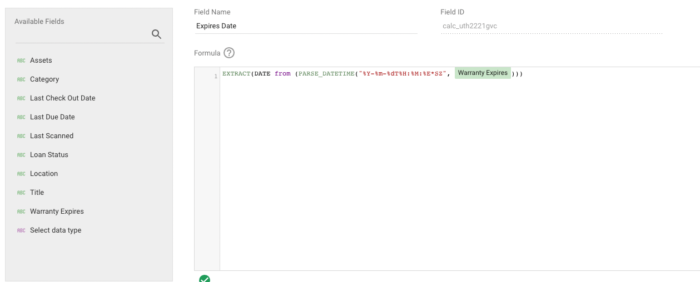
Make sure your Formula looks like the one above and click SAVE at the bottom right corner of your screen. You will want to repeat this step will all fields that include a date such as:
- Last Check Out Date
- Last Due Date
- Last Scanned
How to Create Your First Dashboard
We do not want to go too in depth on How to make a dashboard as there are numerous tutorials regarding Google Data Studio. However, we have created a simple dashboard which you can see below. Upon connecting Google Data Studio and Reftab you will be given a template as well. Add Reftab as a Data Source (same process as Step 1) and you will be able to use our Provided Template.

The Dashboard shown above is a simple breakdown using the fields:
- Loan Status
- Asset ID
- Location
- Warranty Expires
As long as your text fields have been properly mapped, you will be able to create a dashboard that automatically updates whenever a change happens in Reftab. If you need any help regarding Google Data Studio and Reftab, feel free to email [email protected]. Our Support Team is always happy to answer any and all questions you might have.