How to add additional user accounts and setup access restrictions?
Reftab allows you to create unlimited users.
Each user belongs to an access role. Access roles define what level of access a user has.
The lowest level access role is called “Loanee“. Loanees have no login rights, but equipment can still be assigned to them.
The highest level access is called “Administrator“. Administrators can do anything in the account including creating other users, access billing, create / delete assets, etc.
Reftab provides pre-built access roles. Reftab Default Access Role Information
You can also create custom access roles: Jump to custom access roles
To create a user, click “Loanees” > “Add Loanee”

Next, give the user a name, email address and select the access role they’ll belong to:
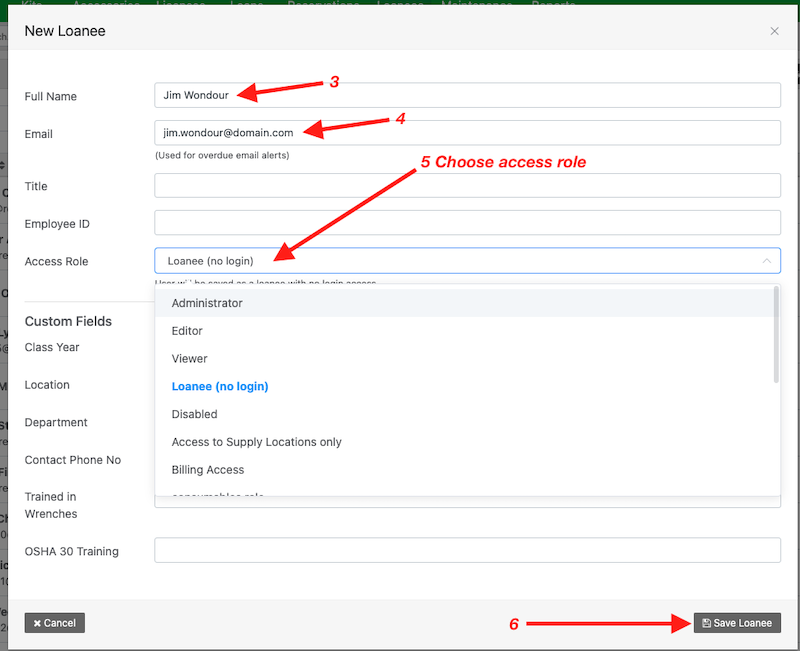
Click “Save“
If you chose “Loanee (no login)”, the user will exist in your list of users and you can loan equipment to them, but they will not receive a new registration email to set a password and login.
If you chose any other account such as “Administrator”, an email address will send to them to set their password and login.
Custom Access Roles
You can create custom access roles to assign specific restrictions to users. For example, you can limit locations, categories, fields and ability to loan or not and much more…
To create custom roles, click “Settings” > “Access Roles” > “New Access Role“

You will then go through each tab, set each setting according to your needs and save when done.
For example, “Loan Rights” will govern how members of this role will loan items.
Note: Some of the options for loan rights refer to “Loan Restrictions”. These are your established business hours and max loan times. These are settings you can configure to limit the days of the week and the maximum amount of time users can have items for.
Please read the gray information text that displays on the page for details on all loan options.

For example, one of the loan rights options is, “Portal Access with Loan Restrictions“. When this setting is applied, users log into your custom user portal.

Portal users can only check out or reserve equipment to themselves. You decide if you want portal users to have the ability to reserve equipment only or check out equipment.
The below image is an example of what a portal user will see upon login. The portal is designed to showcases only the locations and asset categories that their role allows.

On the “Locations” tab, you can set “edit“, “view“, “hide” on each of your locations. For example, you can choose to hide locations from certain users.

Once saved, this role can now be applied to newly created users or existing.
For example, in the screenshot above, I created a role called, “Access to New York Location Only“. This access role is now an option for me to select when creating users or editing:

Next, when this user logs in, they will gain all the permissions defined by the role.
Need help? We're here for you
For any questions or assistance, feel free to reach out to us.
Your assets, simplified. Begin your journey with us!
50 assets free forever with unlimited inventory & software tracking. Includes email alerts, mobile apps, reports, custom asset tags and more.