Reftab can sync loanees over an LDAP connection. The process will only add / update loanees, it wont delete any.
So for example if a user joins the organization, when they are added to Google Workspace, Reftab can pull that loanee in, but if the user leaves the org, and is removed from Google Workspace, the user will not be removed from Reftab.
Note: Loanees are users who cannot log into Reftab. They are records of users that you can check assets in and out to.
Within Google Workspace
In Google Workspace, you’ll need to log in as an administrator and add a LDAP client. Doing so will allow you to download a certificate which you will store in Reftab.
- Click the Apps tile.
- The Apps screen is displayed.
- Click the LDAP tile.
- The LDAP screen is displayed.
- Click ADD CLIENT.
- Type a name for the LDAP client connection you’ll be configuring to use for Reftab (for example, “Reftab”), and optionally type a description.
- Then, click CONTINUE.
- The Access permissions screen is displayed.
In the Verify user credentials section, select either:
- Enter domain <domain name>
- Selected organizational units, then click Add and select the units from the list. (Use this to limit syncing to users in a subset of groups.)
In the Read user information section, select either:
- Entire domain <domain name>
- Selected organizational units; then either click Copy from Verify user credentials or click Add and select the units from the list. (Use this to limit syncing to users in a subset of groups.)
In the Read group information section, click the switch to set it to On.
- Then click ADD LDAP CLIENT. Google displays a confirmation message and information about downloading the certificate.
- On the same screen, click Download certificate;
- then save the downloaded certificate (which is a PDF file) in a secure location.
Click CONTINUE TO CLIENT DETAILS.
The Settings for <LDAP client name> screen is displayed.
Note: The service status, displayed at the top right of the screen, is initially set to OFF.
Click anywhere in the Service Status box. The Service Status screen is displayed.
Select On for everyone. The service status is updated for everyone.
Click SAVE.
Within Reftab:
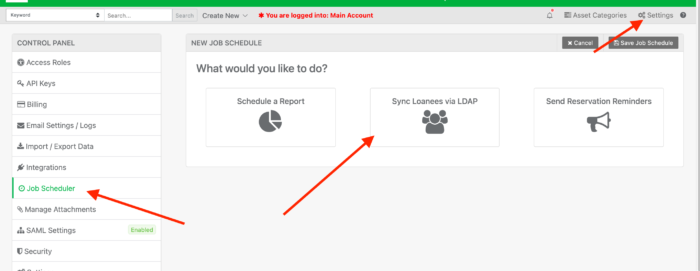
In Reftab, click “Settings” > “Job Scheduler” > “New Scheduled Job” > ‘Sync Loanees via LDAP‘
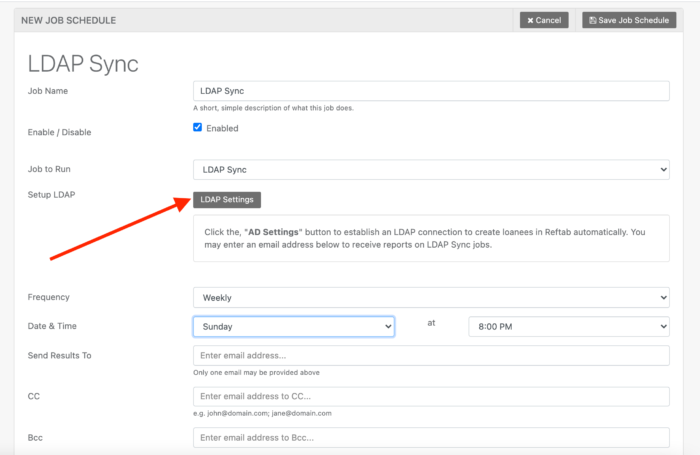
Give the job a name and click “LDAP Settings”
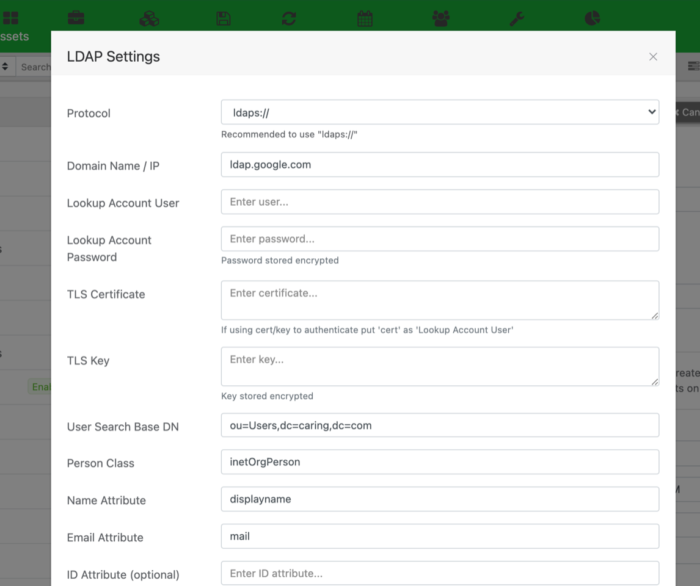
This is the form you will need to fill out to connect to your GSuite Account:
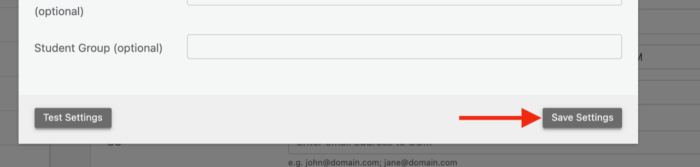
To test the connection, click “Test Settings”
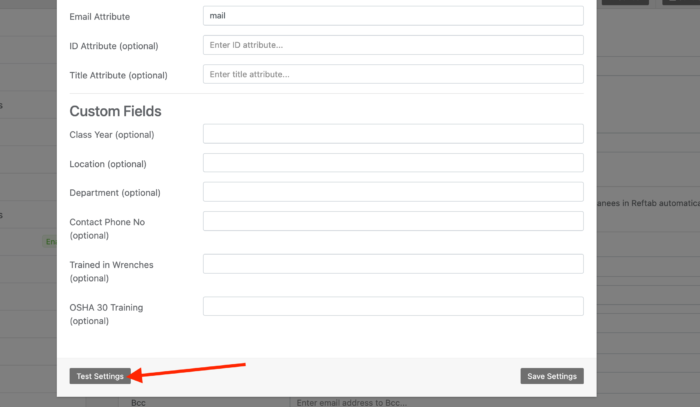
When the connection is successful, click “Save Settings”
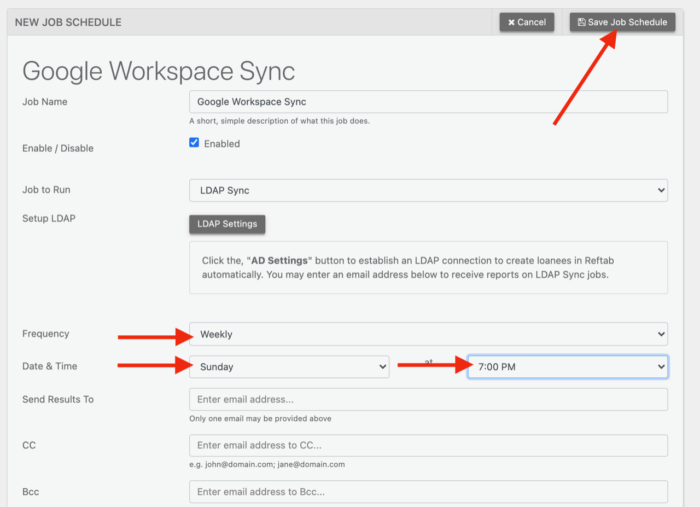
Then, you’ll want to set the frequency of when you want the LDAP sync to run, and click “Save Job Schedule”
Whenever the sync job runs, upon completion, you will receive an email with the status of the sync. For example, it can show that 100 new loanees were created, 45 loanees were updated and 10 failed to sync. When you go to your loanees page, you’ll see the new users.
Reach out to help@reftab.com for questions