How to Group Loans and Reservations
If multiple assets are checked out at the same time, Reftab will automatically group these assets into one loan. This allows bulk reservations and loans to be easily edited and maintained. In this guide we will walk you through:
- How to group assets into one loan using Bulk Actions
- How to Group Assets into one loan using the Scan Out page
- How to Filter for a Loan Group
- How to Edit a Loan Group
How to group assets into one loan using Bulk Actions
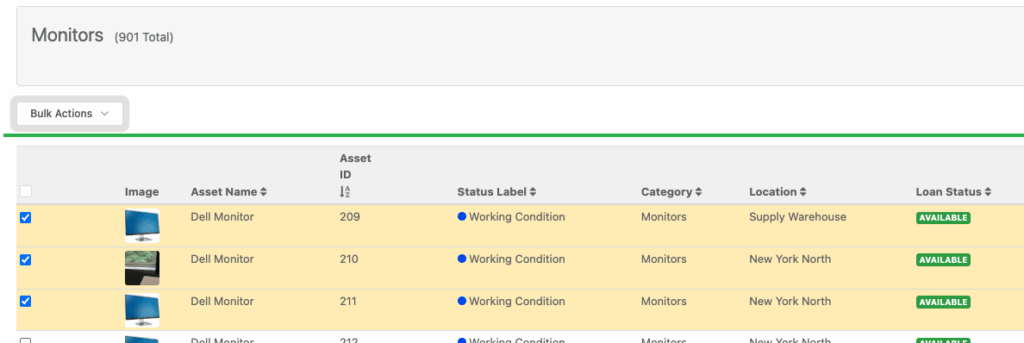
In order to group assets you will need to check them out at the same time. There is two ways to complete this. The first way is to use Bulk Actions. From the Assets tab click the checkbox of each asset you are looking to loan. Keep in mind, you are able to select assets from multiple categories when performing a Bulk Action.
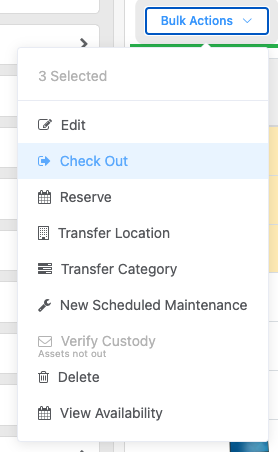
After selecting each asset, click the Bulk Actions dropdown and choose Check Out.
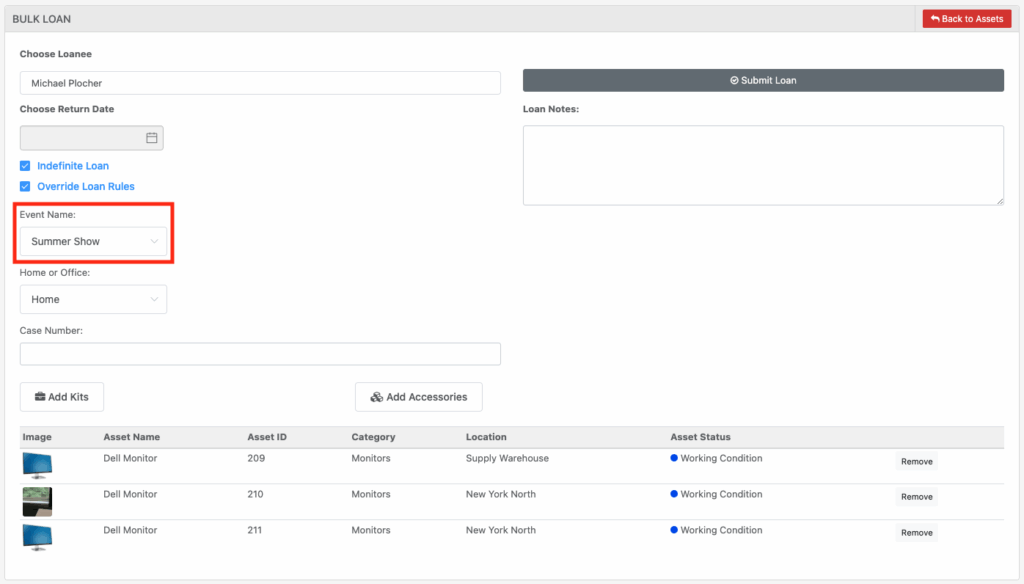
You will then be prompted to Choose a Loanee, Loan Length, and any other information needed for loans in your system. For this guide, we are going to choose the Event Name of Summer Show. We will be able to filter for this in step 3.
How to Group Assets to one loan using the Scan Out page
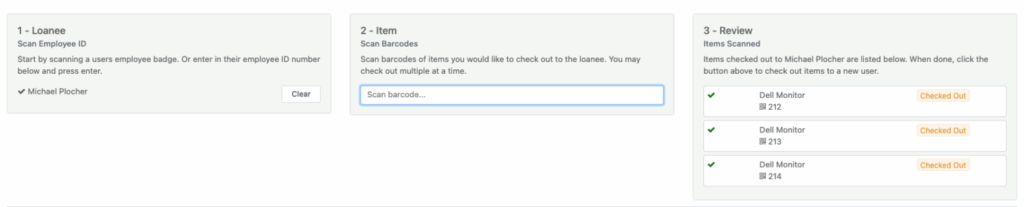
To group assets using the Scan Out page it is as simple as scanning all assets at the same time. The main things to keep in mind, before scanning an asset be sure to choose the Multiple Loan option. You can then input the correct Loan Details. As shown below, we are going to input an Event Name as Summer Show. This will allow us to filter for this event in the next step.
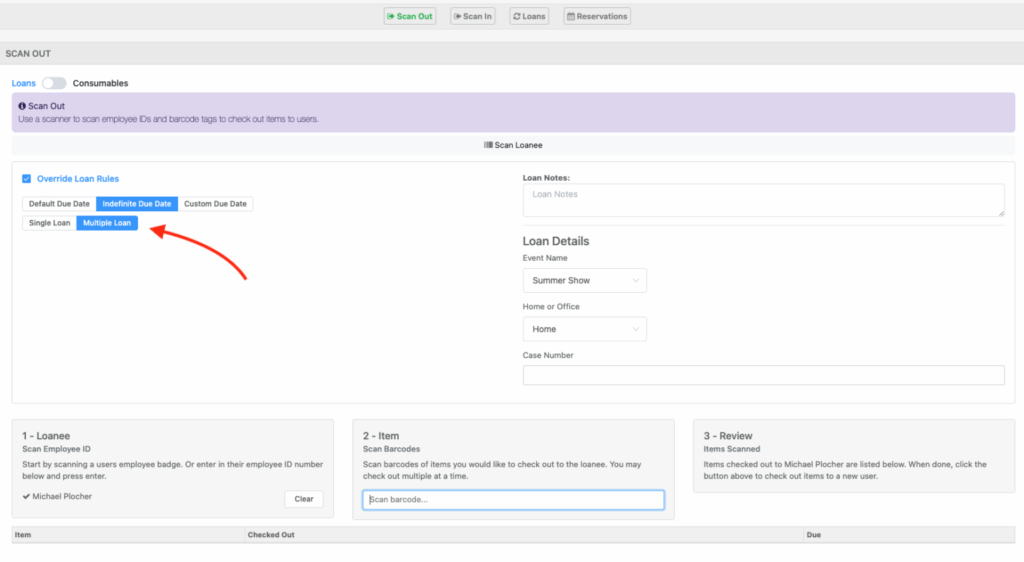
After inputting all fields, you will then be able to scan each asset. This will automatically group these assets to one loan.
How to Filter for a Loan Group
In order to Filter for a specific Loan Group, first head to the Loans tab. You then need to be sure the correct column is displayed in this table. For example, we need to be sure the column Event Name is displayed.
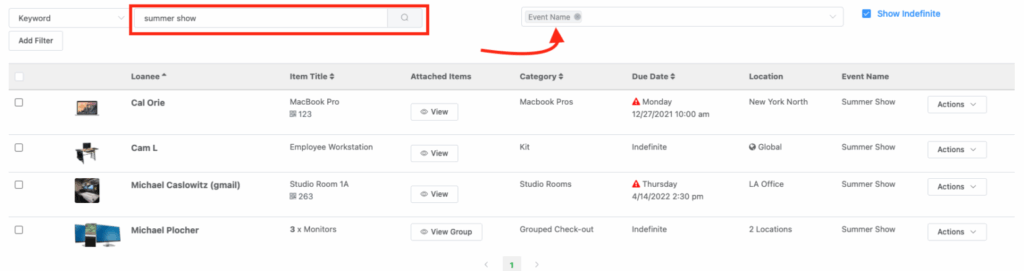
We can then use the Keyword search to filter for this event name, in our case, Summer Show.
How to Edit a Loan Group
In order to Edit a Group, choose the View Group option, for your particular loan.

From here you are given the options of:
- Check-in All Items
- Add More Items
- Edit Loan – allows editing Loan Details
- Request Verification – sends one email to verify each asset individually
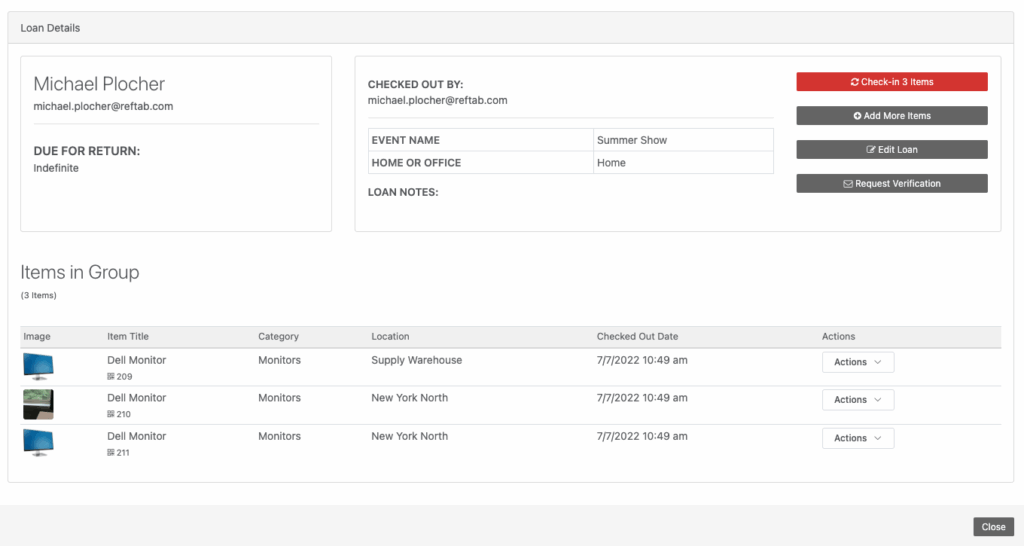
You are also able to check in each asset individually using the Actions dropdown to the right of your asset. You can then choose the Check-in option.

The remaining items will still be in this Loan Group after checking in an individual asset.
Group Reservations
Group Reservations work much the same way as loan groups. There are two ways to group a Reservation. The first being through the User Portal. When a user adds multiple assets/accessories to their Cart in the portal, this will be added as a Group Reservation. See image below:

These 3 assets will be added to your Reservations calendar as one Reservation, previously they were reflected 3 times on the same calendar. Group Reservations was our answer to cleaning up the calendar. Once this reservation is fulfilled, the assets will automatically be placed in a Loan Group. These loan groups are reflected on your calendar in red. As shown below:
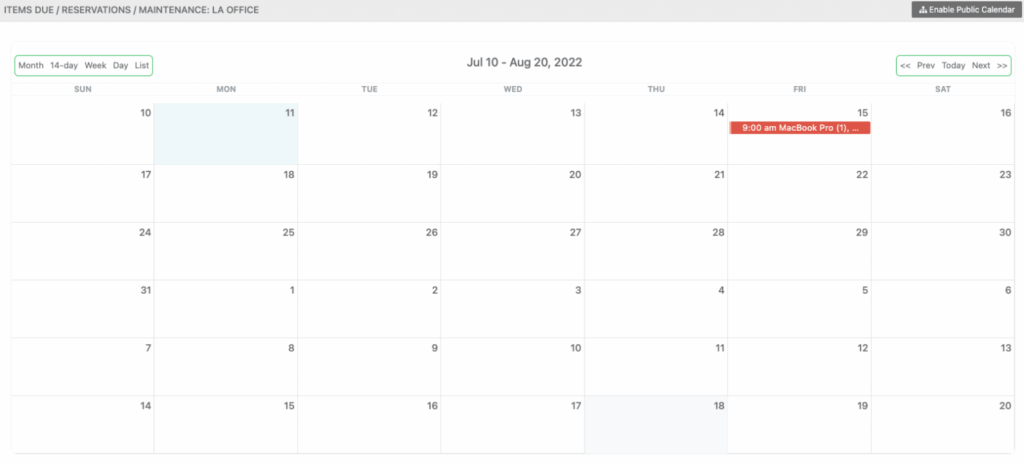
You may now click on these Red Loans through the calendar to edit the loan.
The second way to group reservations would be using Bulk Actions through the Asset Tab. Once you have chosen each asset, click the Bulk Actions dropdown and choose Reserve.
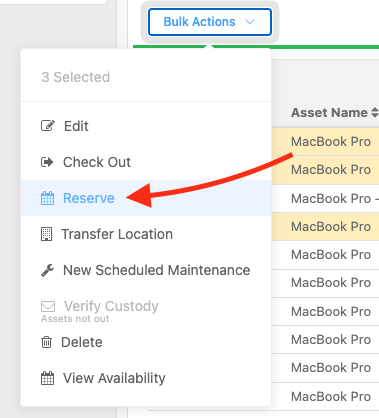
This action will automatically create a Group Reservation, allowing you to input the same details for each asset. Once fulfilled, you will create a Loan Group which will act in the same way as the steps shown above.
Conclusion
Loan and Reservation groups were added as part of our Summer 2022 update. This update focused on providing ease of use to our Bulk Loans and Reservations. You should have a good grasp on the biggest feature of this update after reading this post. If you run into any issues or need further clarification on these functions, feel free to reach out to help@reftab.com. Our Support Team is always happy to help!
Your assets, simplified. Begin your journey with us!
50 assets free forever with unlimited inventory & software tracking. Includes email alerts, mobile apps, reports, custom asset tags and more.