Reftab can be found in the OKTA App Integration Catalog.
Log into your OKTA account as an administrator.
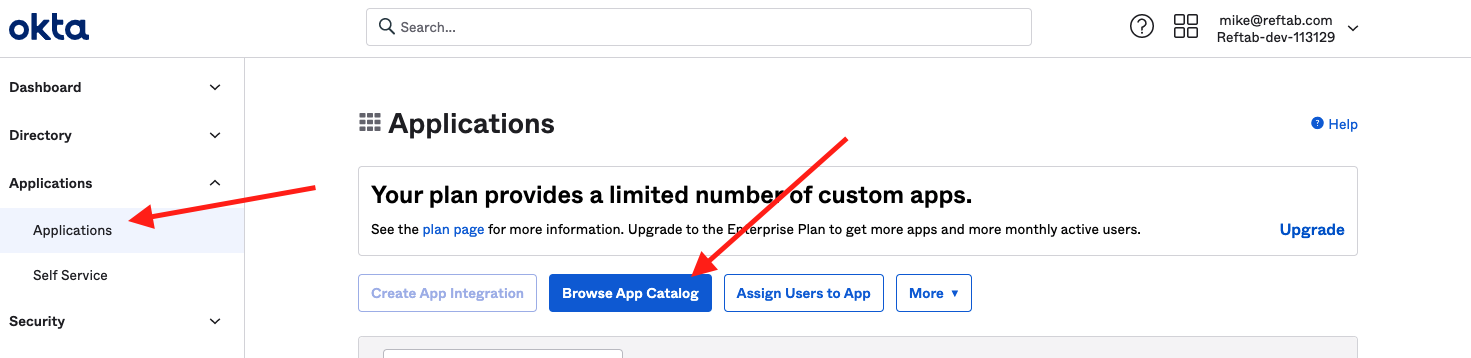
Click “Applications” > “Browse App Catalog“
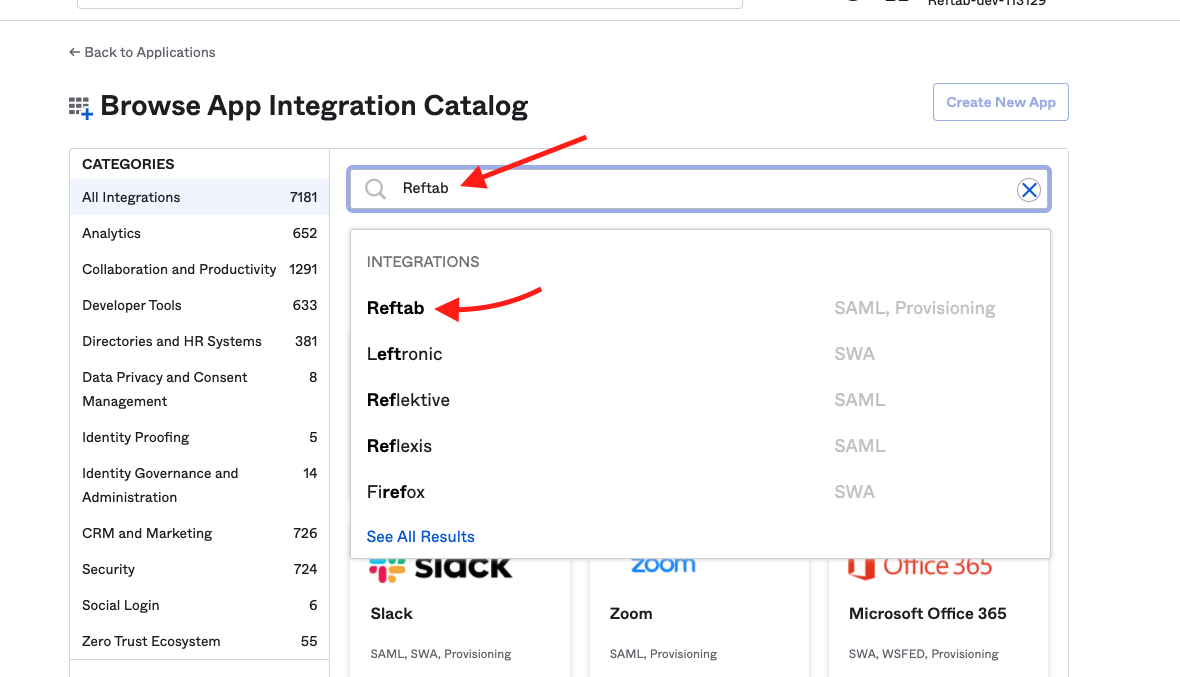
Next, search “Reftab“
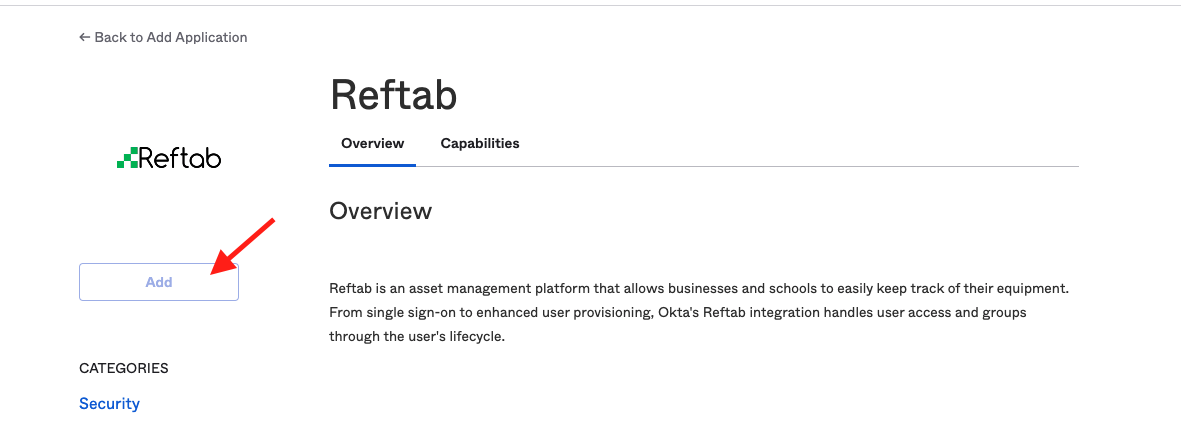
Next, click “Add“
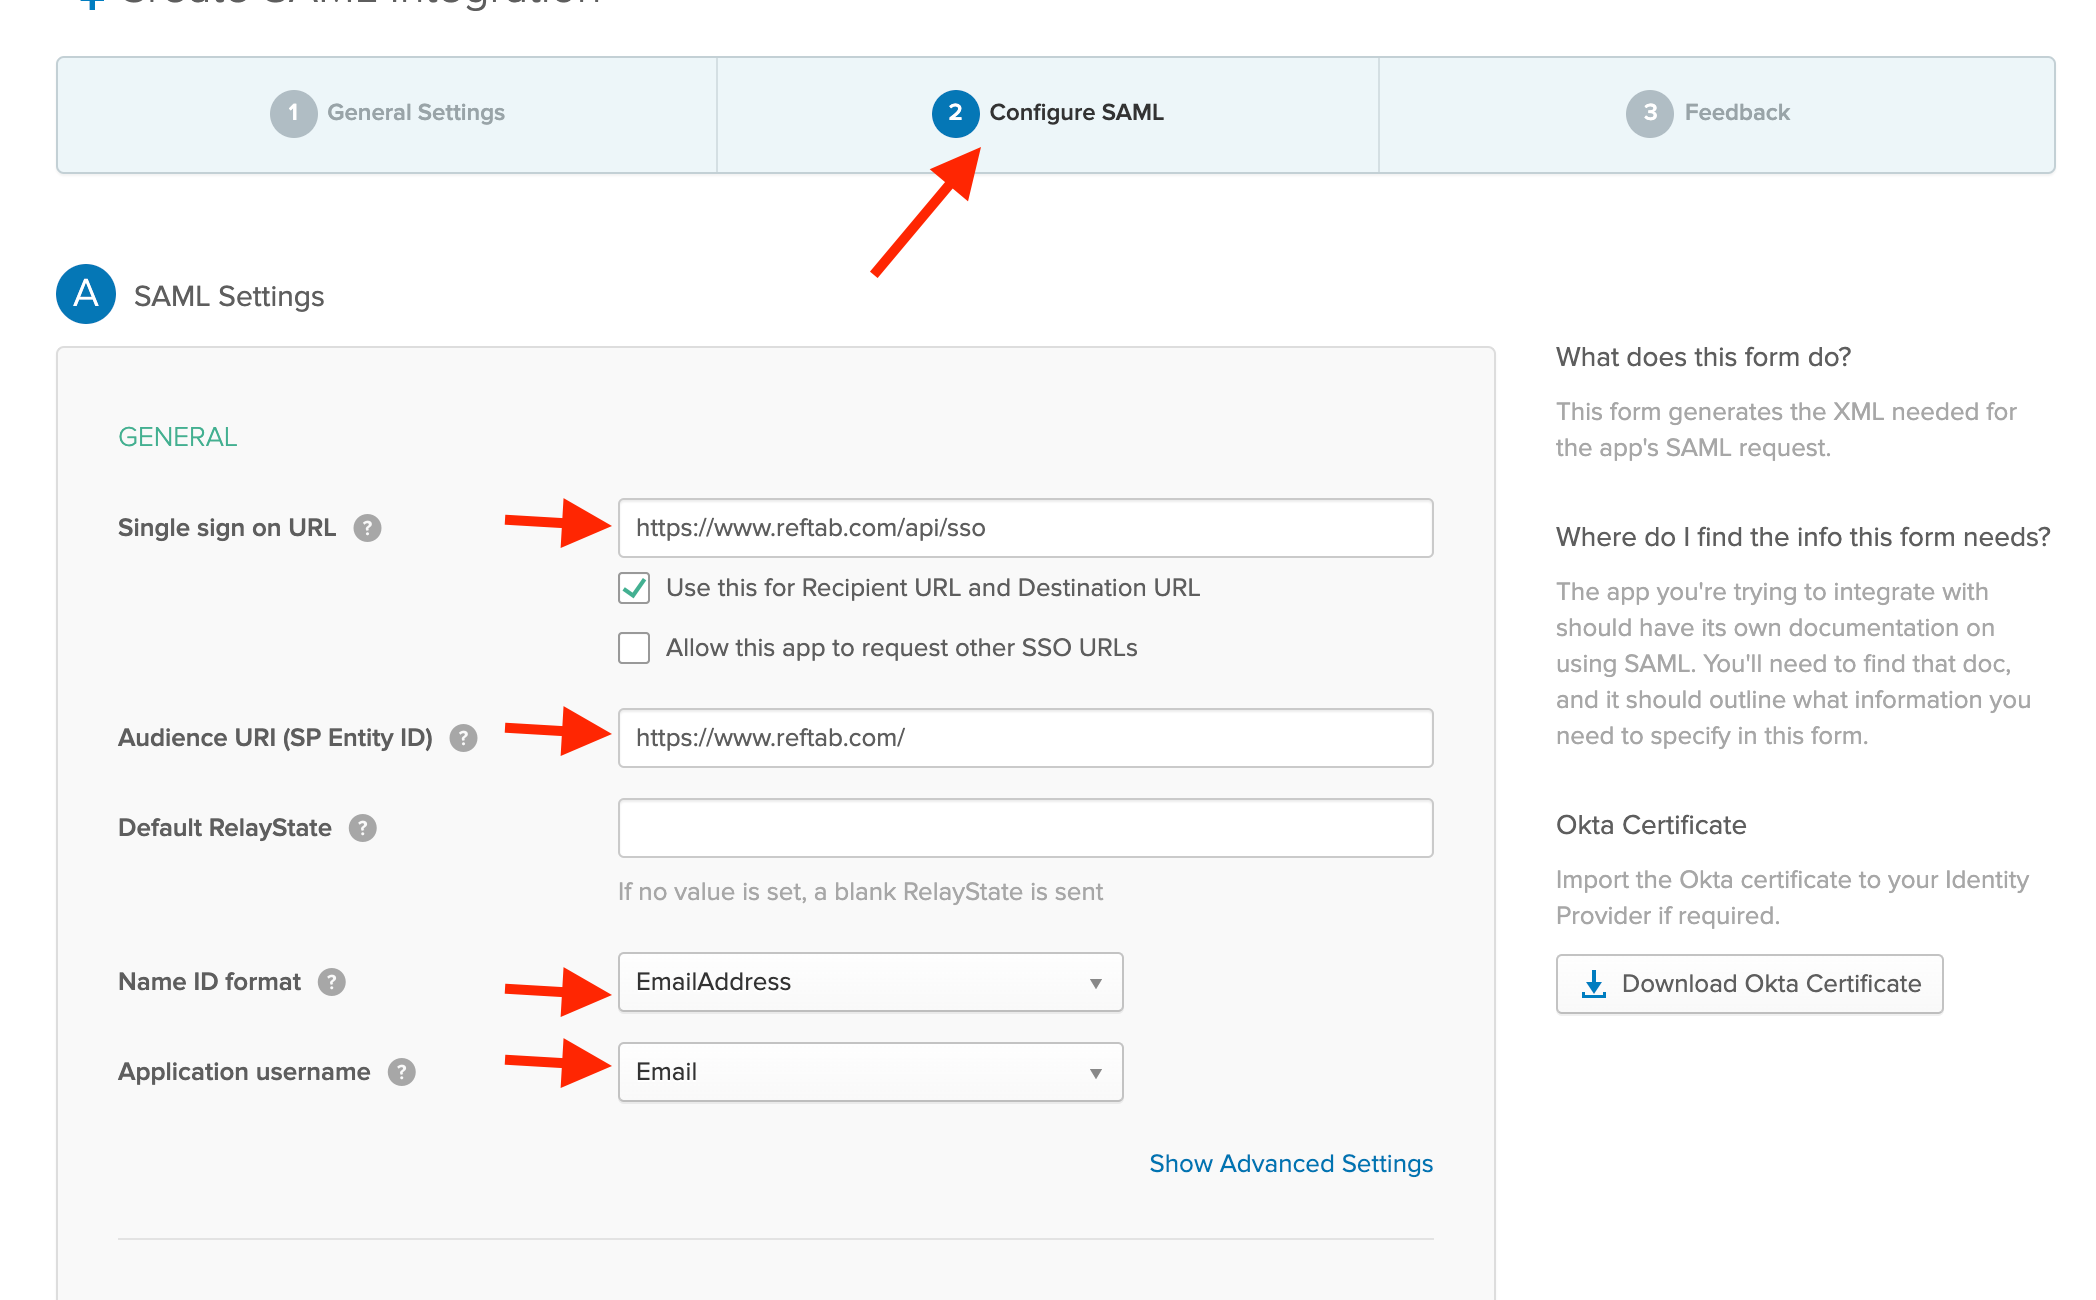
Next, see configure settings as below:
Single sign on URL: https://www.reftab.com/api/sso
Audiance URI: https://www.reftab.com/
Name ID format: EmailAddress
Application username: Email
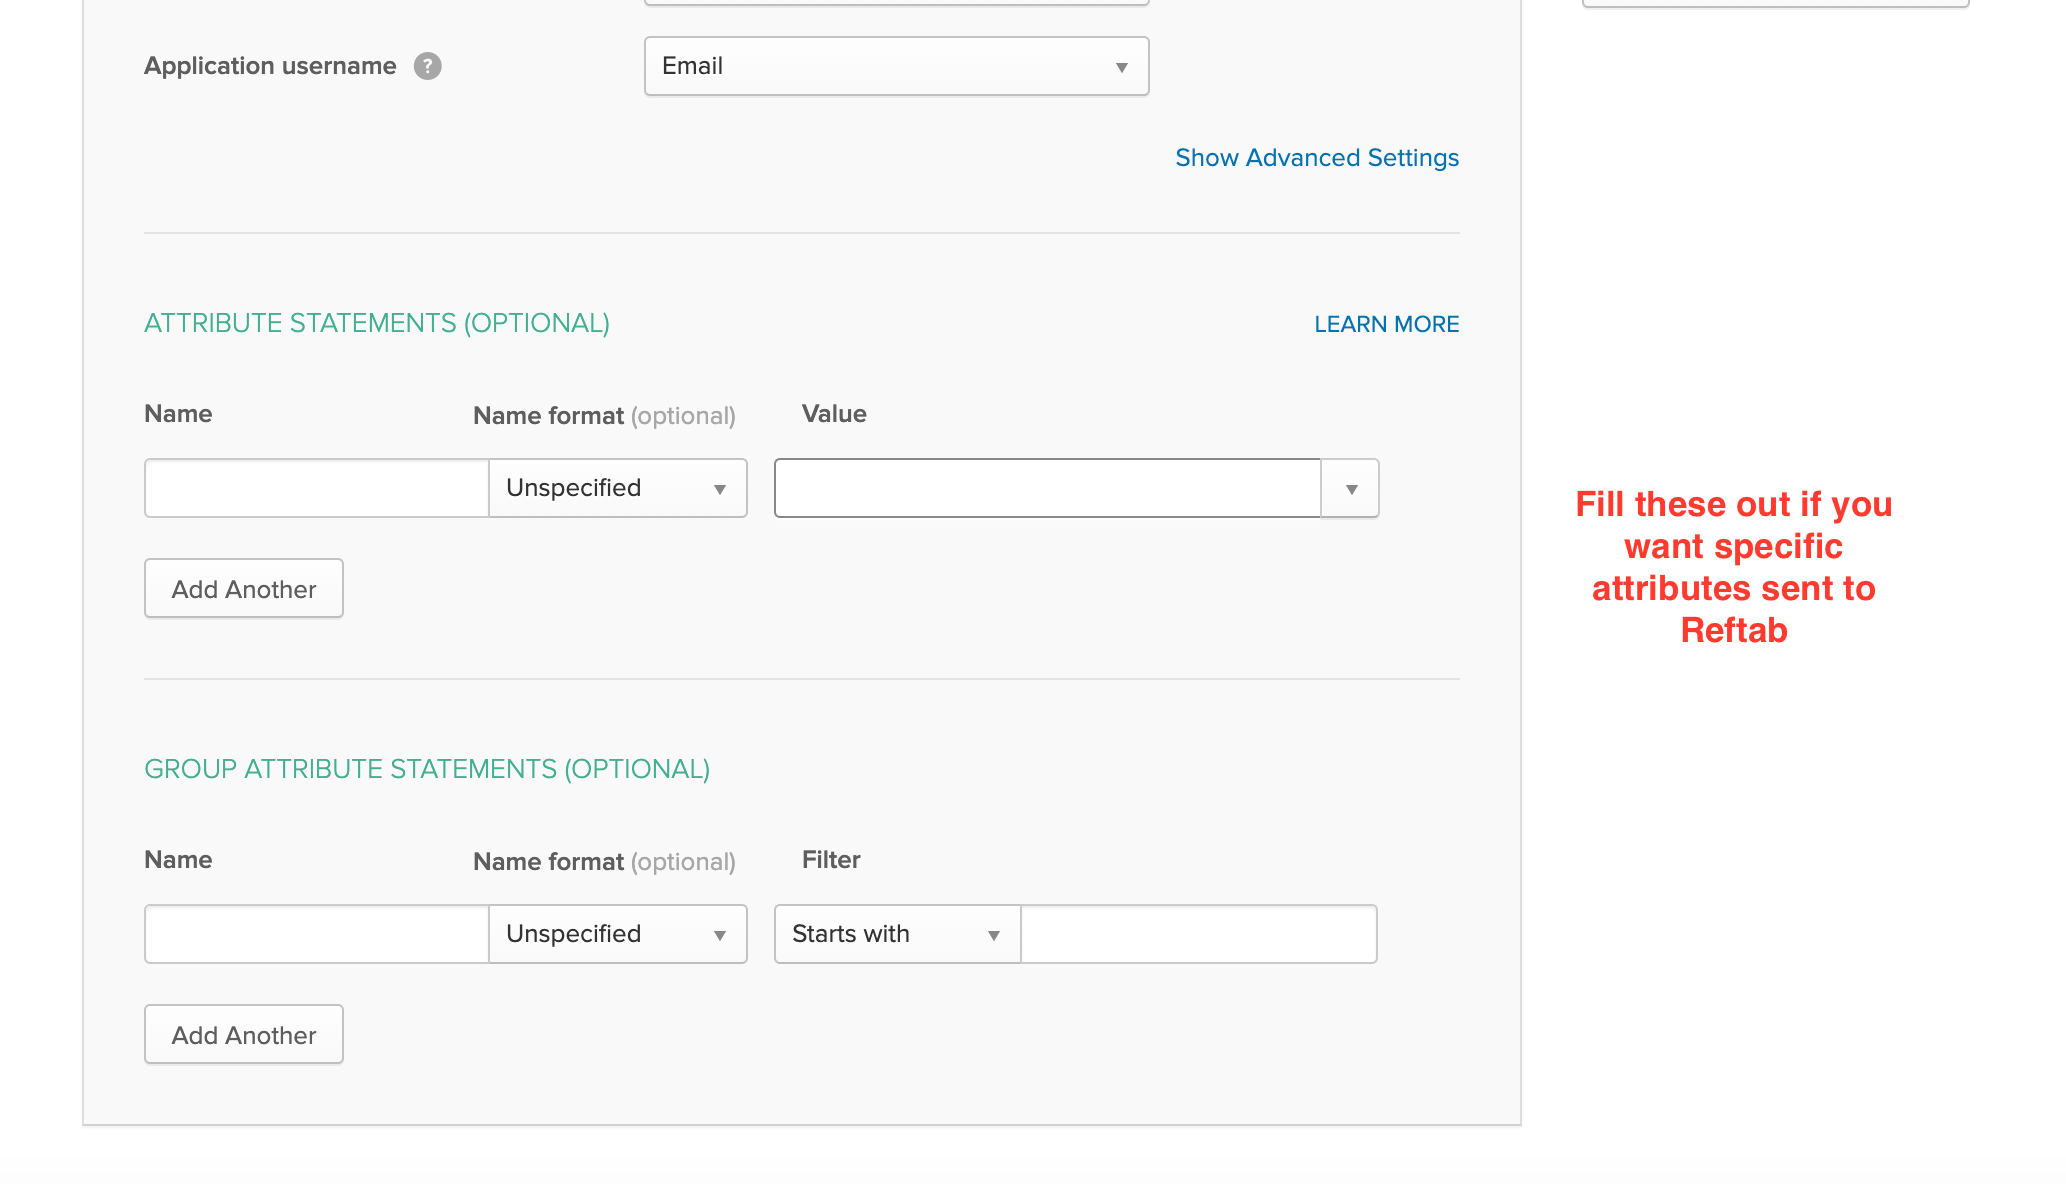
Attribute Statements
The options below are optional if you added Reftab via OKTA’s App Catalog. If you are manually adding Reftab as an application, you will need to send at least an attribute that identifies a user’s email.
Attributes are ideal to use in scenarios where just-in-time provisioning is used, or multi tenancy. These attributes can be sent from OKTA that further describe who a user is. Reftab can take that additional information and provision the user into a pre-made Reftab access role or tenant.
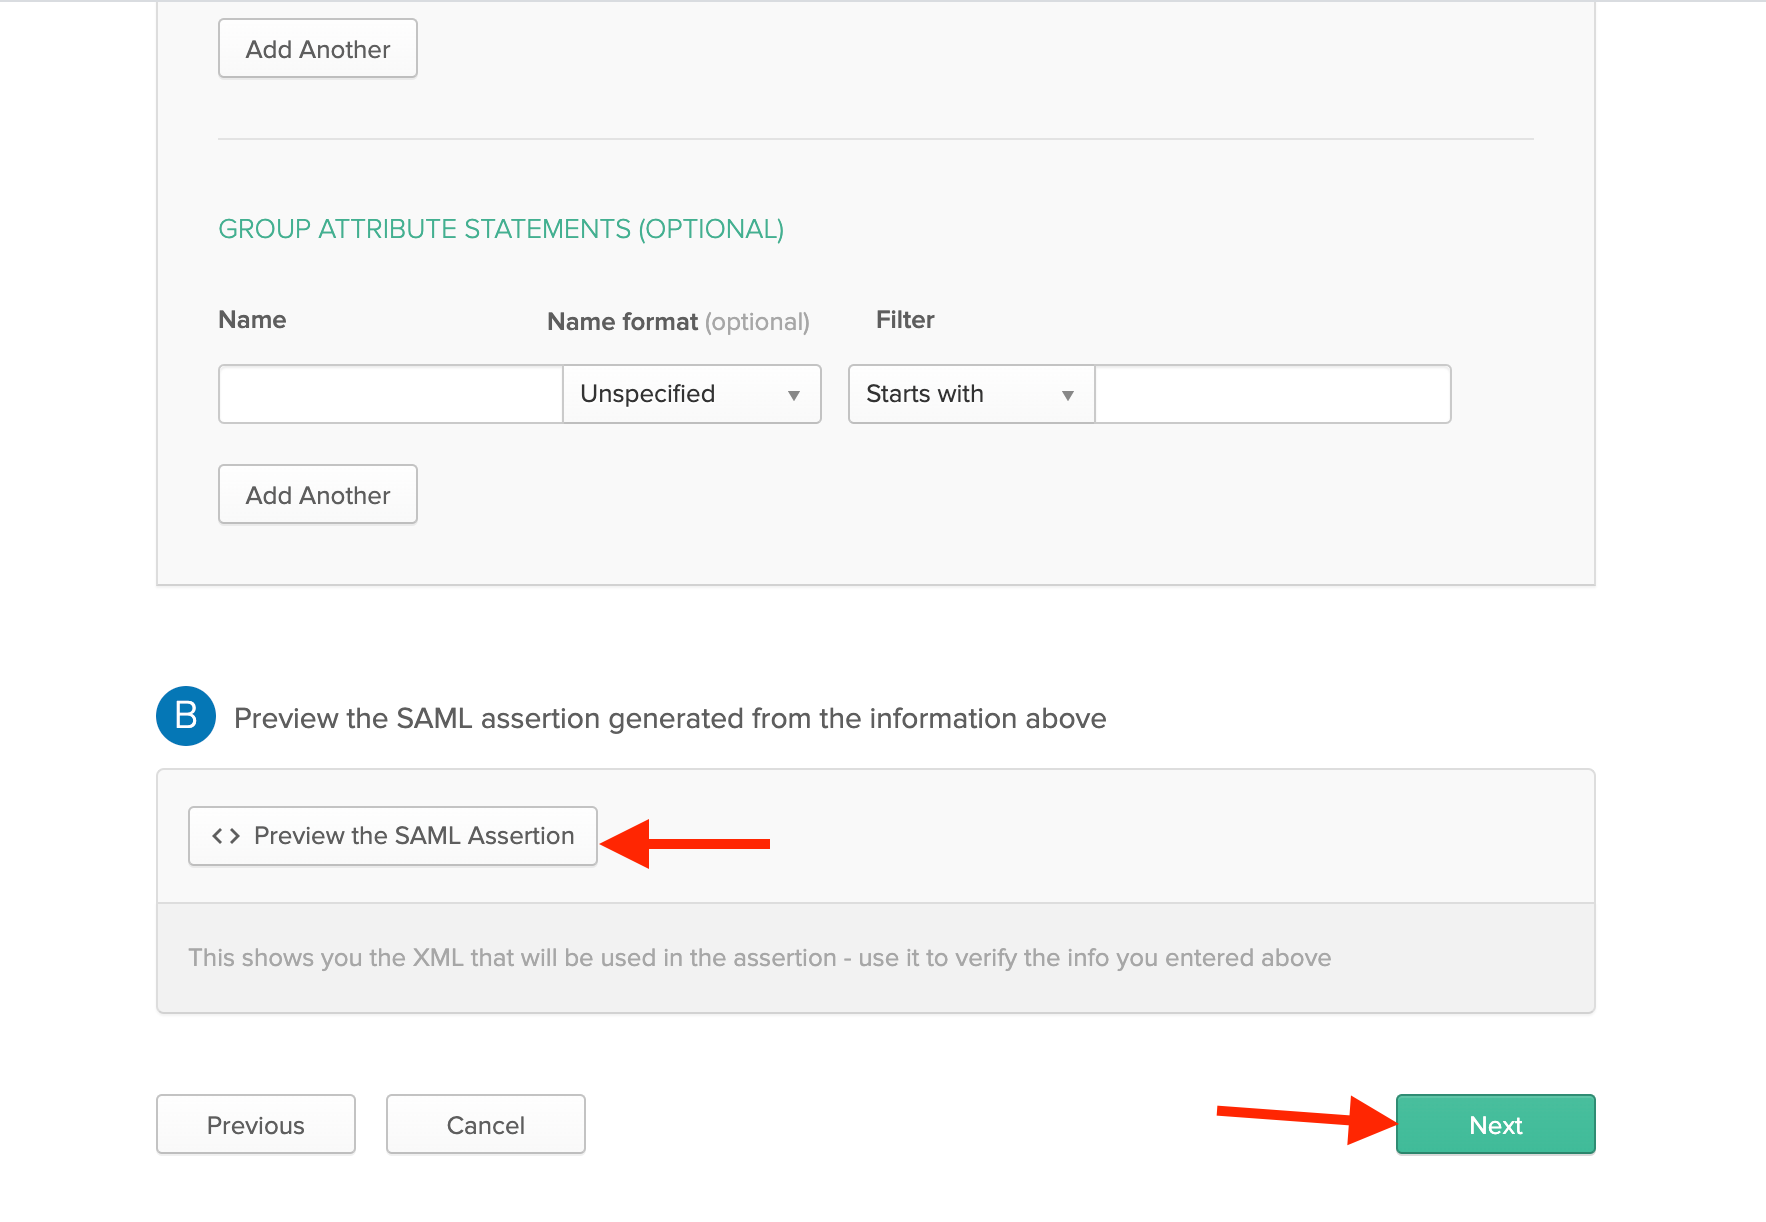
Next, click “Next“.
Next, Fill out the Feedback step, as seen in the below image:
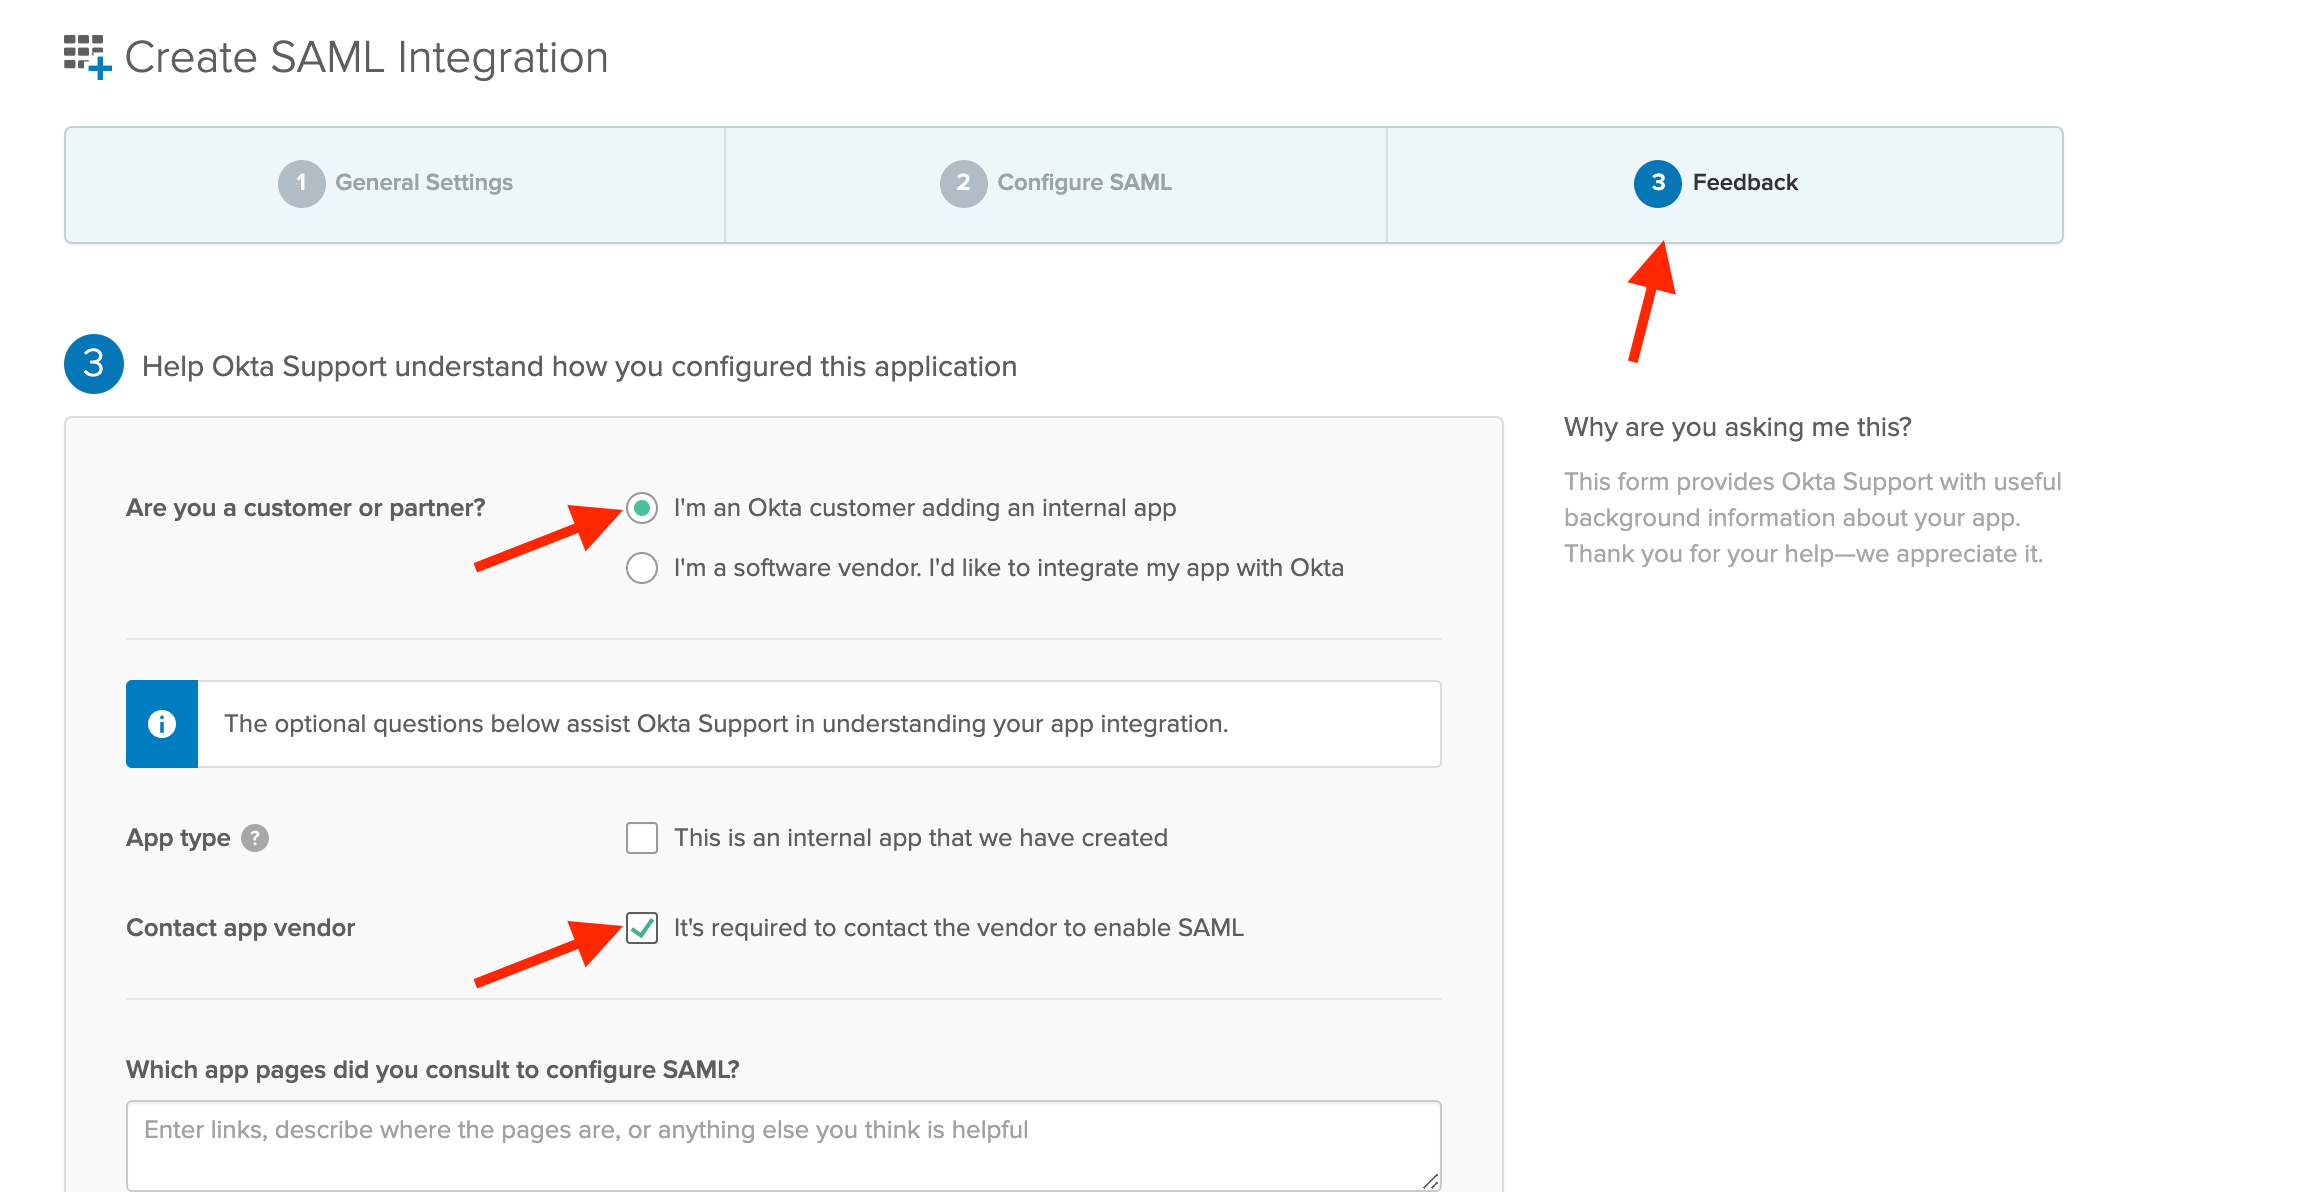
Click, “Finish“.

Next, you will be taken to the applications settings page, click the button to “View SAML Setup Instructions“
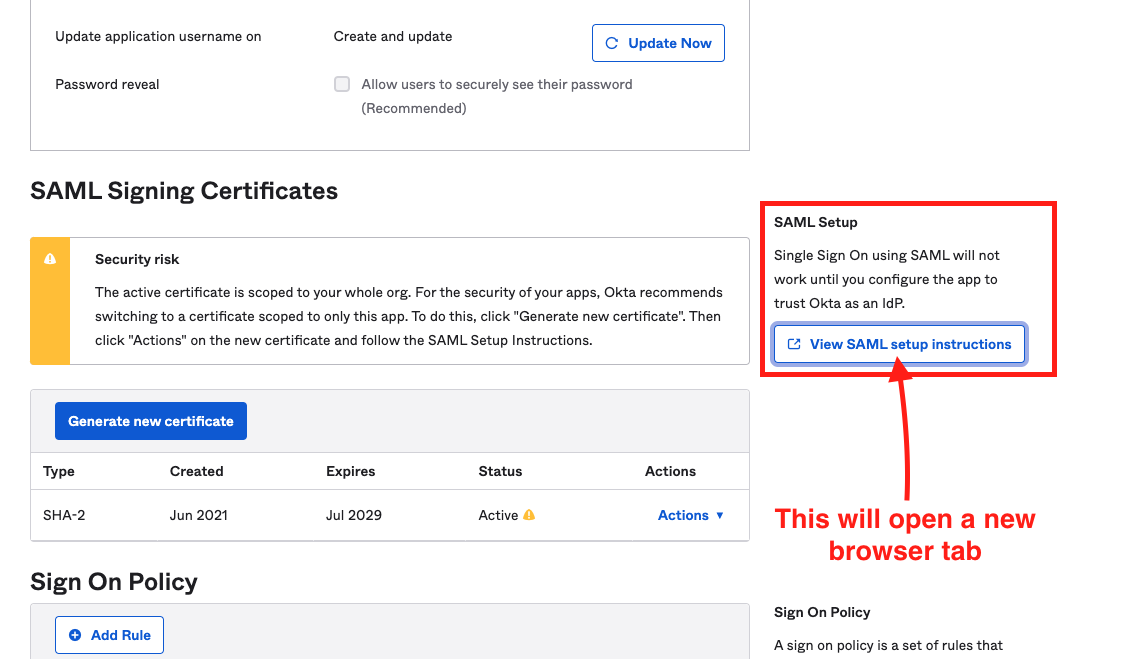
Next, copy and paste the settings that are displayed in your screen into Reftab.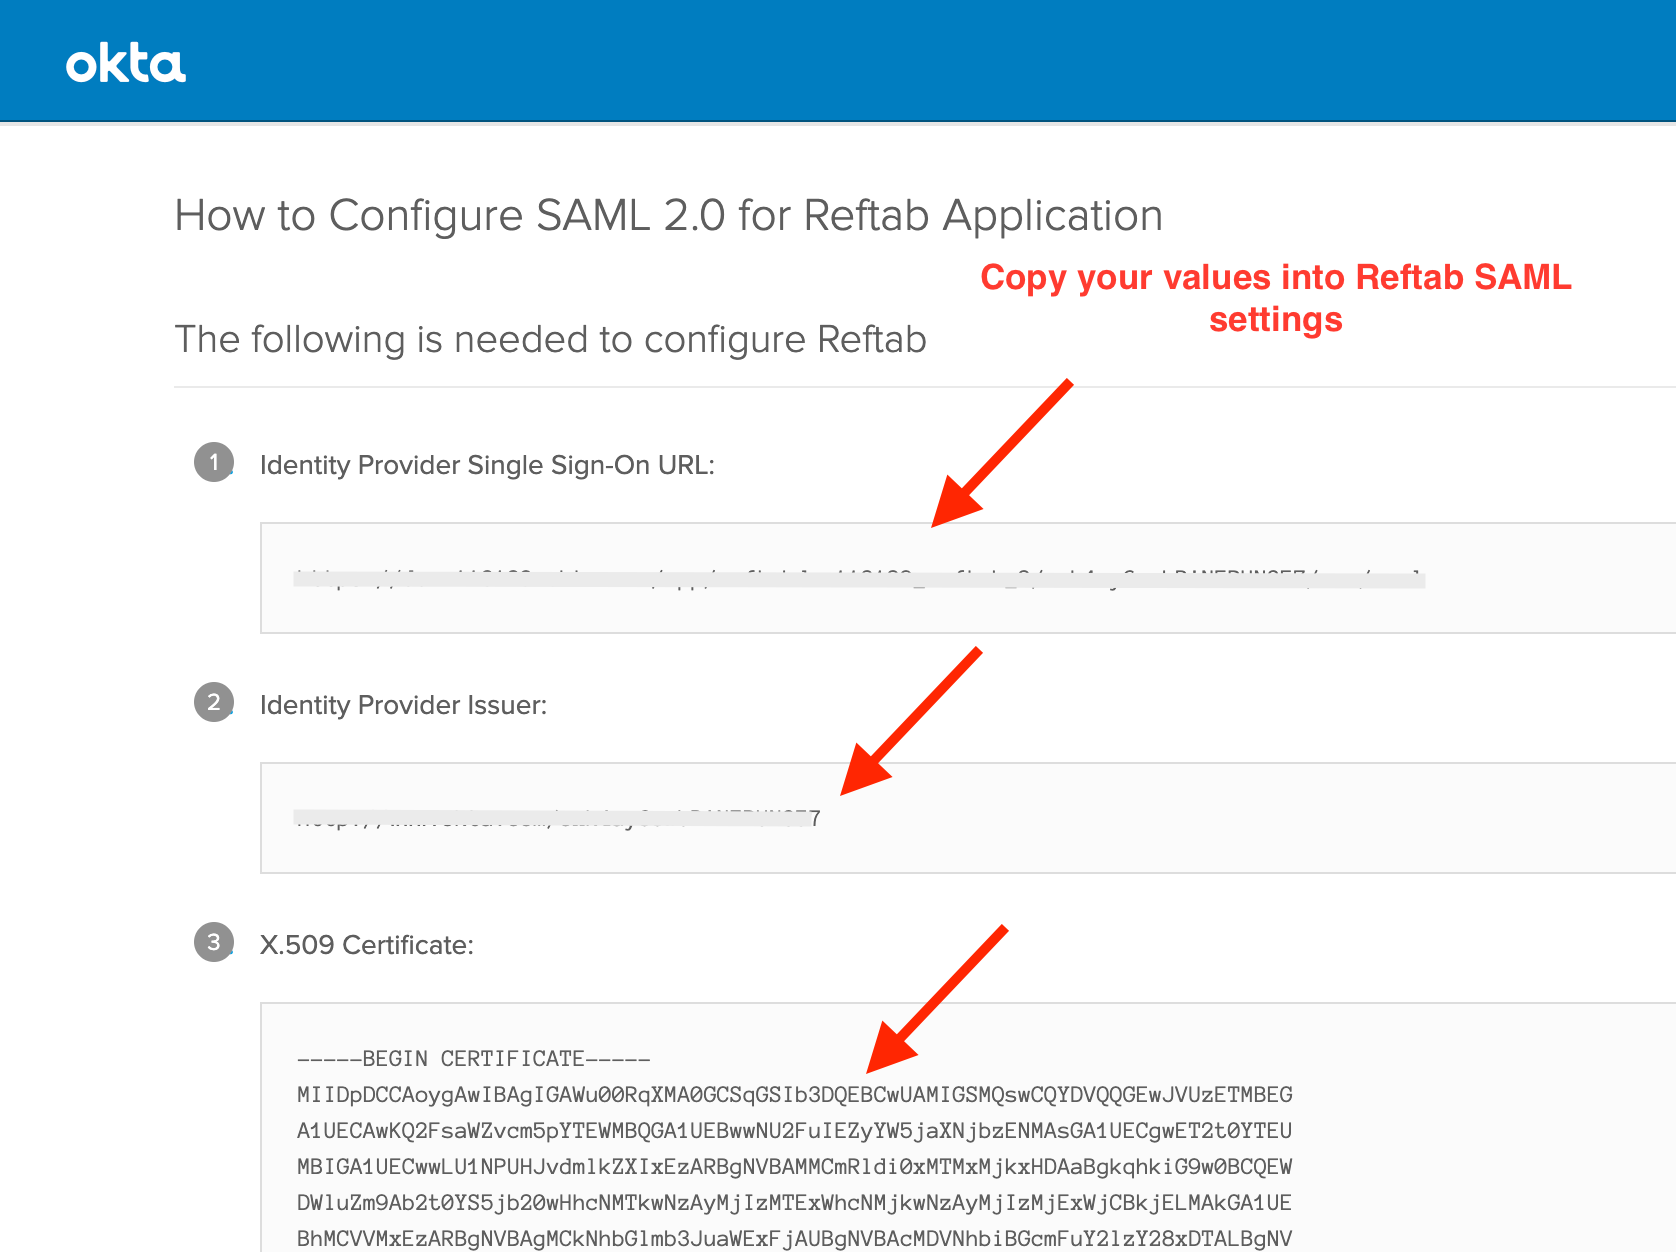
Log into Reftab, click “Settings” > “SAML Settings” > “Add New Domain“
Domain: the part after @ in your company’s email address. (this is what triggers the single sign on button on Reftab’s login page).
IDP Entity ID: copy and paste from the Identity Provider Issuer as seen in above screenshot.
URI Endpoint: Copy and paste from the Identity Provider Single Sign-On URL as seen in above screenshot.
Email Attribute: leave as email
Certificate: Copy and paste from the X.509 Certificate as seen in above screenshot.
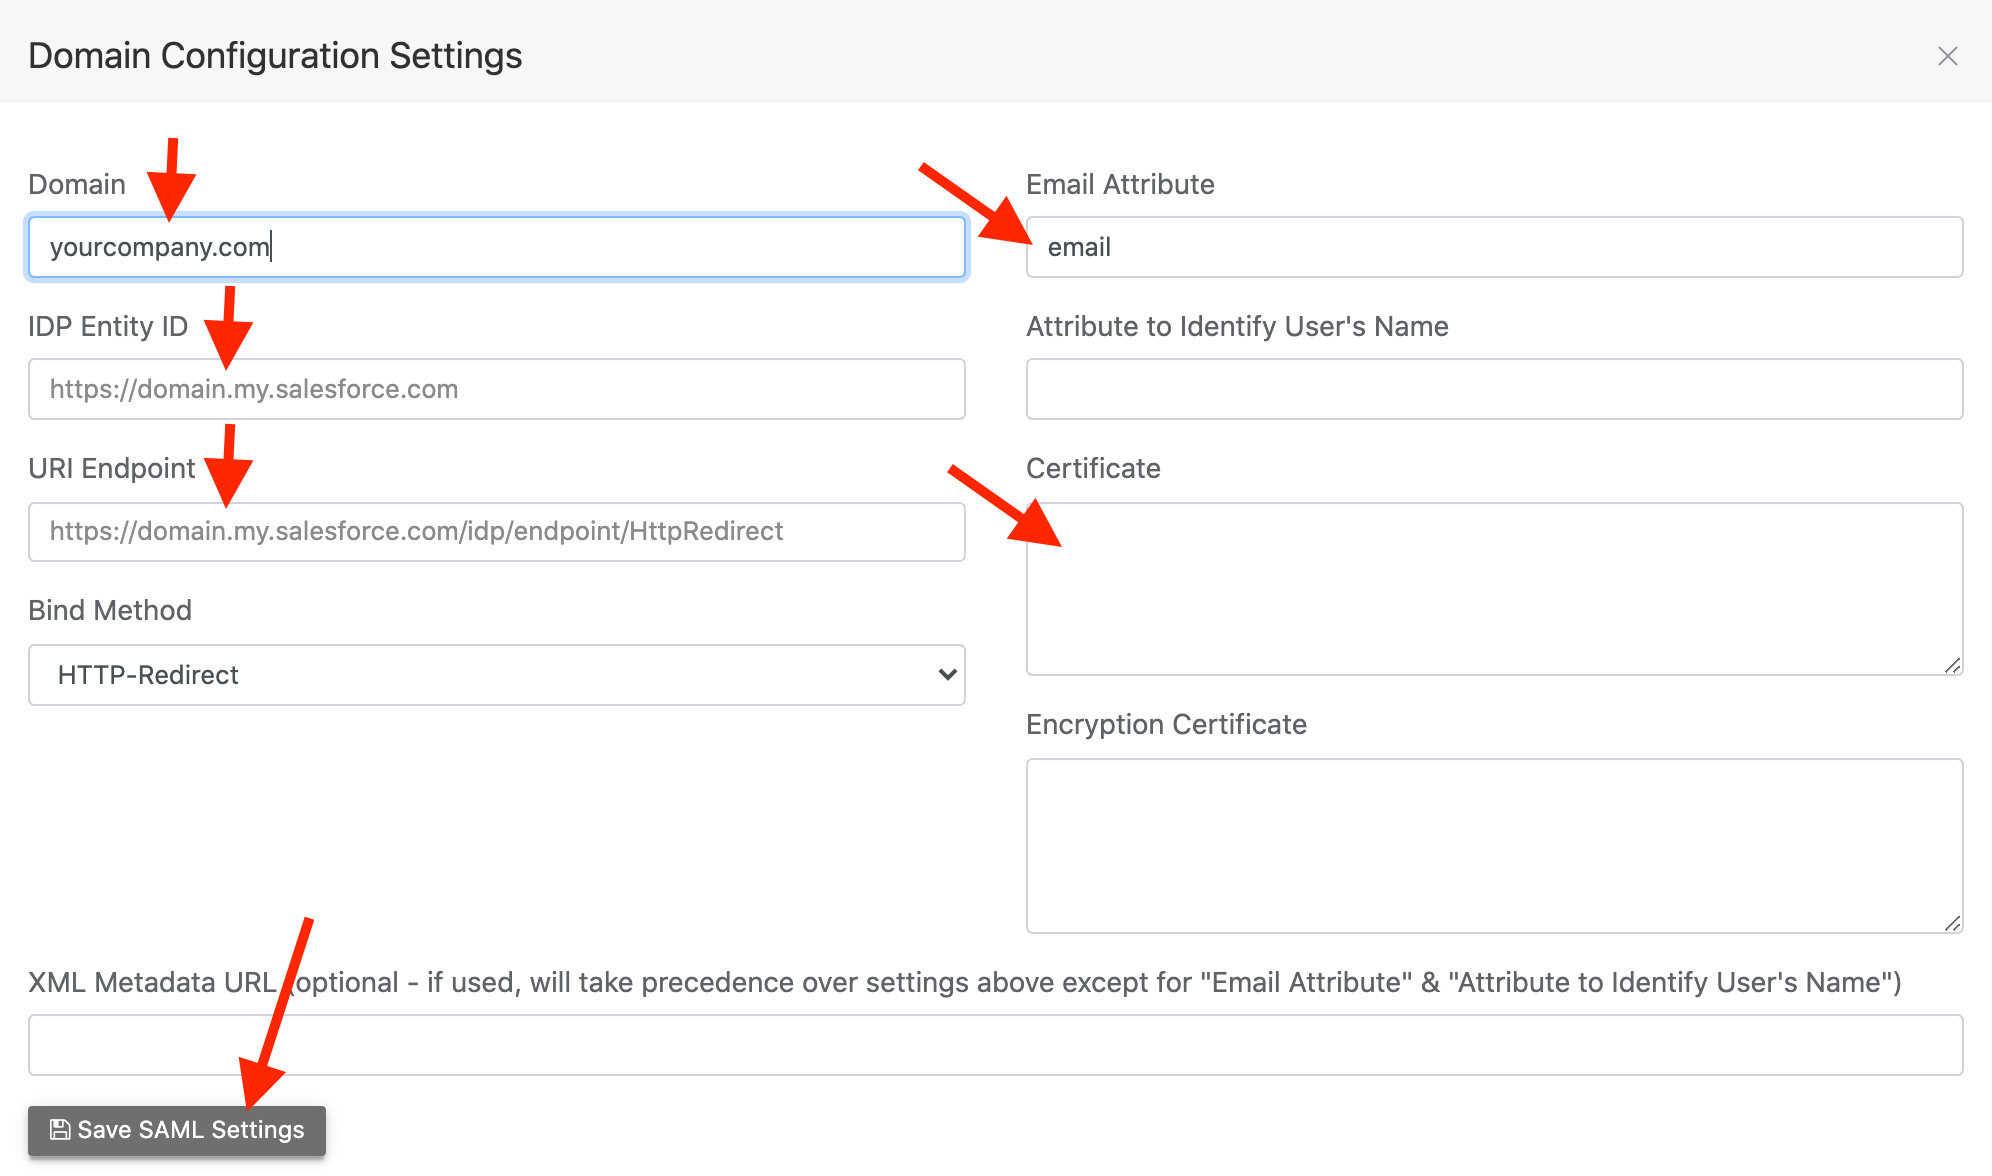
Click “Save SAML Settings“
Next, you will need to verify ownership of your domain before you can begin using SSO with Reftab. This is an important security step. This checks that your domain belongs to you and not anyone else trying to claim it as theirs. Follow this guide to verify your domain: https://www.reftab.com/blog/faq/domain-verification-for-saml/index.html
Once domain verification is complete. OKTA is ready to accept authentication requests from Reftab. To test this, in Reftab click “Sub Accounts” > “Add Sub Account“.

Add an account that you know is in your OKTA environment. Then, test logging into Reftab from our login page: https://www.reftab.com/login
For additional help, please email [email protected]