How do I configure SCIM with OKTA?
Okta user provisioning integration with SCIM
If your organization uses Okta to manage your employees’ access to tools and services, you can take advantage of Okta’s “Provisioning” feature to automatically grant access to Reftab to your users, and even optionally synchronize membership in select Okta Groups with Reftab Access Roles.
The integration between Okta and Reftab that enables this provisioning to occur is built around an industry-standard protocol known as SCIM (System for Cross-domain Identity Management). To learn more about how Okta works with SCIM, please see this article.
The remainder of this guide is focused on enabling you to configure both Reftab and Okta to get provisioning up and running for your organization.
Features
The following provisioning features are supported by Reftab at present:
- Push Users: Users in Okta that are assigned to the Reftab application within Okta are automatically added as users in Reftab
- Update User Attributes: When user attributes are updated in Okta, they will be updated in Reftab.
- Deactivate Users: When users are deactivated in Okta, they will be set to ‘disabled’ within Reftab – which prevents the user from logging into Reftab.
- Push Groups: Groups and their users in Okta can be pushed to Reftab. (Group information from Okta can be used to map users to Reftab access roles.)
Requirements
SCIM-based user provisioning is available to Reftab’s Business customers only. Reach out to info@reftab.com if you would like to upgrade your Reftab account.
Step-by-step configuration instructions
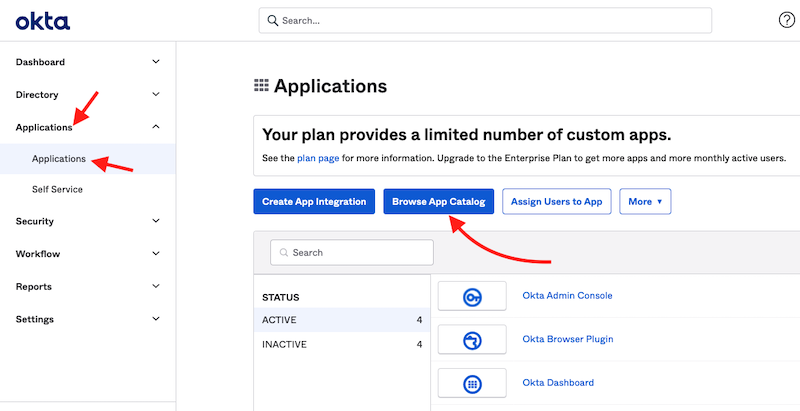
1) Click “Applications” > “Applications” > “Browse App Catalog“
(If you already have Reftab as an application, click on it).
Search for “Reftab”.
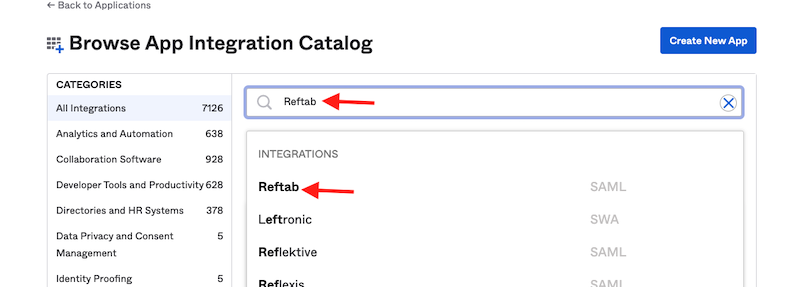
Click “Add“
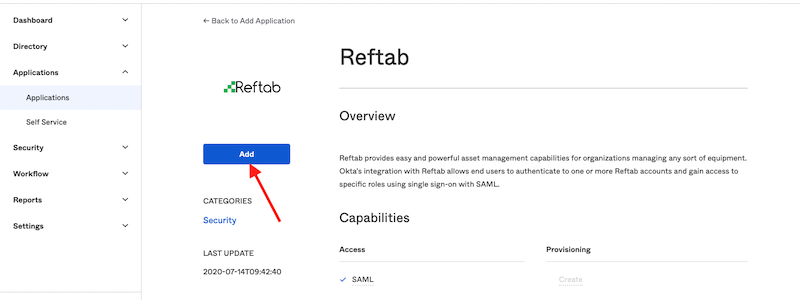
Click “Done“.

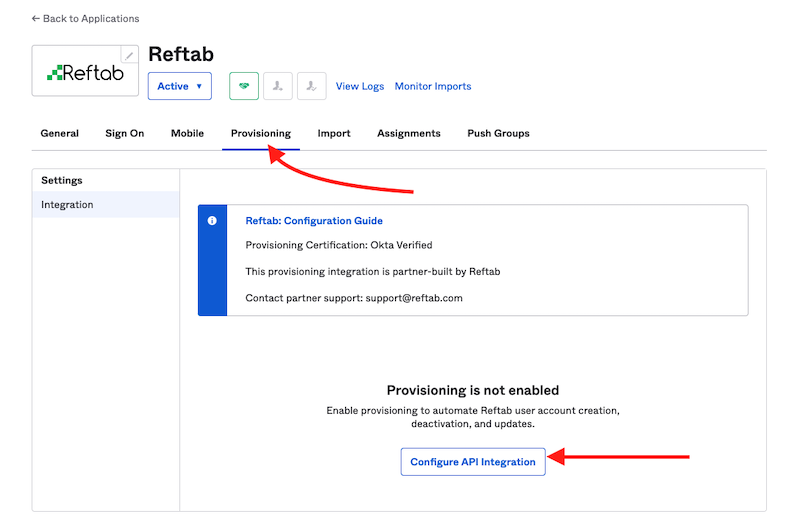
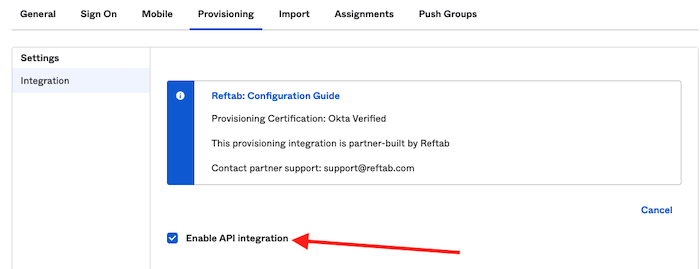
2) Click the “Provisioning” tab and click “Configure API Integration“
3) Next, click the checkbox “Enable API Integration“.
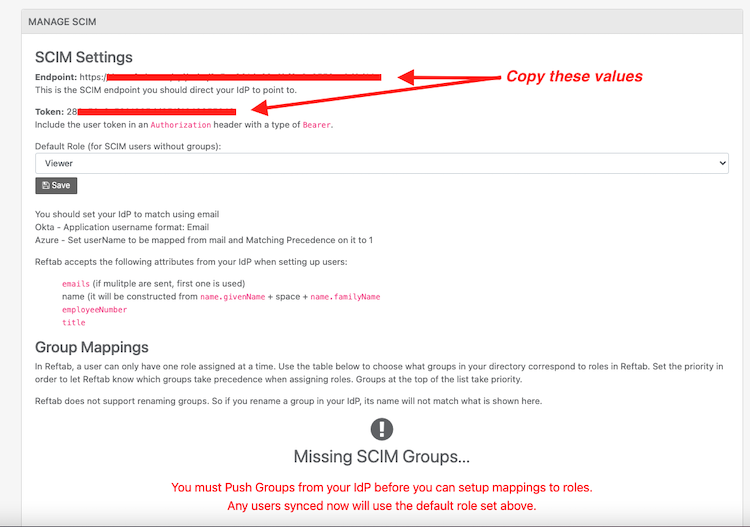
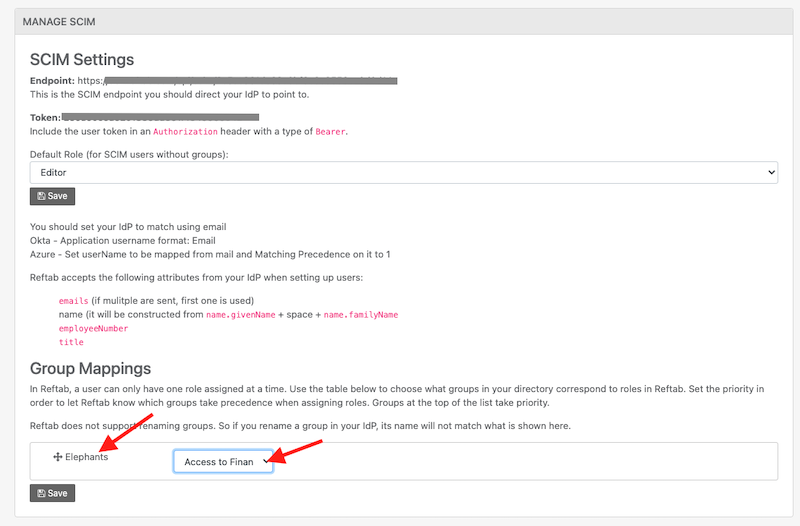
4) Next, log into Reftab as an administrator and click “Settings” > “Integrations” > Type, “SCIM“ > Configure

5) Copy the Endpoint and the Token
6) Next, back in Okta under the “Provisioning” tab, paste the Base URL endpoint and API token:
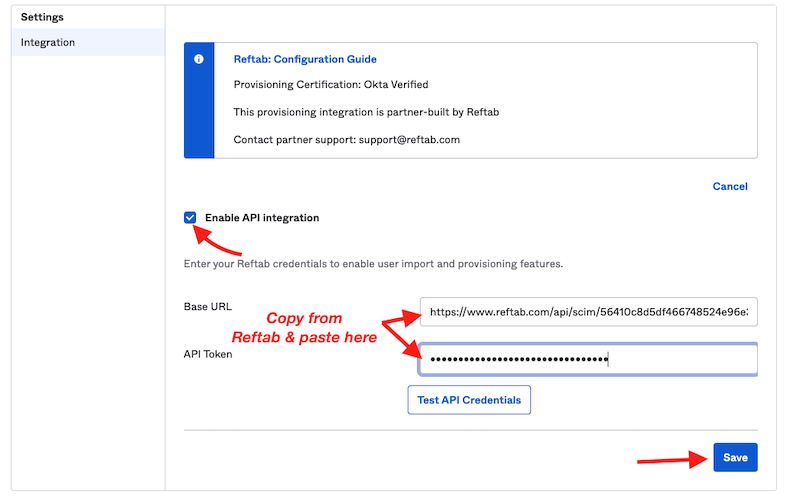
Click “Save“
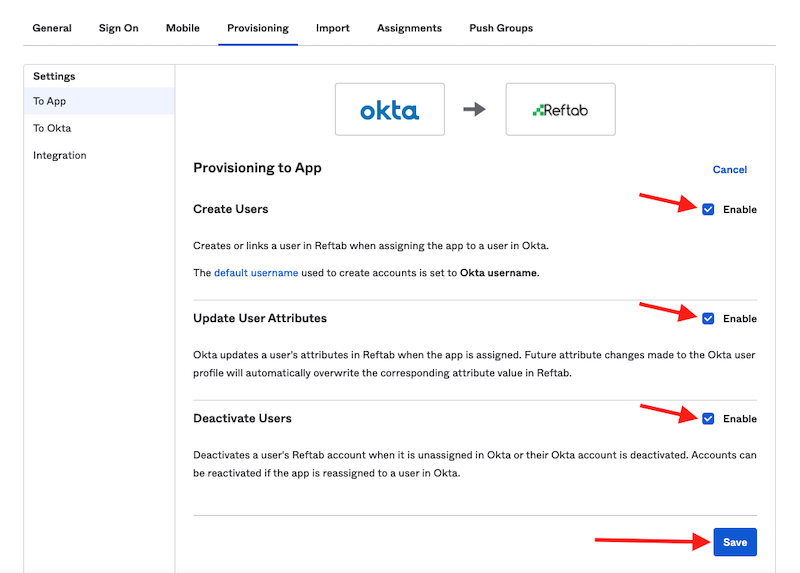
7) Next, on the “Provisioning” tab click “To App” and click “Edit“
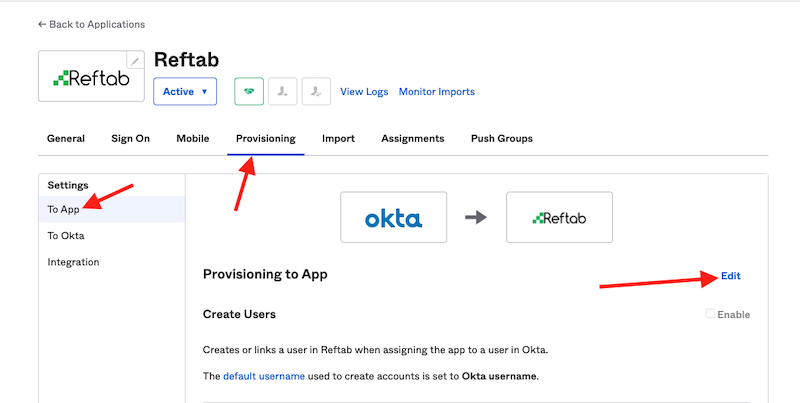
8) Check each box for Reftab’s supported provisioning actions:
- Create Users
- Update User Attributes
- Deactivate Users
Click “Save“
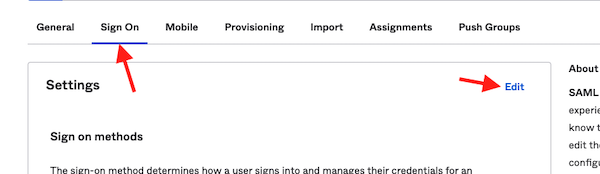
9) Next, click the tab for “Sign On” and click “Edit“
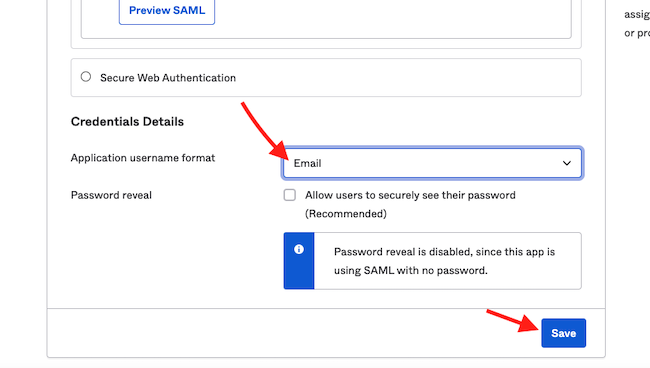
10) Select Email for the Application username format and click “save”
11) Next, click “Assignments” > “Assign” > “Assign to Groups” (You can optionaly select Assign to People)
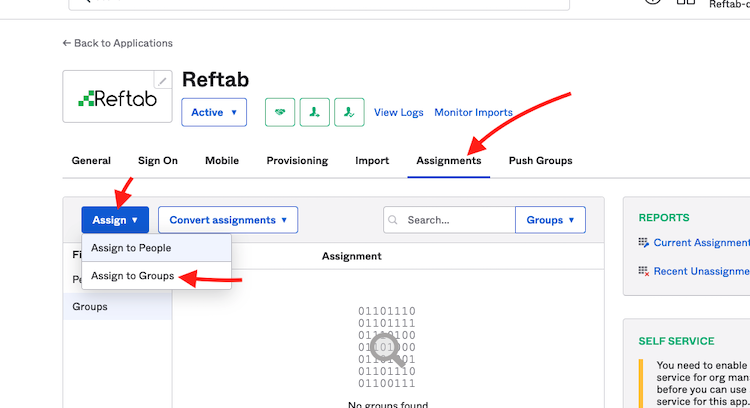
Click “Assign” next to any group(s) and then click “Done”
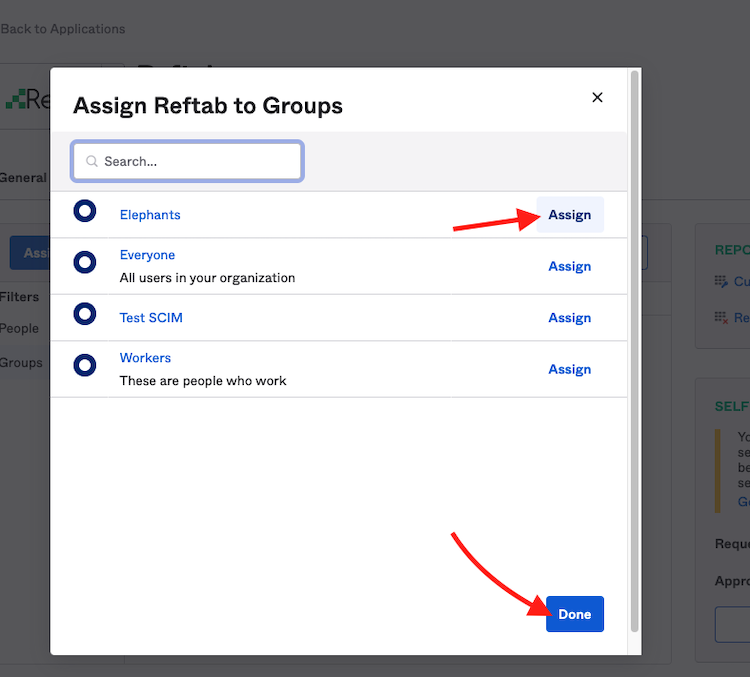
NOTE: You must populate the assignment tab with users or groups. This is what ultimately will populate your Reftab account with users.
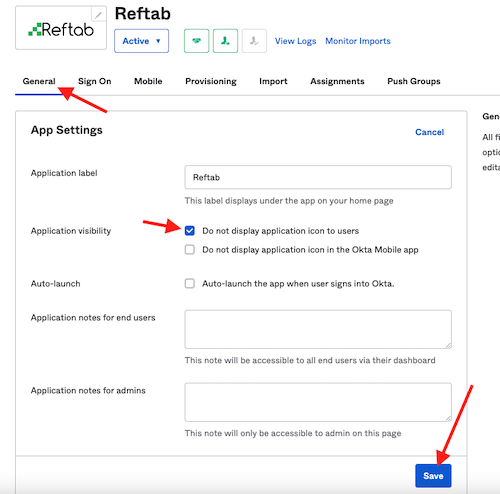
If you just want to add loanees into Reftab and don’t want your users to see the Reftab app icon, you can hide the icon to user:
- Sign in to your Okta tenant as an administrator.
- Find the Reftab application and click “General” > “Edit” (next to app settings)
- Check the box “Do not display application icon to users”.
- Clic “Save”.
Push groups
Push groups simply pushes group names into Reftab so that you can map them to Reftab access roles. Groups added here do not push any of the users within them. If you only add groups to the push groups tab, your Reftab account will not show any users from Okta.
12) Next, scroll to the top and click the tab for “Push Groups” > “Push Groups” > “Find Groups by name“
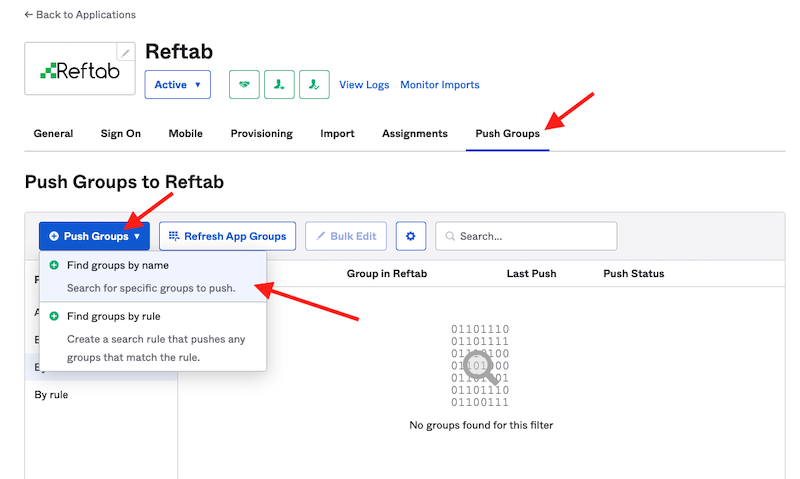
13) Start typing for a group and when found, click Save
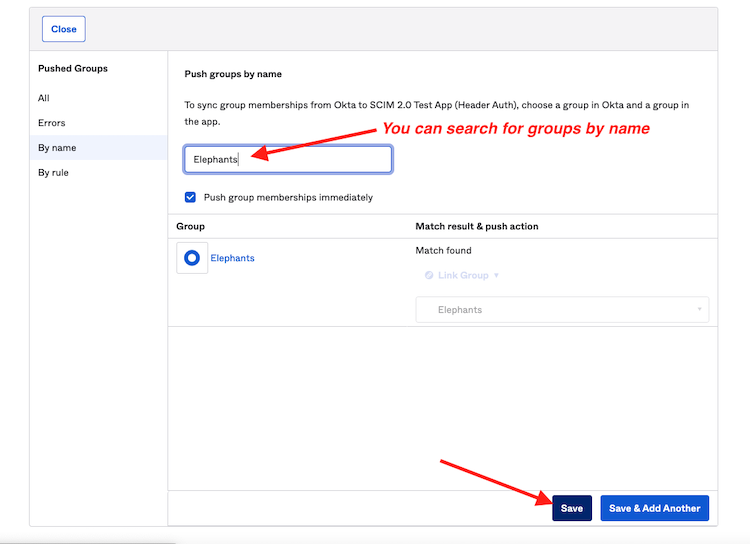
The groups that you push will be accessible by Reftab and can be used for mapping a user’s group in Okta to a Reftab access role.
For example, by pushing the group in the screenshot above “Elephants”, within Reftab, users from within that group are saved into a Reftab access role:
14) Log into Reftab as an administrator and click “Settings” > “Integrations” > Type, “SCIM“ > Configure, scroll down to “Group Mappings” and you should see your pushed groups.
Map each group to a Reftab access role of your choice.
NOTE ON MULTI-TENANCY: If you are using multi-tenancy with Reftab, you can manage users/groups and sync them to their tenants. To do this, configure SCIM at the super tenant level. This allows for a one-to-many relationship, enabling you to push users and groups into separate tenants from the super tenant. You won’t need to log into each individual tenant to set up SCIM. For assistance, please contact Reftab support by emailing “help@reftab.com”.
This is useful because you don’t have to manage each individual persons access in Reftab, you can manage group mappings to automatically assign users to access roles based upon their group.
Next, you can log into Reftab and you should see user accounts appear. To see users in Reftab, click “Settings” > “Sub Accounts” and the users should appear.
We suggest setting up Single Sign-On so that your users can automatically log into Reftab without the need to create their own Reftab password.
Suggested Next Steps
Sync you hardware and software!
Sync Hardware from your MDM platforms
Sync with your MDM platform to automatically track assigned hardware.
- 📘 Intune – https://www.reftab.com/blog/faq/ms-intune-integration-guide
- 📘 Jamf – https://www.reftab.com/blog/faq/how-to-integrate-jamf-with-reftab/
- 📘 Jamf School – https://www.reftab.com/faq/how-to-integrate-jamf-school-with-reftab
- 📘 Google Workspace – https://www.reftab.com/blog/faq/google-workspace-integration-guide-how-to-integrate-google-workspace-with-reftab/
- 📘 Kandji – https://www.reftab.com/faq/how-to-setup-kandji-integration-with-reftab
- 📘 NinjaOne – https://www.reftab.com/blog/faq/how-do-i-integrate-ninjaone-with-reftab
- 📘 Meraki – https://www.reftab.com/blog/faq/how-to-sync-cisco-meraki-with-reftab/
- 📘 CDW – https://www.reftab.com/blog/faq/how-to-integrating-cdw-assets-with-reftab/
- 📘 Lansweeper – https://www.reftab.com/blog/faq/how-to-integrate-lansweeper-with-reftab/
Sync Software Licenses and Usage
Connect your SSO Identity Provider with Reftab to gain full visibility into user software access and license usage. This guide will help you set that up.
Troubleshooting and Tips
For questions email “help@reftab.com” and we will be happy to help.
Need help? We're here for you
For any questions or assistance, feel free to reach out to us.
Your assets, simplified. Begin your journey with us!
50 assets free forever with unlimited inventory & software tracking. Includes email alerts, mobile apps, reports, custom asset tags and more.