Requiring Electronic Signature upon Checkout
Reftab makes it easy to manage equipment checkouts by adding signatures. This helps track who’s responsible for each item, whether it’s assigned to students or staff. Using signatures boosts security and lets you keep a close eye on equipment use, protecting your organization’s assets.
You can set up Reftab to require signatures when users check out equipment on our website, mobile app, or through email. The signature process can show agreement text, so users understand their responsibility to take care of the equipment. Plus, you can generate PDFs to store equipment loan agreements.
In this guide, we’ll cover:
- Setting up electronic signatures
- Capturing a signature during the checkout process
- Capturing a signature by email
- Generating a PDF of the loan signature agreement
Setting up electronic signatures
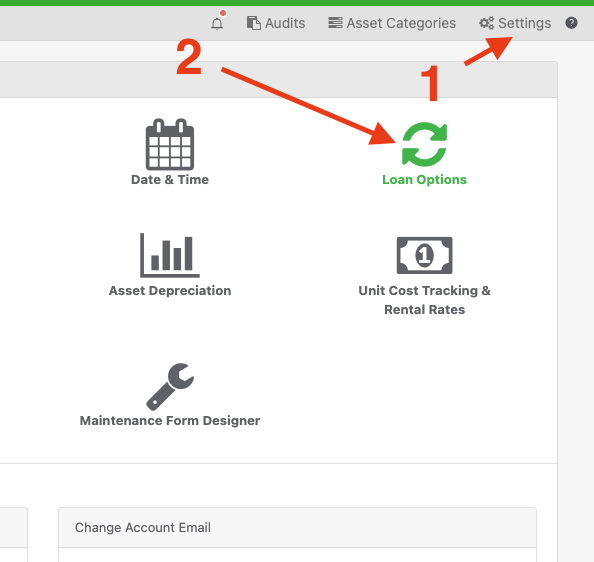
Login to Reftab as an administrator, click “Settings” > “Loan Options”
Then, click “Configure Loan Signature Requirements“

For a basic setup, simply select the categories of assets you would like to collect signatures for and click “Save Signature Requirements“.

Capturing a signature during the checkout process
When checking out items in that category (whether on mobile or desktop), the screen will display a pop up requiring the user to use their finger or mouse to draw their signature on screen. The signature is captured and stored on each loan record. A PDF will generate (if enabled) storing the signature and the agreement.

After the item is checked out, you can download the Loan Agreement Form (if enabled). Click the “Loan History” tab when viewing an asset and click “Download” (Note: you can also download the agreement form from the loanee’s page.)


Capturing a signature by email
From the Loan Signature Requirements page, you’ll see an option under “Additional Settings” called “Enable Email Remote Signature Capture“. Toggle this on and click “Save Signature Requirements“

Next, when checking out an asset, you’ll see a new button, “Send Email to Capture Signature“

Clicking, “Send email to capture signature” will close the pop-up window and send an email to the loanee you’re checking out the asset(s) to. The user will need to check their email which by default is sent from info@reftab.com with the subject, “Signature Required for Equipment“. Within the email, the user will need to click the button, “Sign Here“.

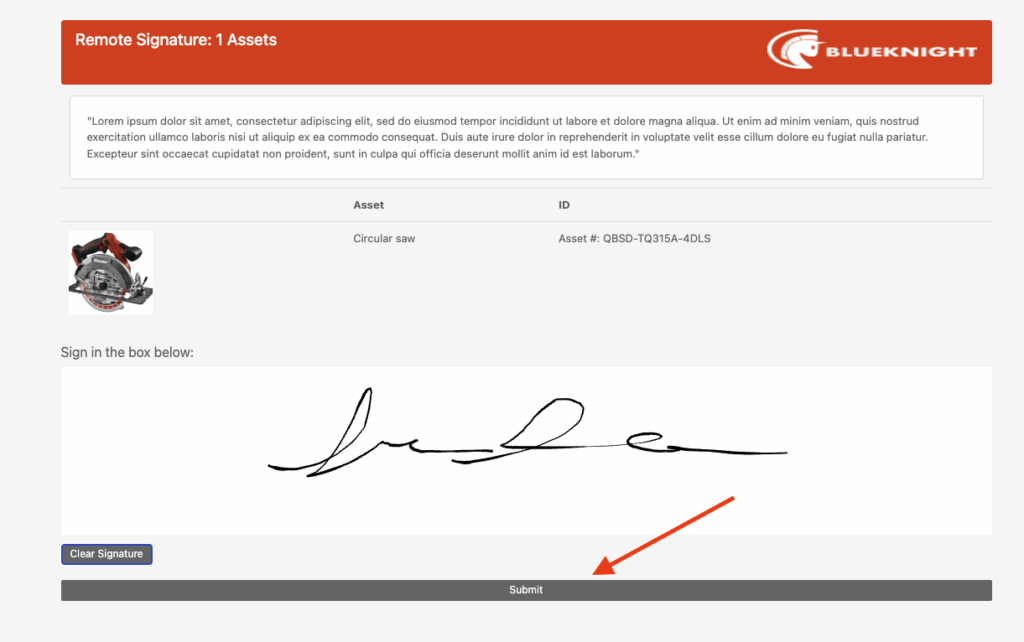
A webpage will open allowing the user to view the item they have received, any agreement text and sign on screen. They’ll need to click “Submit” when done.
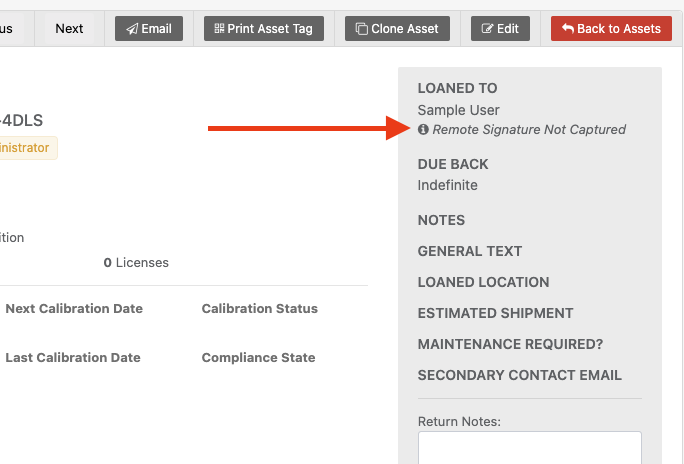
Until a user signs, Reftab will display “Remote signature not captured“. This way, you’ll know if a signature is still pending or not.
(Reftab has settings to configure multiple reminder emails from the Job Scheduler page in the Settings menu.)
Also note that if multiple items are checked out that require signature, those items will display on one page. This way, it’s easy for the user to sign once for all applicable items.

If an admin checks out an asset and the signature email is sent, but the user doesn’t click to sign within an hour and more items needing a signature are assigned to them, the system won’t send multiple emails. Instead, it will just add those new assets to the original email link. However, if more items are checked out after an hour, a new email will be sent for a signature.
Finally, it’s strongly recommended to set up SMTP/OAuth2 for sending emails. This ensures that your end users receive emails from familiar addresses, reducing the chance they’ll be confused about Reftab and possibly ignore the emails. See our guide on how to setup SMTP/OAuth2 with Reftab here.
Generating a PDF of the loan signature agreement
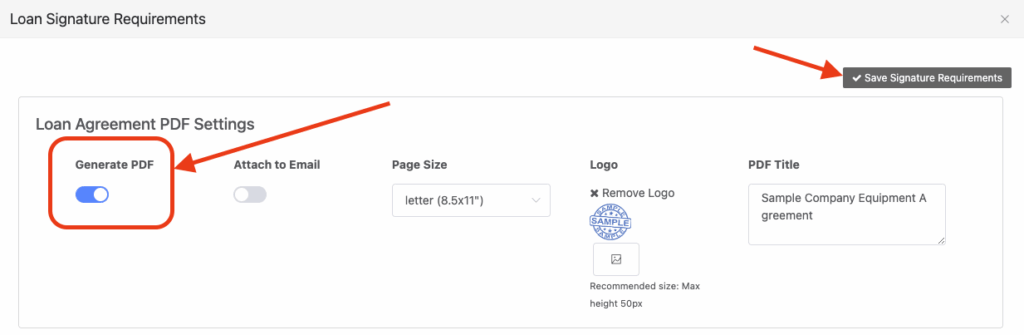
From the Loan Signature Requirements page, you’ll see options for “Loan Agreement PDF Settings“. Simply toggle on the option “Generate PDF“, and click “Save Signature Requirements“. (Note that you can also add a custom logo and a PDF Title that will appear at the top of the page.)
When saved, after a user signs for equipment, admins can view the asset screen and click, “Agreement PDF” on the right hand side under the loanee’s name.

Clicking on the Agreement PDF will open the PDF and display the captured signature along with a timestamp and include any customizations such as your company logo and agreement text.

Displaying a captured signature in emails
Signatures can even be sent as images in the emails. Click “Settings” > “Email Settings / Logs“. Find an email you’d like to display the signature, and click “Edit Email“

Add the variable, {{loan signature}} and click “Save Email“
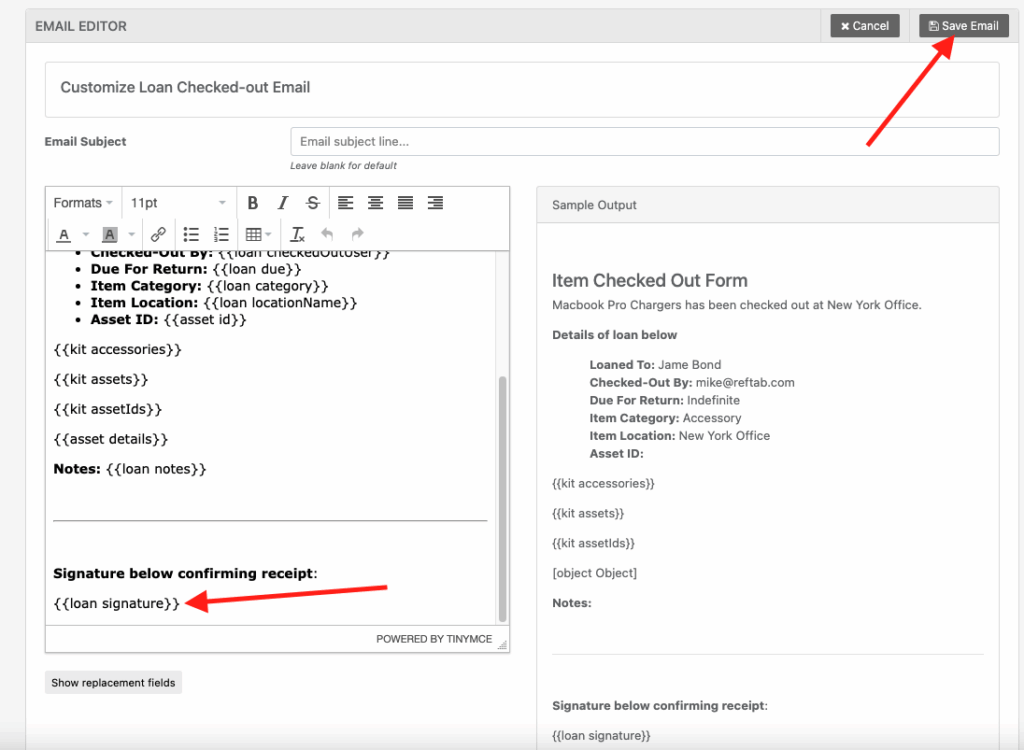
For example, if you edit the email for “Loan Checked Out”, you’ll see the signature from the user on the email sent after the item is checked out.

Need help? We're here for you
For any questions or assistance, feel free to reach out to us.
Your assets, simplified. Begin your journey with us!
50 assets free forever with unlimited inventory & software tracking. Includes email alerts, mobile apps, reports, custom asset tags and more.