How to track Software Licenses in Reftab
Are you logging in to each software manually to check expirations? How do you know who has access to which software? Reftab allows you to track which licenses you have, who has access to those licenses, and when they’ll expire.
Being able to view software license usage alongside physical asset usage, (like laptops) provides IT admins, such as yourself with holistic insights into resource allocation, enabling you to optimize both software licenses and hardware assets efficiently to meet organizational needs and budget constraints.
In this article we will outline how to:
1. Add a Software License to Reftab
2. Assign a License to specific users (loanees)
3. Link Reftab to Azure and Okta to Automatically Assign Licenses
4. Assign a License to an Asset
1. How to add a Software License to Reftab

First, head over to the Software tab at the top of your screen. Click “Licenses“, and then “Add License”.
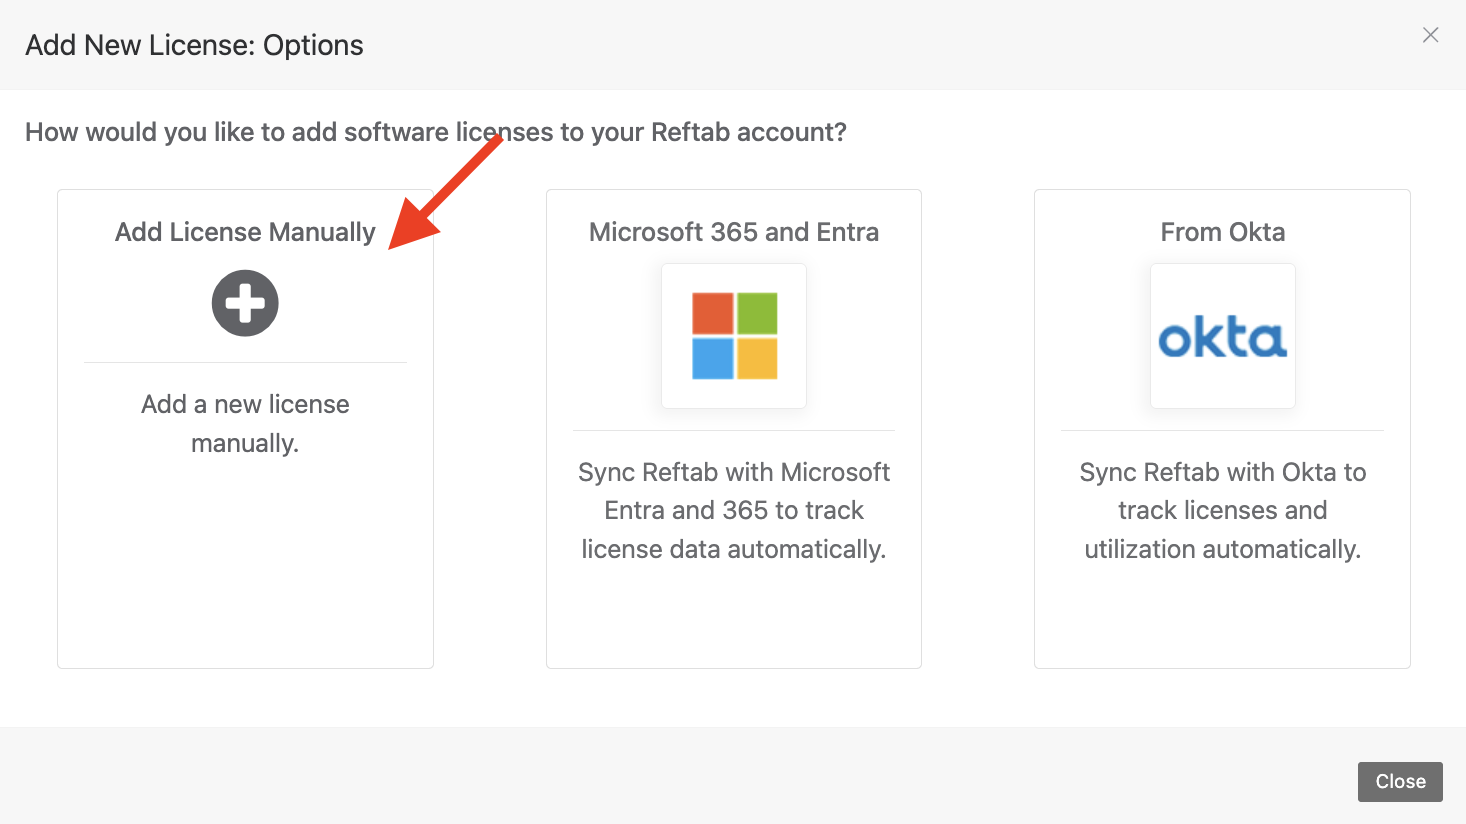
Click on “Add License Manually“.
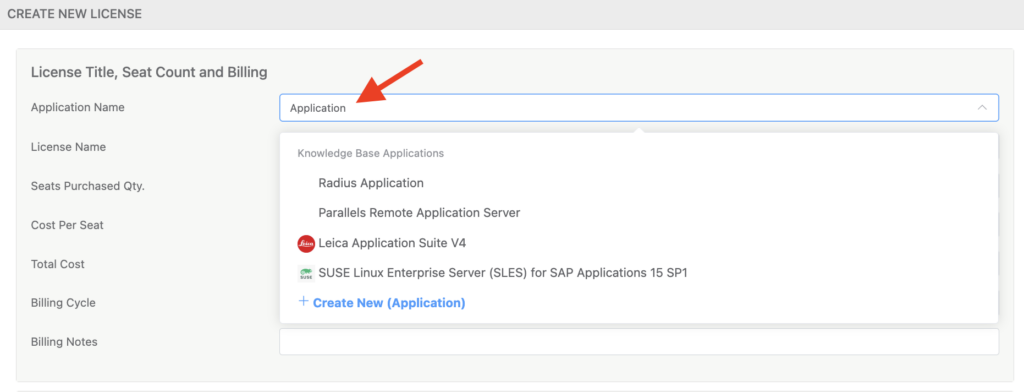
Assign the license to an existing application, or create a new application.
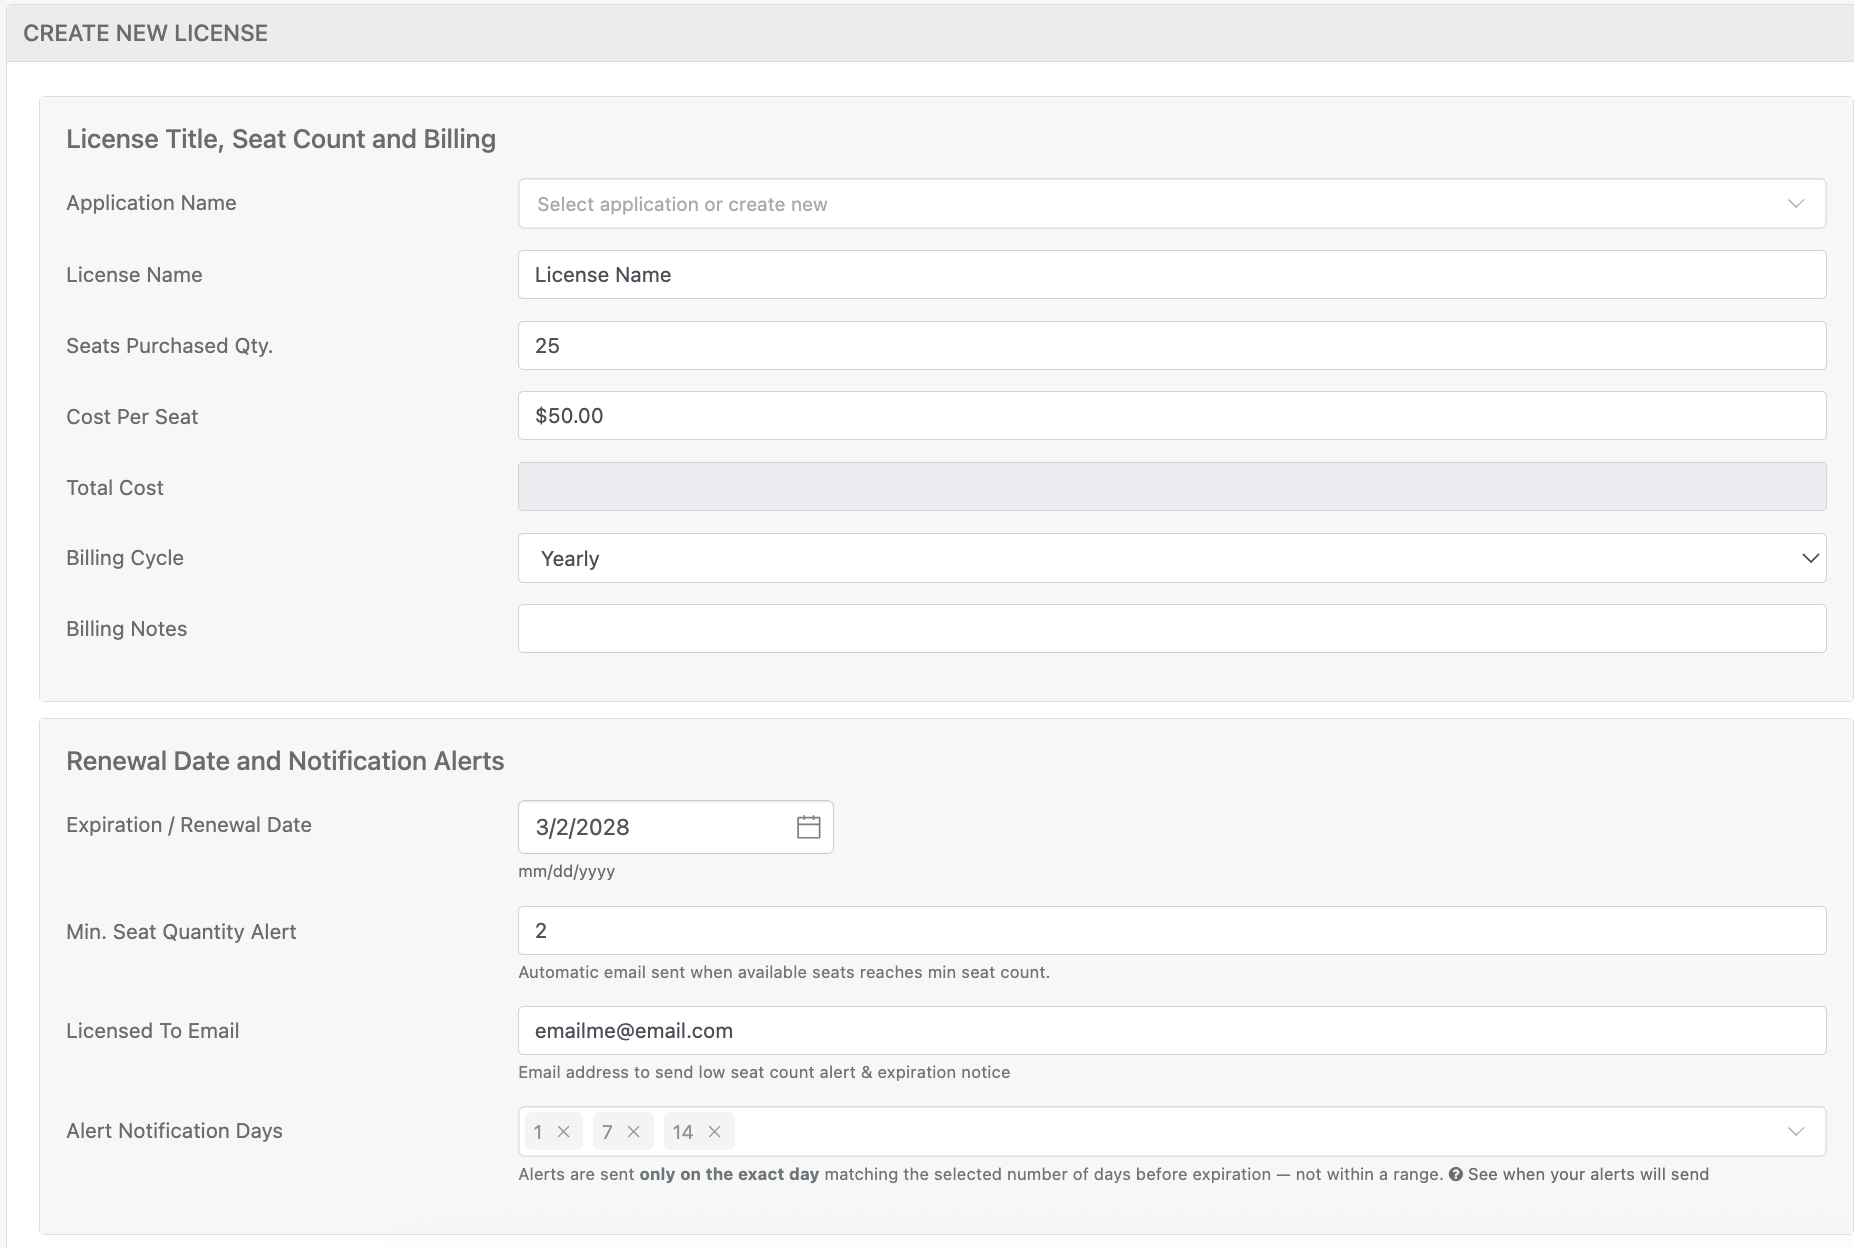
Fill out all of the items necessary for you to sufficiently track your license. A few items to note, the items outlined in red above coincide with your email notifications. The Licensed to Email should be your email or the email of the license manager. The remaining outlined fields are your email triggers. In the example above, we will receive an email when we only have 2 licenses left. This is helpful for informing when it’s time to purchase new seats. We will also receive an email 1, 7, and 14 days before this license expires.
2. How to assign a License to specific users (loanees)
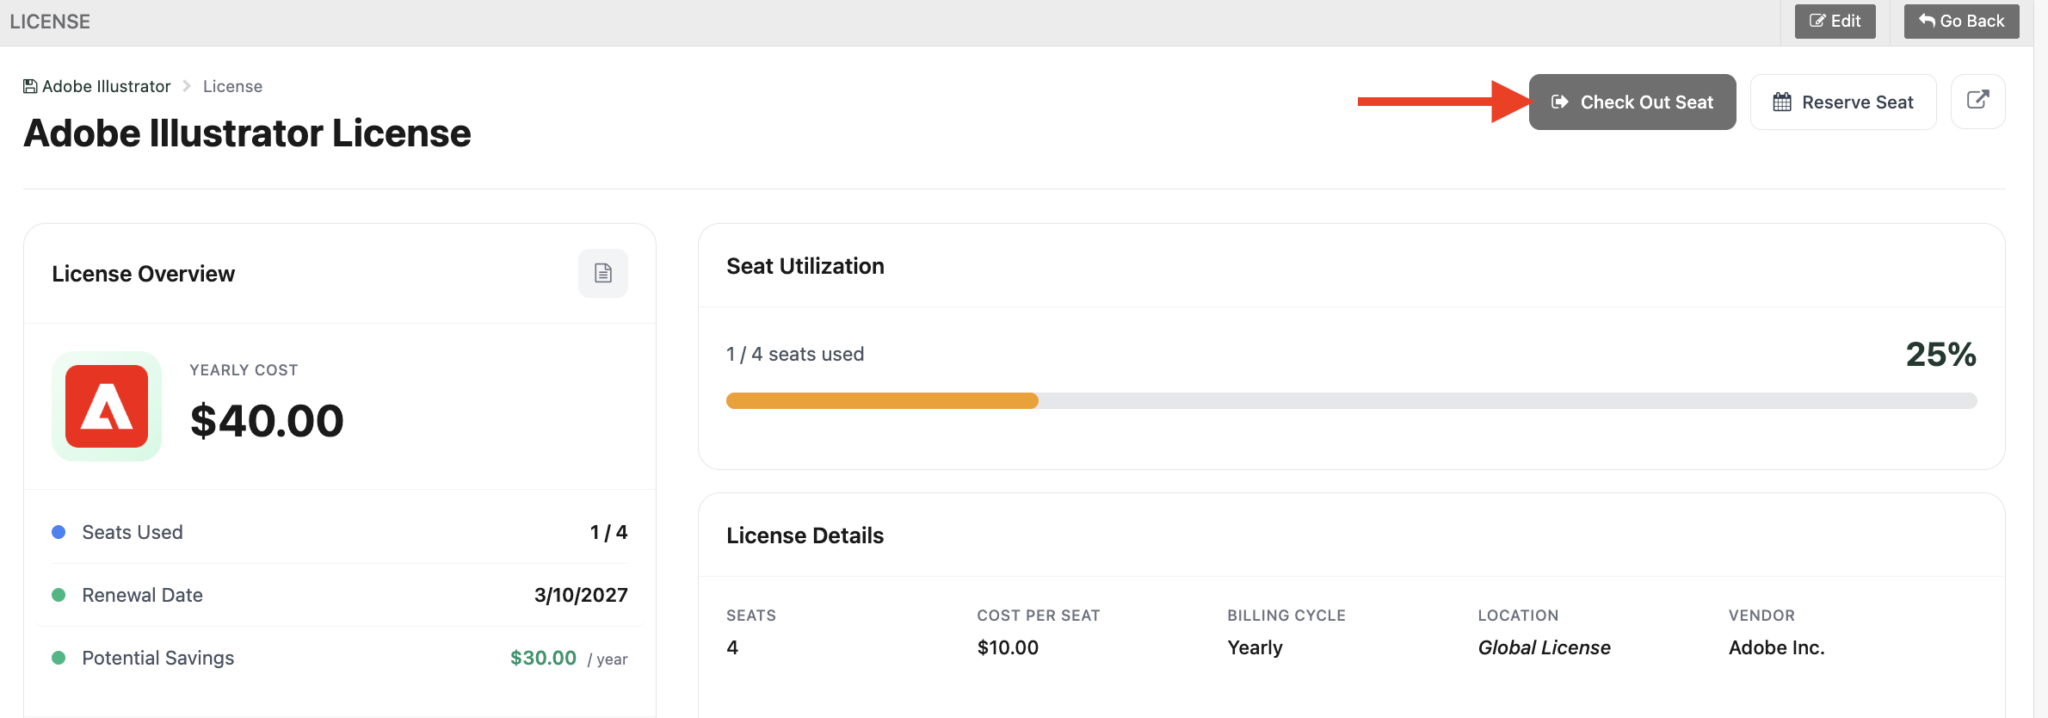
The screen above shows the overview of a single license. The current license has 3 available seat out of 4. We can assign the another seat by clicking the Check Out Seat button. This process is very similar to assigning an asset to a loanee. The screen shown below gives you the option to assign the license to a loanee or to a specific asset. This option works great for software used on dedicated machines and/or workstations. For this example, however, we will be assigning the license to a specific loanee.
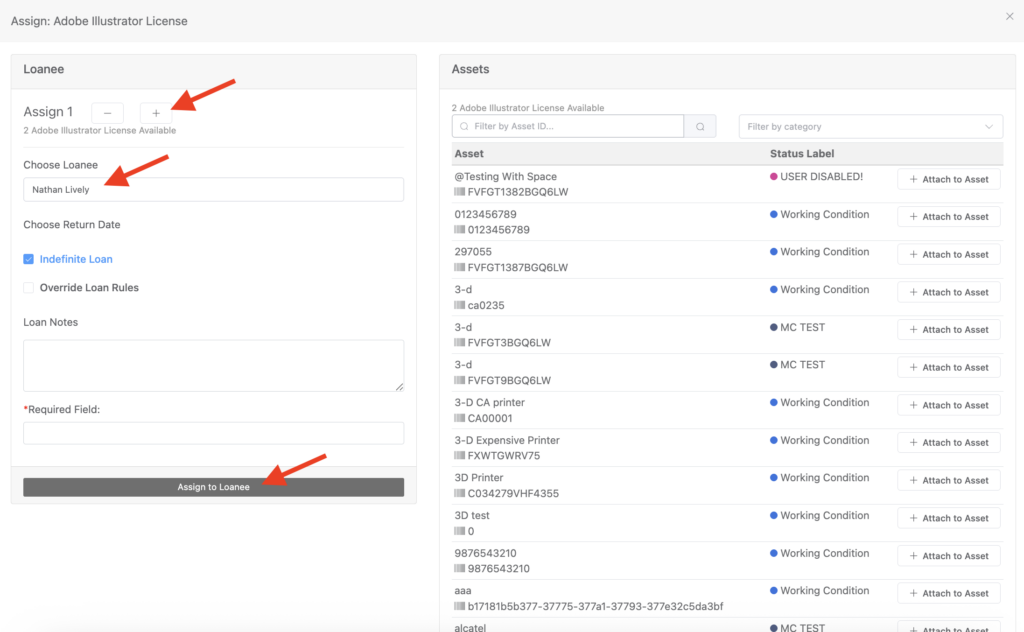
We want to first click the plus sign above to assign 1 License. Choose your loanee, then choose the length of your loan. We have chosen an indefinite loan for this example and then click “Assign to Loanee” at the bottom to save your changes.
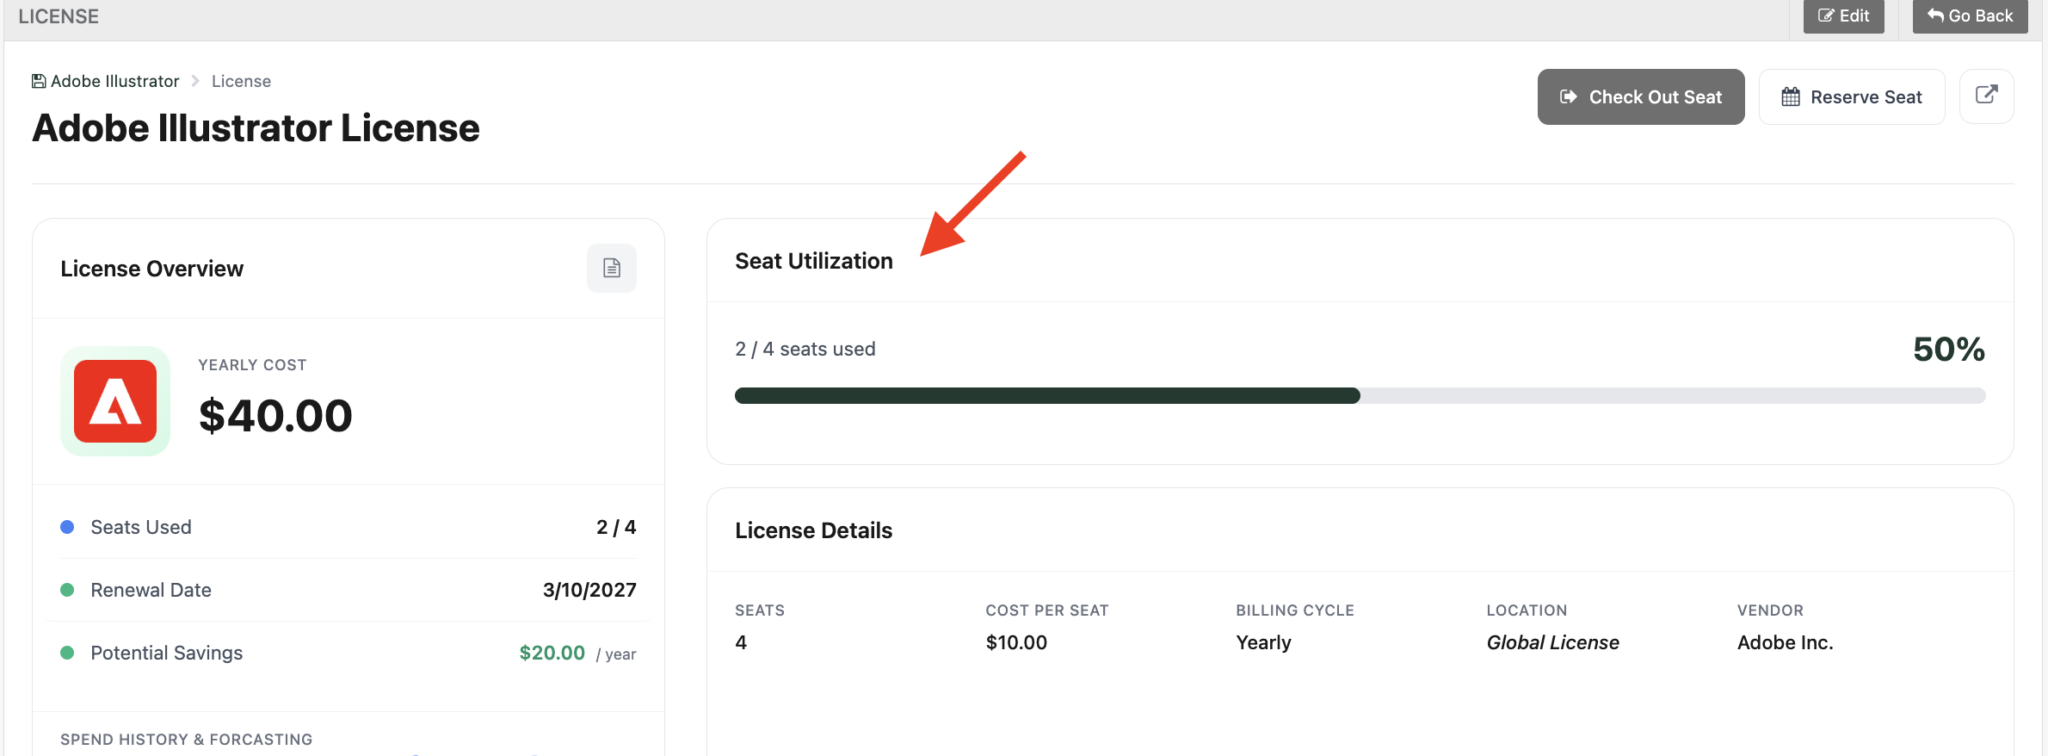
You’ll notice our seat utilization has now gone from 1/4 used to 2/4 used. The bar below gives you quick access to the percentage of seats filled as well.
3. How to link Reftab to Azure and Okta to Automatically Assign Licenses
By automating license assignments into an asset tracking platform like Reftab, IT admins can significantly reduce manual labor, and allocate resources more efficiently towards strategic initiatives rather than mundane administrative tasks, thereby increasing overall productivity.
See our Azure how-to guide here
See our Okta how-to guide here
4. How to assign a License to an Asset
Assigning a License to an Asset works in a very similar way to assigning to a Loanee. This would best be suited for a shared asset that is dedicated to a specific task such as a dedicated rendering station. After clicking check out on the License Usage screen you will be brought to the screen below.
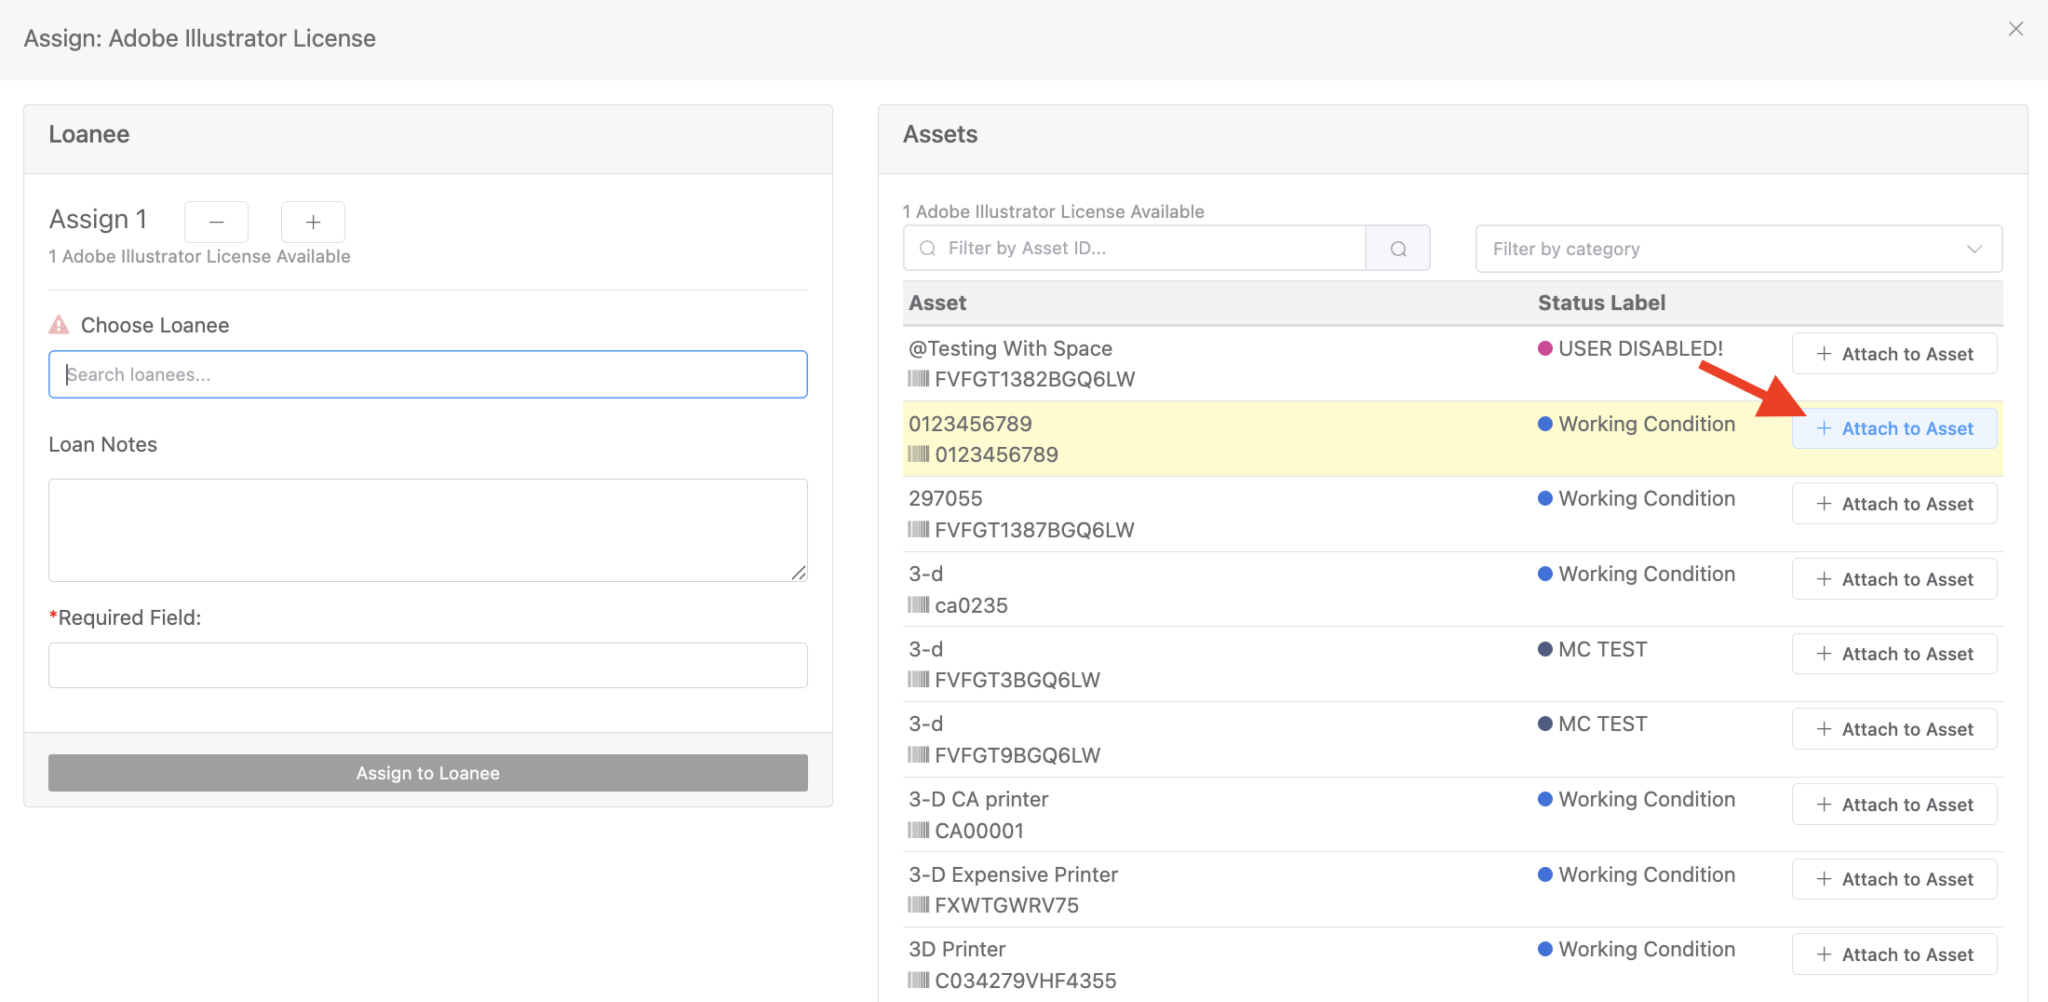
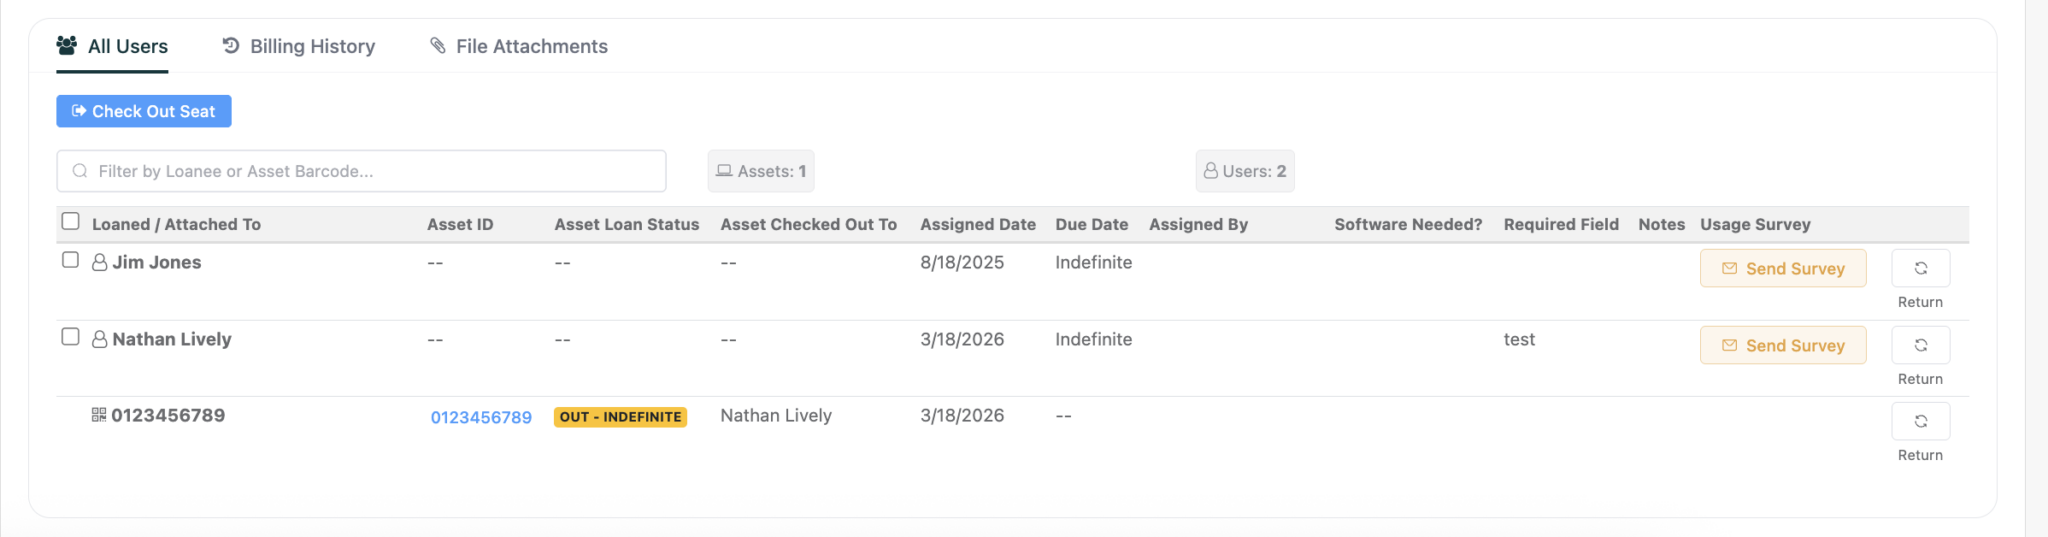
After clicking “Attach to Asset” you can see attached licenses under All Users. As shown below, we can see the license being attached to the asset.
In review, you will now have access to a dashboard full of your Software Licenses. At a glance, you are able to see all of your licenses and a bit of information on each. Information such as, how many seats you have, how many seats are filled, and when these licenses expire.
More questions? email, help@reftab.com and our Support Team will be more than happy to help!
Your assets, simplified. Begin your journey with us!
50 assets free forever with unlimited inventory & software tracking. Includes email alerts, mobile apps, reports, custom asset tags and more.
