How do I configure SSO with JumpCloud?
1) Log into JumpCloud as an administrator.
2) Under “User Authentication” click, “SSO” and click the green plus button to add a new application.

3) Next, towards the bottom, click “Custom SAML App“

4) Next, use “Reftab” as the display label and click “Activate“

5) Next, click “Continue”

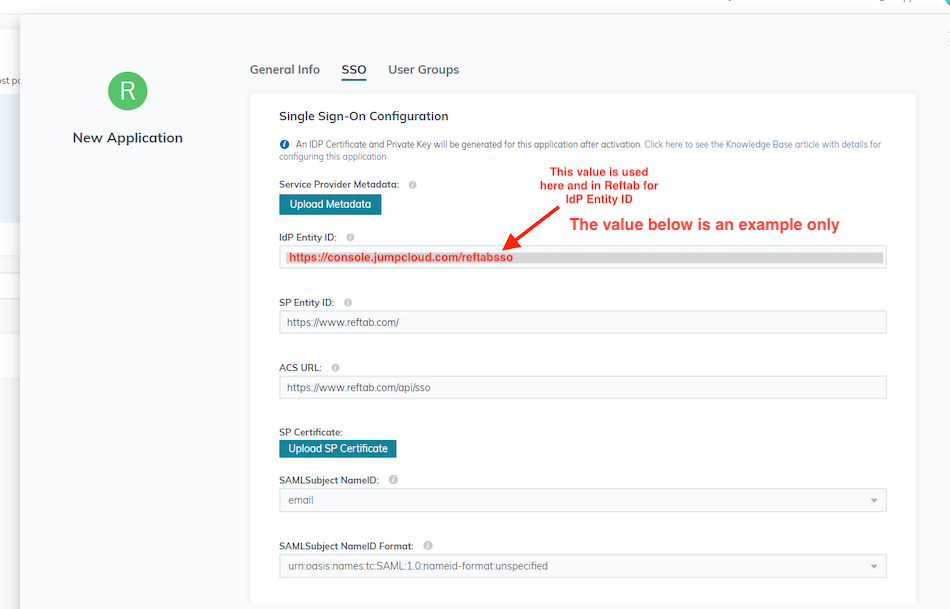
6) Next, on the Single Sign-On Configuration tab. Fill out the inputs:
IDP ENTITY ID: This is a unique, case-sensitive identifier used by JumpCloud for Reftab. This value should match the value specified in the Entity ID field of Reftab. Your domain name, SSO Connect server name or IP address are possible examples.
SP Entity ID: https://www.reftab.com/
ACS URL: https://www.reftab.com/api/sso
SAMLSubject Name ID: email
SAMLSubject Name ID Format: urn:oasis:names:tc:SAML:1.0:nameid-format:unspecified
Signature Algorithm: RSA-SHA256
IDP URL: https://sso.jumpcloud.com/saml2/saml

7) Next, under “Attributes” click “Add Attribute”
You’ll add at least the following two User Attributes:
for the Service Provider Attribute Name:
a) displayname
b) email
for the JumpCloud Attribute Name:
a) displayname
b) email

8) Click “Save“.

9) Once saved, you’ll want to download the certificate because this will be pasted into Reftab. Click “IDP Certificate Valid” > “Download Certificate“

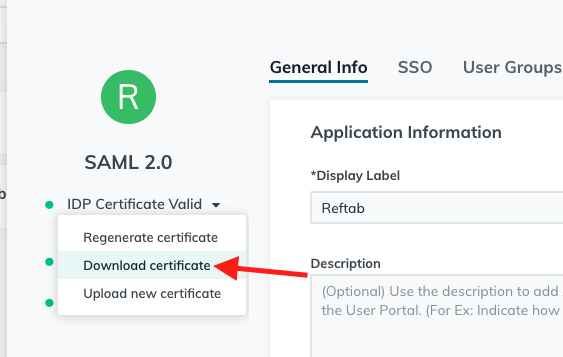
The Cert will download as a .pem file. Right click on it and open with note pad or text editor. Copy the contents to your clipboard.
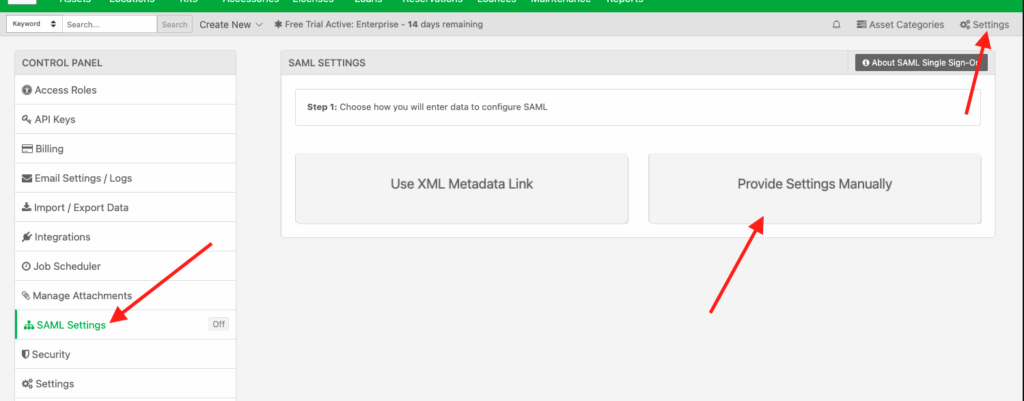
10) Next, log into Reftab as an administrator and click “Settings” > “SAML Settings” > “Provide Settings Manually“
11) Click, “Add New Domain“

12) Here you will configure your domain to use SSO with JumpCloud.
Domain: Your domain
IDP Entity ID: This must match to what you provided in step 6 above for IDP Entity ID in JumpCloud
URI Endpoint: https://sso.jumpcloud.com/saml2/saml
Bind Method: HTTP-Redirect
Email Attribute: email
Attribute To Identify User’s Name: displayname
Certificate: Paste in the text from step 9 above

Click “Save SAML Settings” when done.
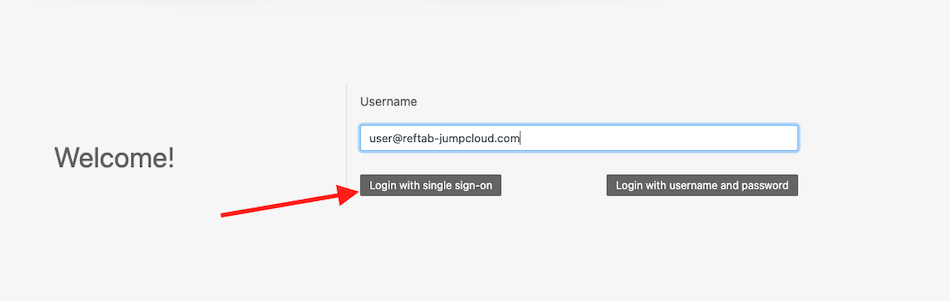
13) Next, log out and on the Reftab login page: https://www.reftab.com/login start typing an email address from your domain. You should see the Reftab login screen present you with a button to “Login with Single Sign-On“. Login with your company credentials.
Your assets, simplified. Begin your journey with us!
50 assets free forever with unlimited inventory & software tracking. Includes email alerts, mobile apps, reports, custom asset tags and more.