This guide provides step-by-step instructions for installing the Reftab Jira Plugin. With this plugin, you can seamlessly link assets in Reftab to Jira, enhancing your workflow and asset management capabilities.
In this how-to, we will go over the following:
How to connect Jira to Reftab
To start off, you will need a valid public and secret api key from Reftab. To obtain these keys:
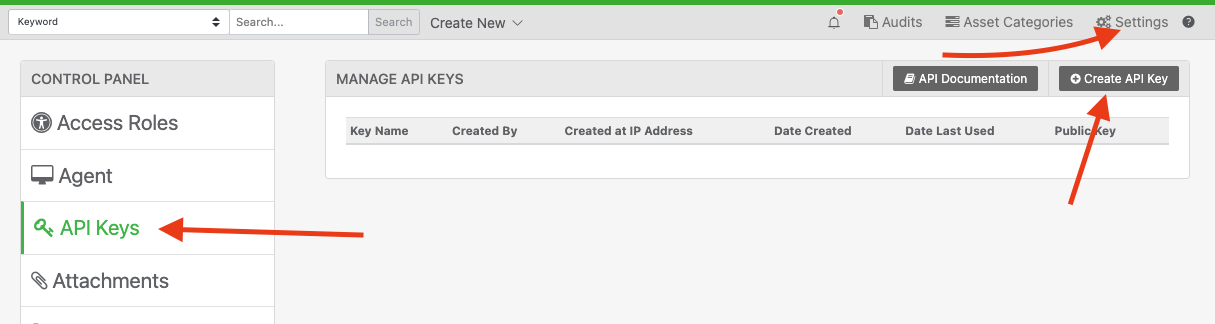
1) Log into your Reftab account as an administrator and click “Settings” > “API Keys” > “Create“.
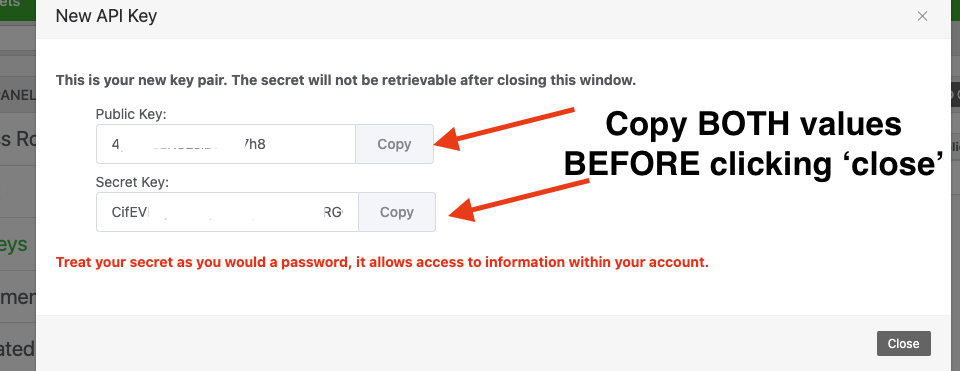
2) On the screen that appears, copy these values onto a note pad before you click close.
Next, you will want to log into Jira as an admin, navigate to “Manage Apps” > “Explore more apps“.

Then search for “Reftab” and install the application.


Once installed you should see a popup modal in the bottom left, select the “Configure” option.

On the next screen you will be presented with a connection configuration screen, here you will input the public and secret API keys we generated and copied earlier.
Additionally, if you previously used our old Jira integration, you will want to utilize the migrate data button to bring over existing links to assets.

How to link assets to issues
With the Reftab Jira connection fully set up, you can now link assets to Jira issues with ease. Here’s an example:
If you need to link a users asset to an issue, simply:
- Navigate to the Reftab Assets section of the Jira issue.
- In previous versions of our Jira Integration, you may be used to seeing “Assets” field for this functionality, this has since changed and you will need look for “Reftab Assets“
- Enter the user’s email address in the search bar.
- Jira will display a list of assets associated with that email.
- Select the relevant asset to link it to the issue.

Notes on the Integration
- In the previous version of the integration, the asset list would prepopulate automatically when clicking on the dropdown field. Due to Jira’s deprecation of the external assets API, you are now required to input the user’s email address to display their associated assets.
- In the previous version of the integration, data from Jira synced to Reftab once daily or could be updated manually using the sync button. This has changed in the current version. Now, data is pulled live whenever an asset’s details page is opened in Reftab, ensuring real-time updates and accuracy.
That’s it, the Jira integration is now fully setup!
For any questions or assistance, please email help@reftab.com