How to Set Up Azure AD (Entra) SAML Single Sign-On with Reftab
What You’ll Achieve
- Users can log into Reftab using their company credentials (instead of creating standalone credentials for Reftab)
- Secure SAML-based authentication managed through Azure
- A foundation for deeper Microsoft Entra integrations down the road, including SCIM provisioning, SaaS discovery, and software-usage tracking that helps you understand which applications your organization is actually using.
Prerequisites
Before you start:
- You’re an admin in your Azure AD / Entra tenant.
- You have a Reftab Administrator role in your Reftab account.
- You know the email domain(s) used by your users (e.g.
yourcompany.com). - You have access to your DNS provider or know someone who does (for domain ownership verification).
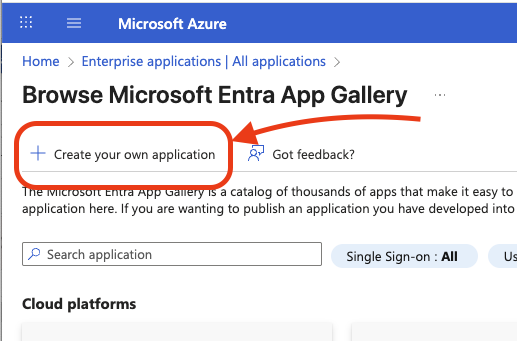
Step 1: Create a New Enterprise Application in Azure AD
- Sign in to the Azure Portal with an admin account.
- Navigate to Azure Active Directory → Enterprise Applications.
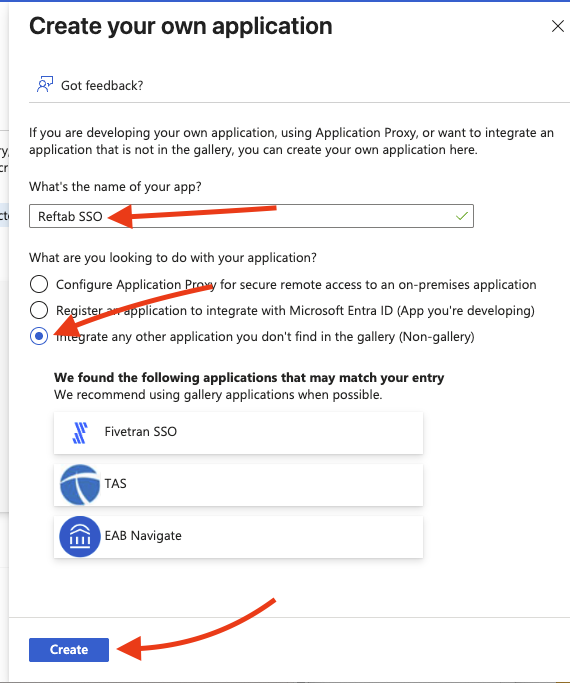
- Click New application → Create your own application.

- Enter a name (for example, Reftab SSO) and choose Integrate any other application you don’t find in the gallery. Click Add.
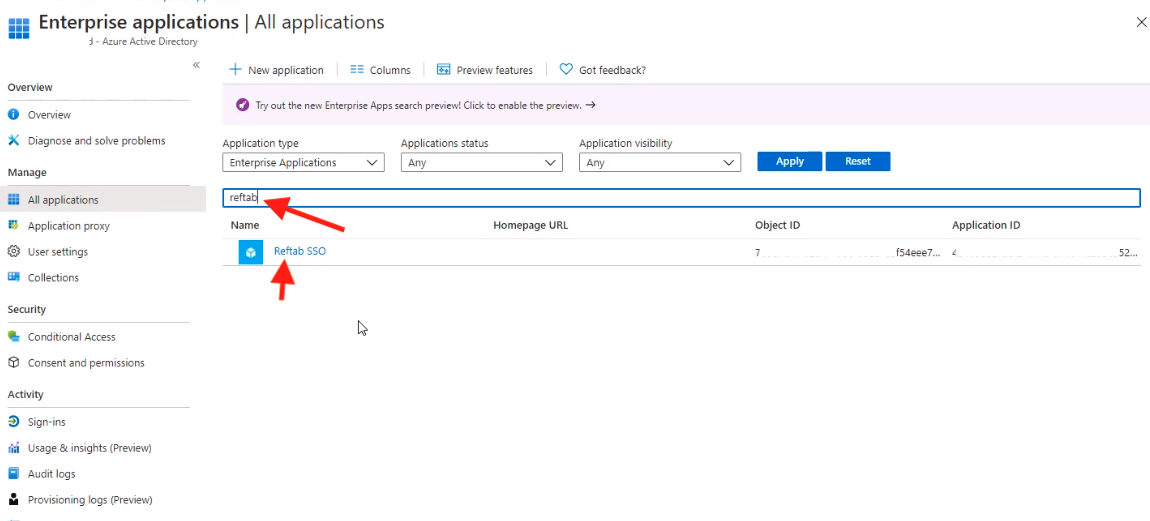
- Next, go back to All Applications and search for Reftab and click on the new application.
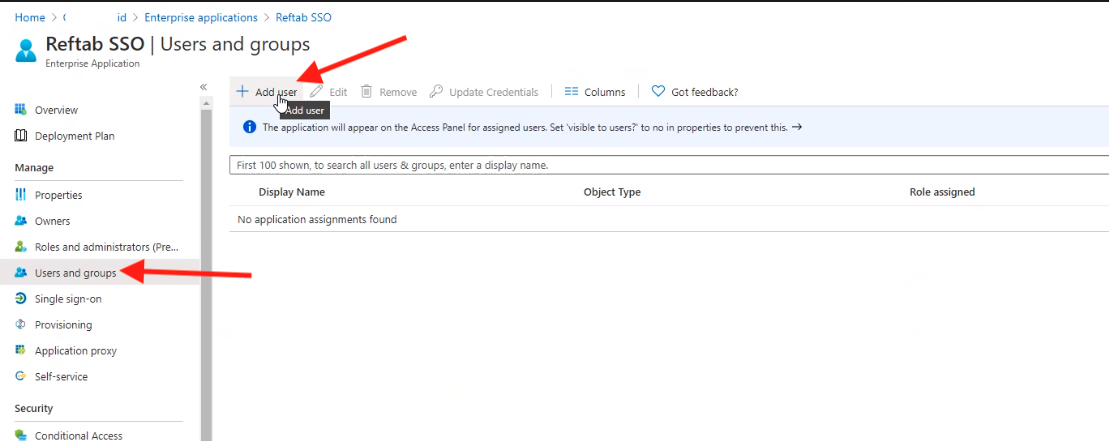
- Once created, go to Users and groups → Add user/group, and assign at least one user or group that will use SSO to access Reftab.
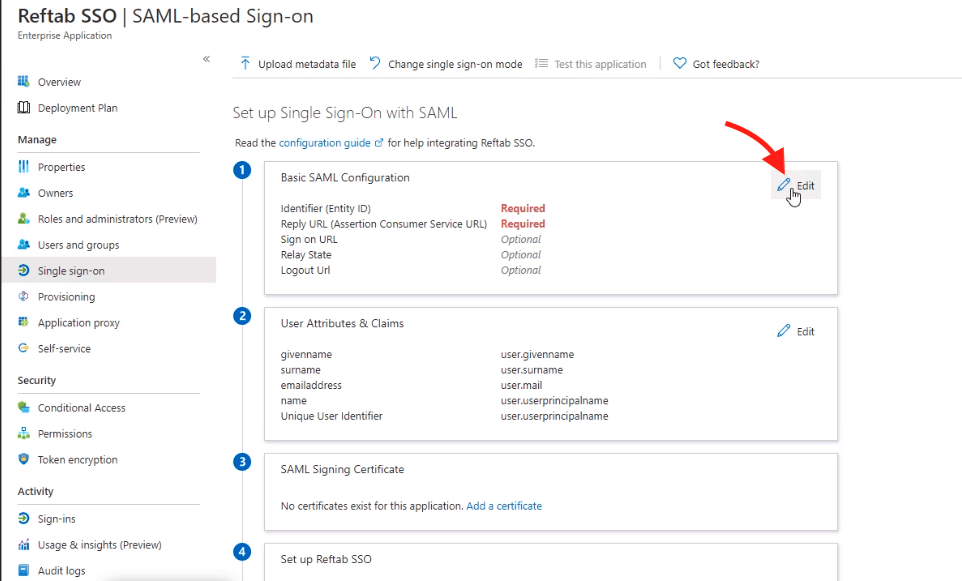
Step 2: Configure SAML SSO in Azure AD
- In your Reftab application in Azure, go to Single sign-on and select SAML.

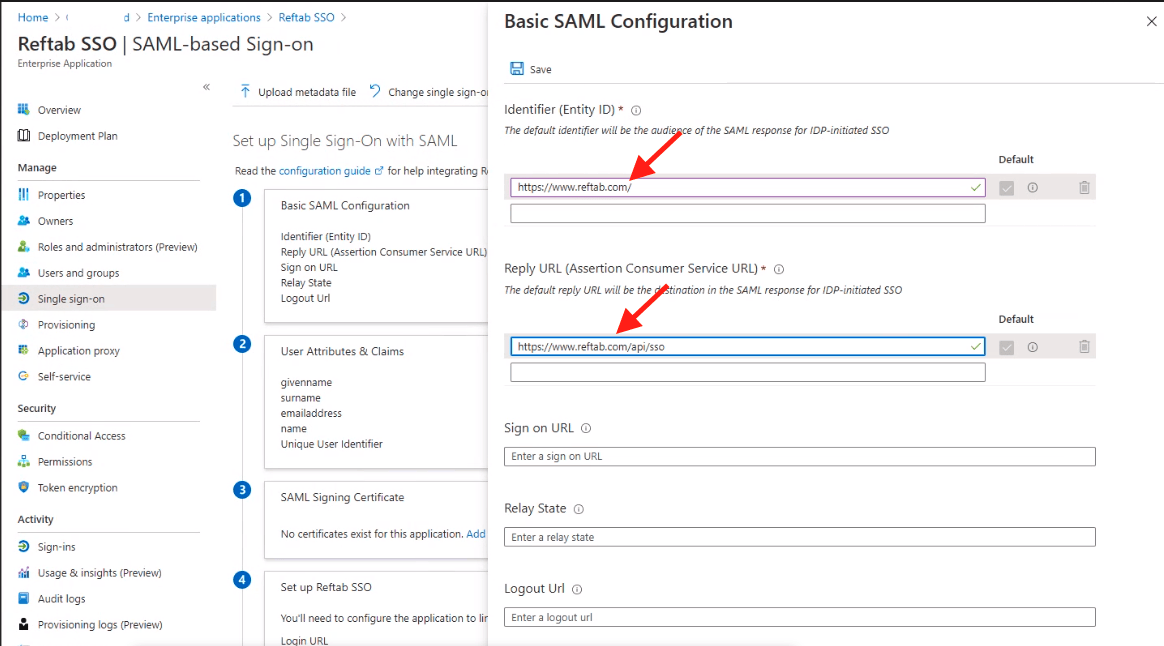
- Under Basic SAML Configuration, click Edit and enter:
- Identifier (Entity ID):
https://www.reftab.com/ - Reply URL (ACS):
https://www.reftab.com/api/sso
- Identifier (Entity ID):
- Save your configuration.
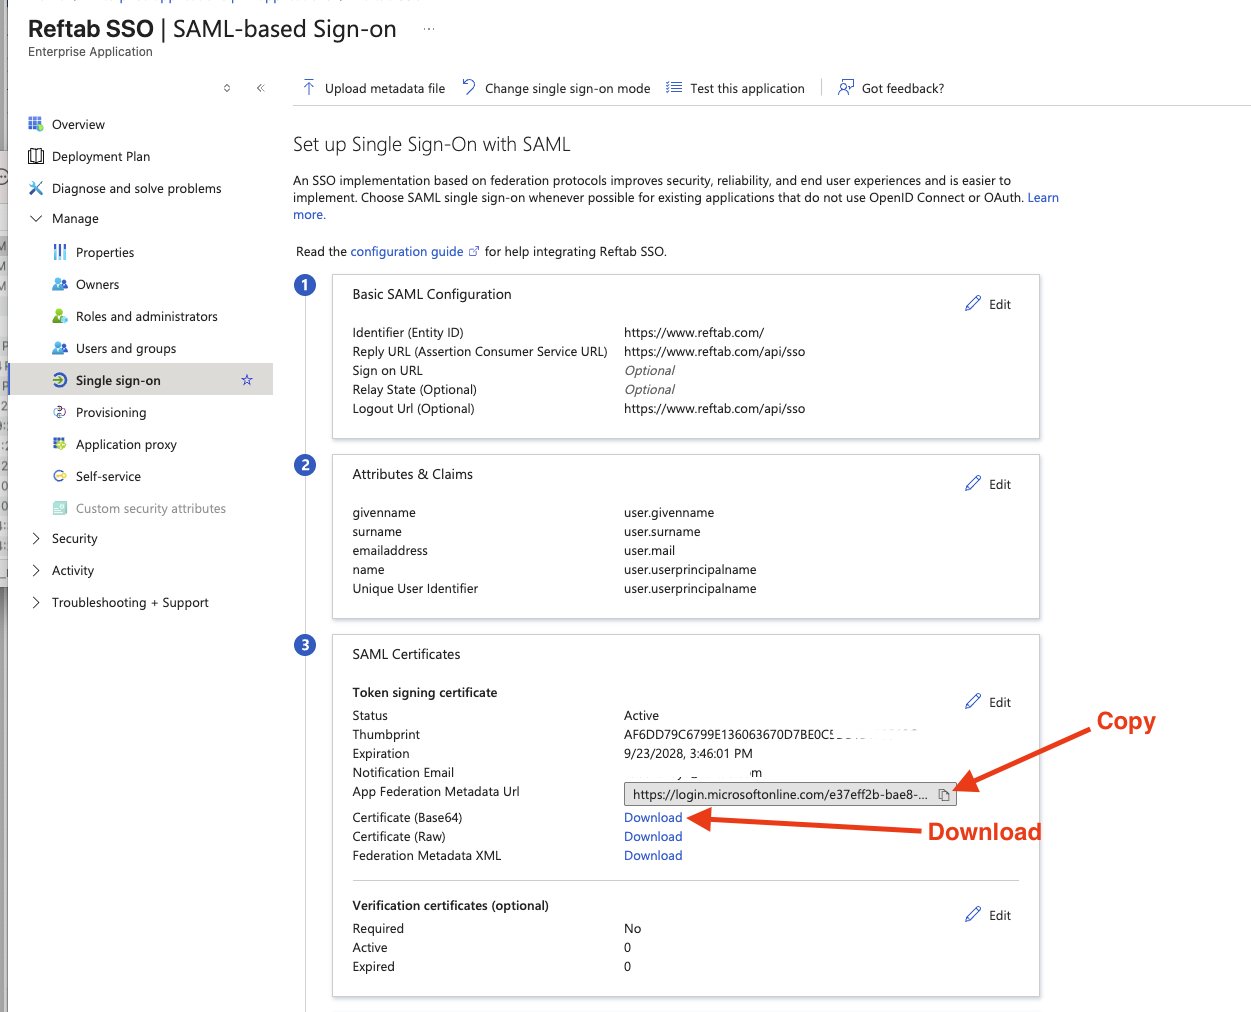
Step 3: Download Certificate & Metadata from Azure
- In the SAML Certificates section, download the SAML Signing Certificate in Base64 format.
- Copy the App Federation Metadata URL (you’ll need this for Reftab).
Step 4: Enter SAML Settings into Reftab
- Log into Reftab as an admin → navigate to Settings → SAML Settings.
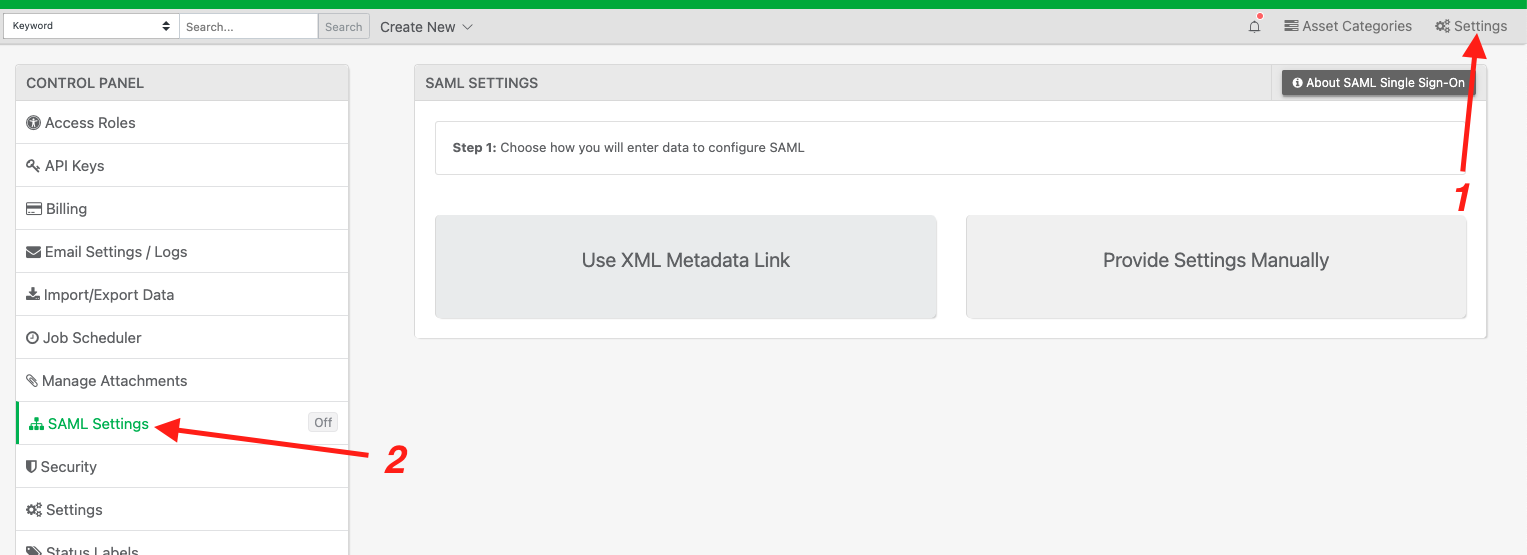
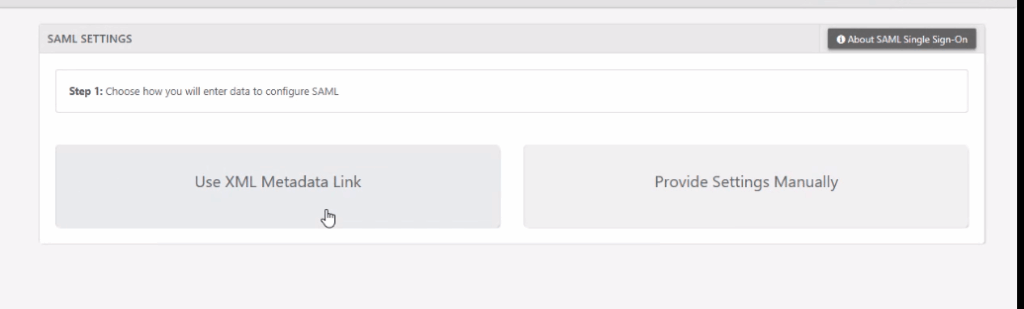
- Select “Use XML Metadata Link” and paste the App Federation Metadata URL from Azure.
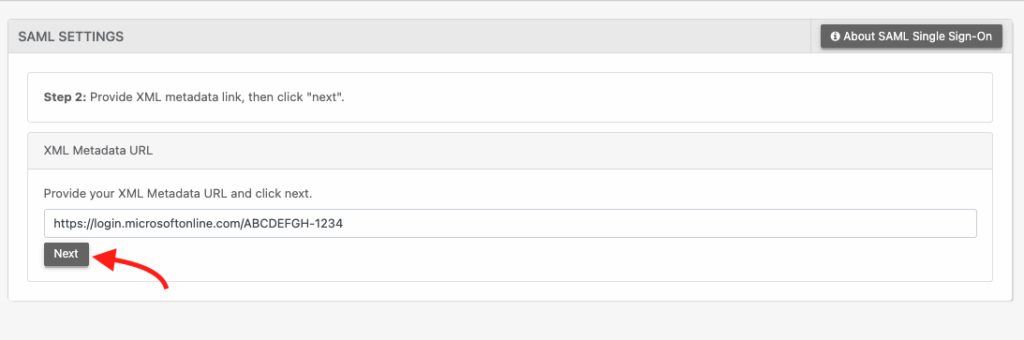
- Click Next.
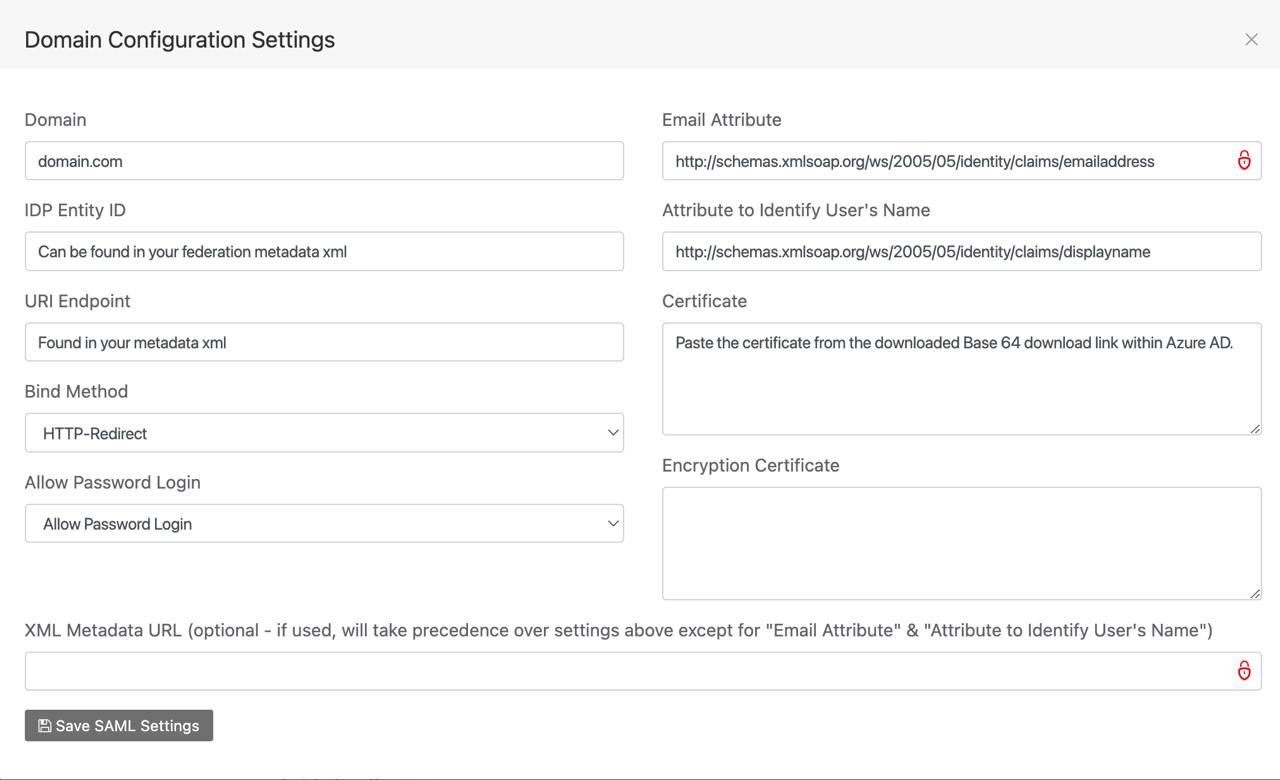
- If any fields remain empty, fill them manually. Here are the common values:
- Domain – Your users’ email domain (e.g.
yourcompany.com) - IDP Entity ID – From the Azure metadata XML
- SSO URL – From the metadata XML
- Binding Method
- HTTP-Redirect - Email Attribute
- http://schemas.xmlsoap.org/ws/2005/05/identity/claims/emailaddress - Name Attribute (optional)
- http://schemas.xmlsoap.org/ws/2005/05/identity/claims/displayname - Certificate – Paste the Base64 certificate you downloaded from Azure
- Domain – Your users’ email domain (e.g.
Your resulting configuration should look similar to the below image:
- Click Save SAML Settings.
Step 5: Verify Your Domain in Reftab
In Reftab, go to Settings → SAML SSO Settings
Next, you will need to verify ownership of your domain before you can begin using SSO with Reftab. This is an important security step. This checks that your domain belongs to you and not anyone else trying to claim it as theirs. Follow this guide to verify your domain: https://www.reftab.com/blog/faq/domain-verification-for-saml/index.html

- Copy the TXT verification record that Reftab displays on your SSO settings page (looks like
reftab-domain-verification=xxxx). - In your DNS provider, add that TXT record to your domain. Use
@or leave blank for host if needed. - Wait for DNS to propagate (usually minutes, but could take up to 24 hours).
- Back in Reftab → click Verify Domain. Once verified, the status should show “Verified.”
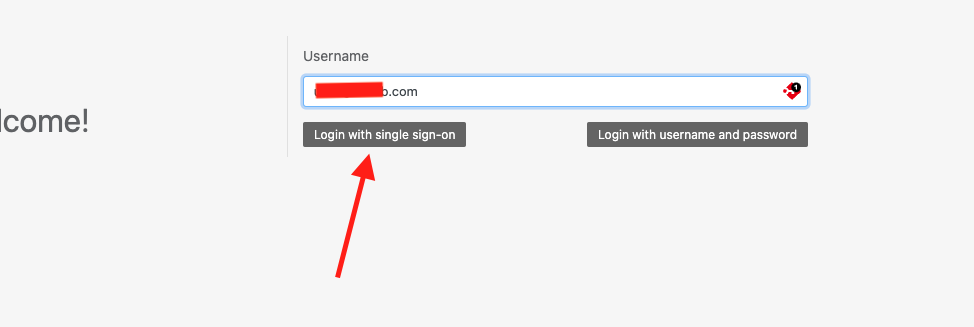
Step 6: Test SSO Login
- Go to the Reftab login page. If your domain is verified, you’ll see a “Login with Single Sign-On” button.
- Click that button → sign in using an Azure AD account that has access.
- Confirm that you can access Reftab successfully.
Step 7: Understanding Logout Behavior
- When a user logs out of Reftab, their Azure AD (Entra) session may still be active.
- To fully sign out, make sure the user also logs out of Azure AD in their browser or portal.
Troubleshooting & Common Errors
| Problem | What to Check / Do |
|---|---|
| “User authenticated, but email not in Reftab” | Make sure the email attribute in your Reftab SAML settings matches the user’s email in Reftab and confirm the user exists in Reftab prior to signing in. |
| Incorrect code or login errors | Re-verify the SAML settings in both Azure and Reftab. Check that the certificate, SSO URL, and attribute mappings match. |
| SSO button not appearing | Verify that the domain was successfully added and verified in Reftab. |
| Users not being provisioned | You need to have SCIM User Provisioning Setup to do this.. |
Suggested Next Steps
- Setup Users with SCIM Provisioning: Use SCIM to automatically sync users, groups, and deactivations between Azure AD and Reftab — reduces manual effort.
Click here for how to setup a SCIM integration with Reftab
- Track Software Usage with SaaS Discovery (if using Microsoft Entra): Automatically discover and track SaaS applications being used in your organization and feed that into Reftab for better software asset management.
Click here for how to setup SaaS Discovery with Reftab
Need Help?
If you run into any issues or want help reviewing your setup:
- Email our team at help@reftab.com
- Provide screenshots of your Azure SAML settings or Reftab SAML Settings page
- Share any error messages you’re seeing — we’ll help you debug and resolve
Your assets, simplified. Begin your journey with us!
50 assets free forever with unlimited inventory & software tracking. Includes email alerts, mobile apps, reports, custom asset tags and more.