How to Set Up Microsoft Entra SaaS Discovery in Reftab
Integrating with your Entra (Azure) instance allows Reftab to discover who has access to your SaaS platforms, how often they utilize these applications, and which applications exist in your environment — automatically adding them to Reftab without any manual work. This data flows into Reftab giving you a single-pane-of-glass view into not just your hardware, but your software as well.
This guide will cover:
- Entra Settings
- Permissions Required
- Permission Required for O365 Applications
- Creating a Certificate and Secret
- Settings within your Reftab Account
- Tracking Licenses by Group Membership
- Tracking Microsoft Office 365 Applications
- Viewing Applications and Usage by User
- Seats, Users and Spend Tracking
Important Foreword
If you have already setup SSO for Reftab, then there is no need to register an additional application. Simply head into the already created application, and skip to this section to continue with SaaS setup.
Entra Settings
You’ll need to register Reftab as an application within your Entra account.
Log into your Entra account (https://portal.azure.com), and click, “Enterprise Applications” (note it may display as “App Registrations”.
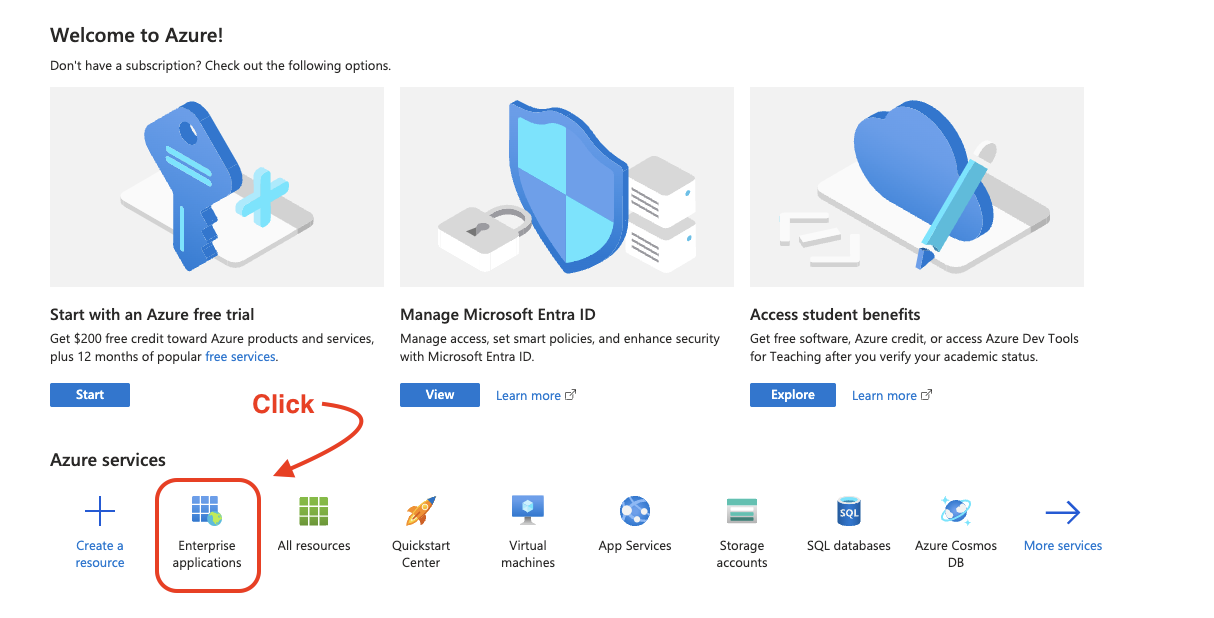
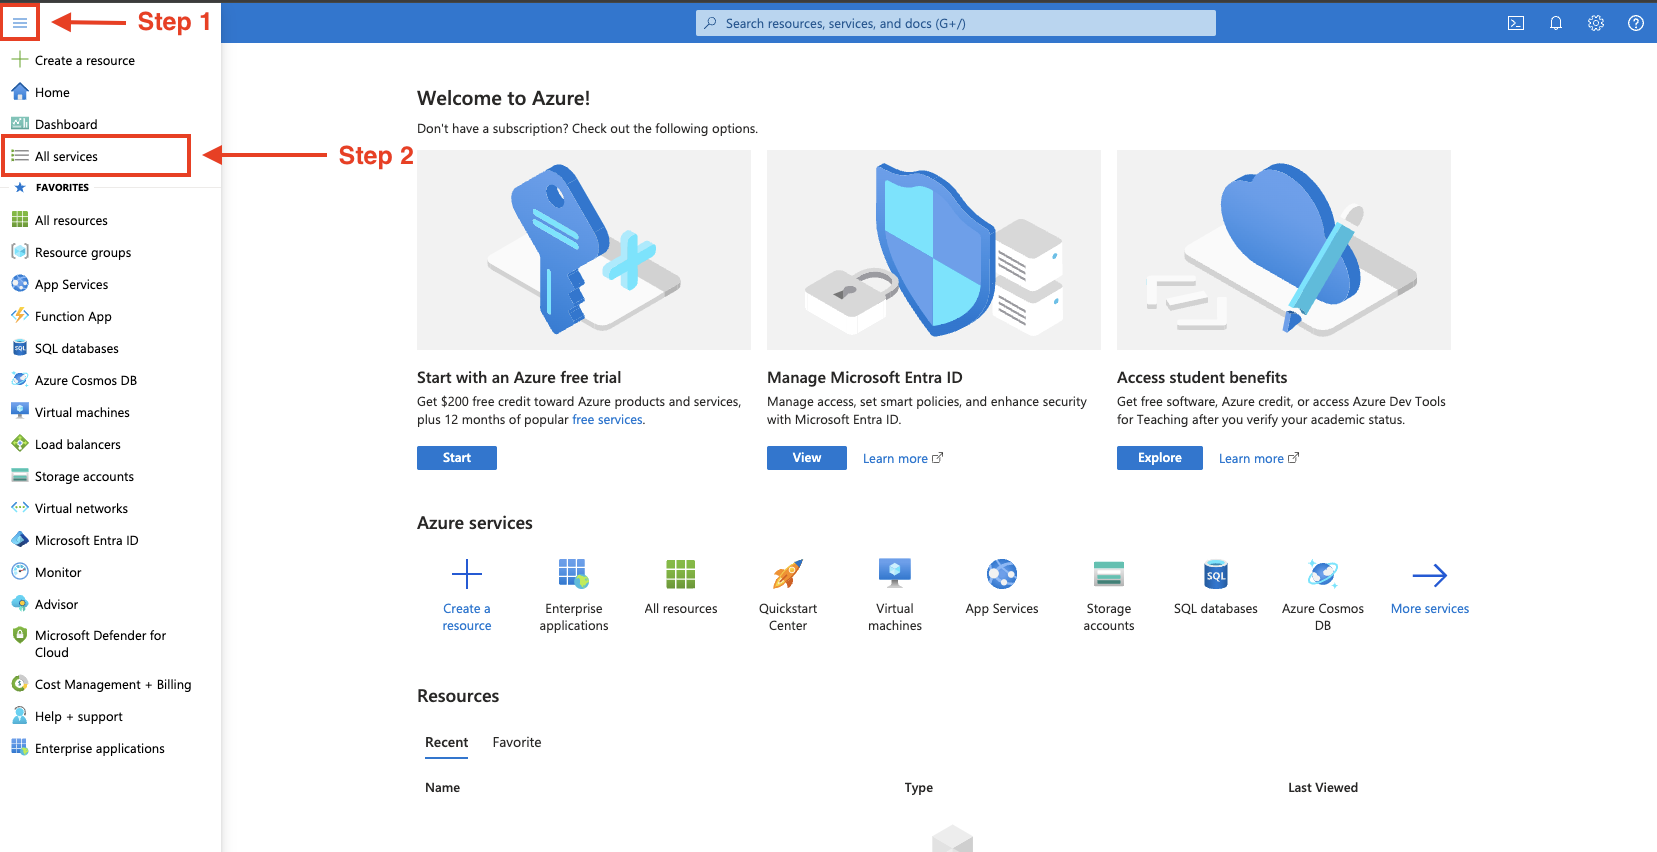
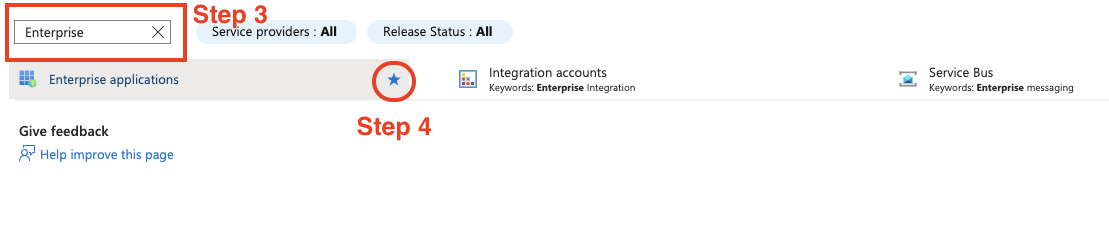
If you do not see “Enterprise Applications”, then you will need to click the menu tree in the top left corner, and then click “All services”. Here you can search for “Enterprise Applications” and star the service so that it can be easily accessed from the landing page.
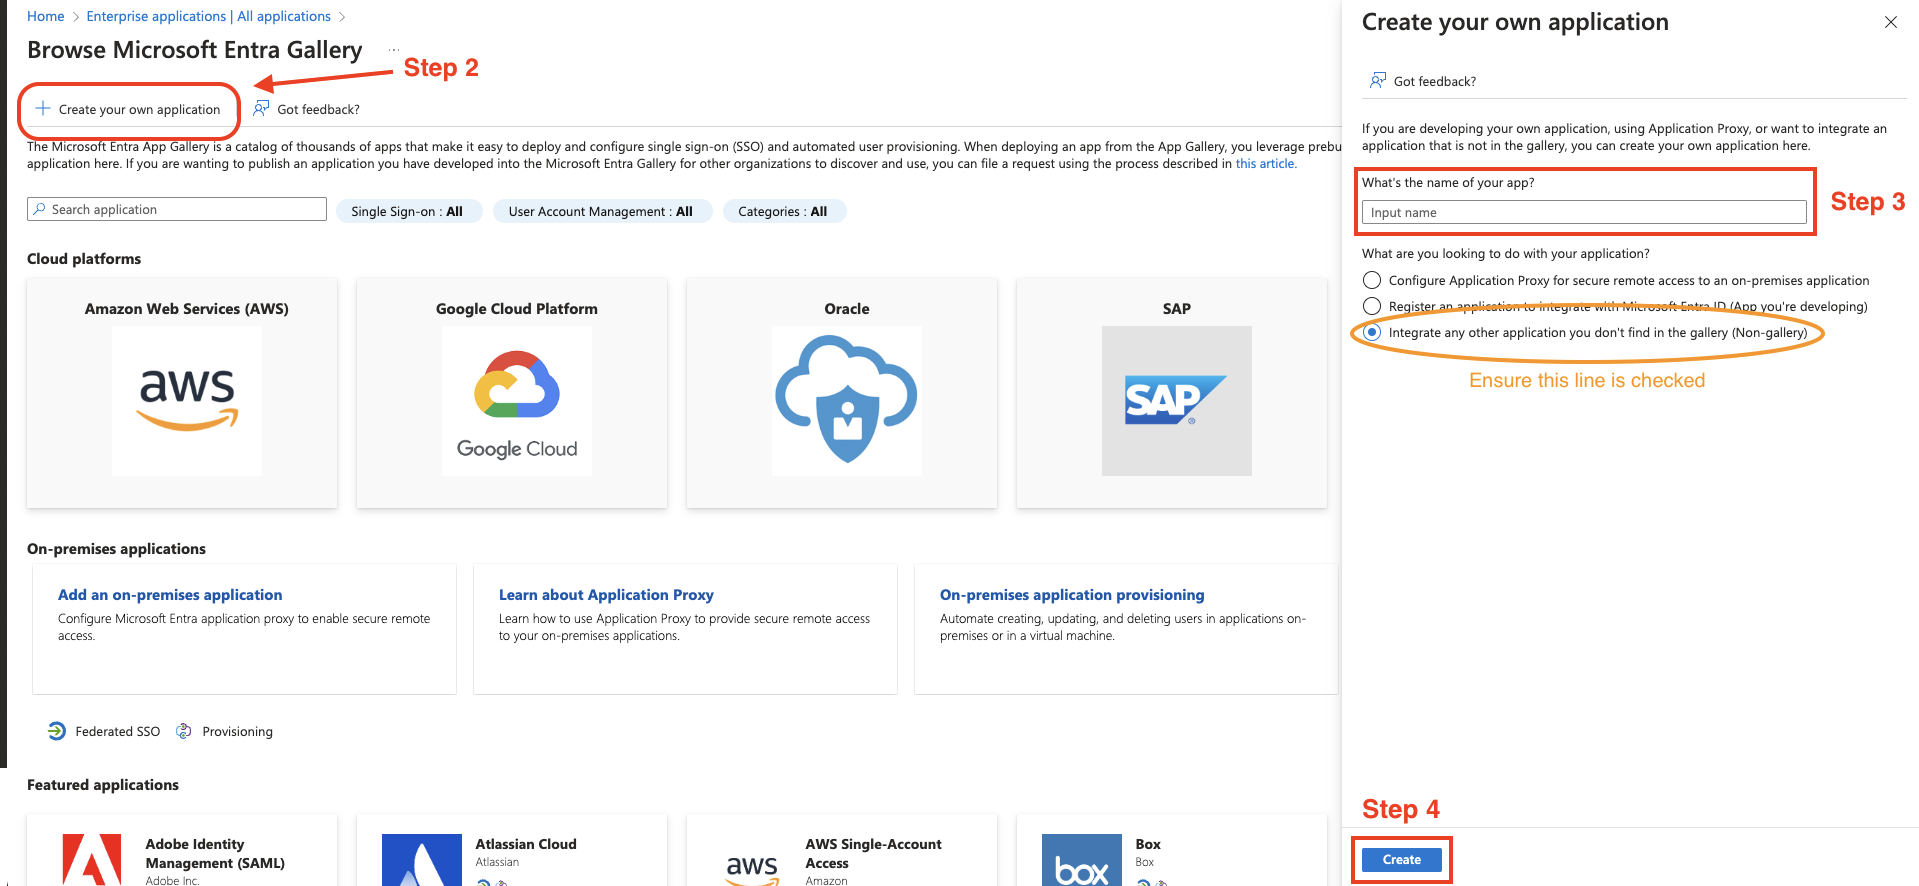
Next, click “New application” > “Create your own application”.
Name the application, “Reftab”. Ensure that “Integrate any other application you don’t find in the gallery (Non-gallery)” is checked. Then press “Create”.

Next, note the “Application ID” under the “Properties”. This will be needed later on.

Grant Permissions
Next the application needs to be granted permissions.
On the left side, click “Permissions“.
Then click, “app registration” > “Add a permission” > “Microsoft Graph”.

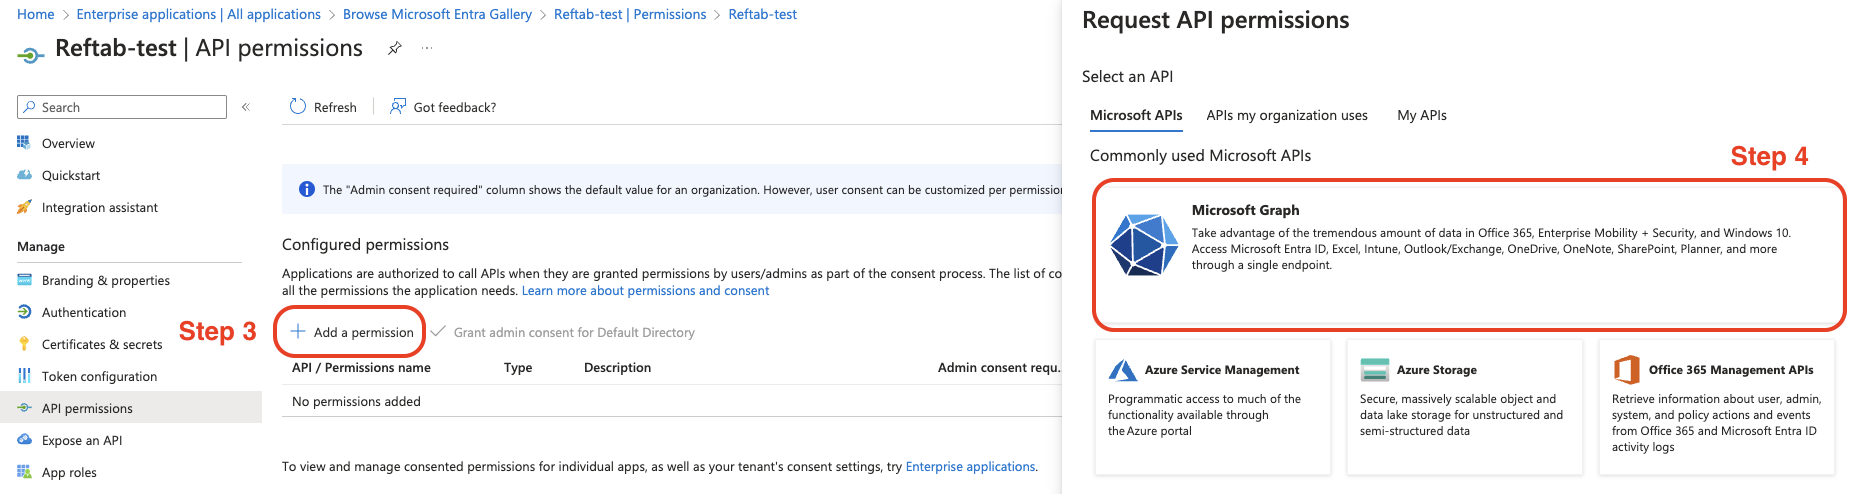
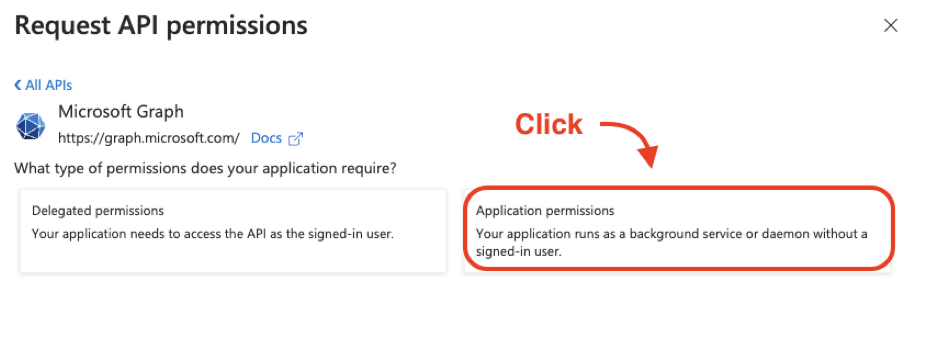
Next click, “Application permissions”.
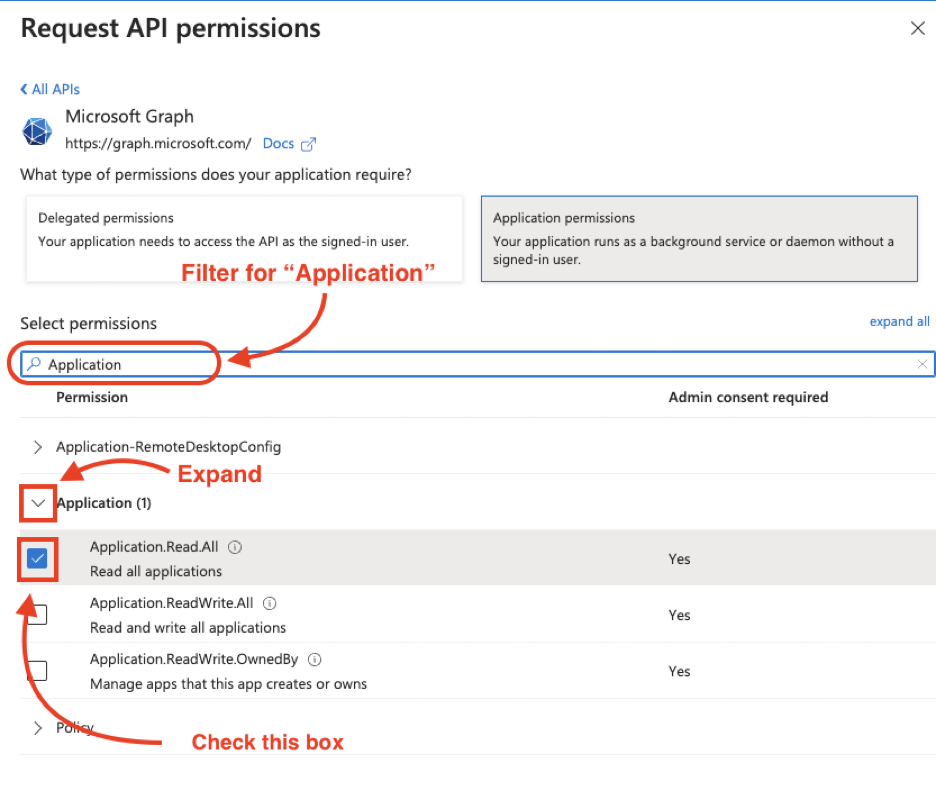
Next, filter by typing in the respective box and search for “Application”, expand the category and check the box, “Application.Read.All”.
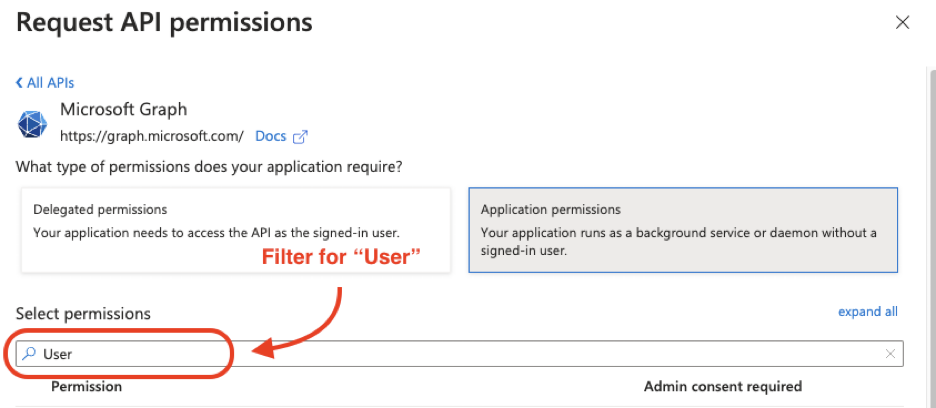
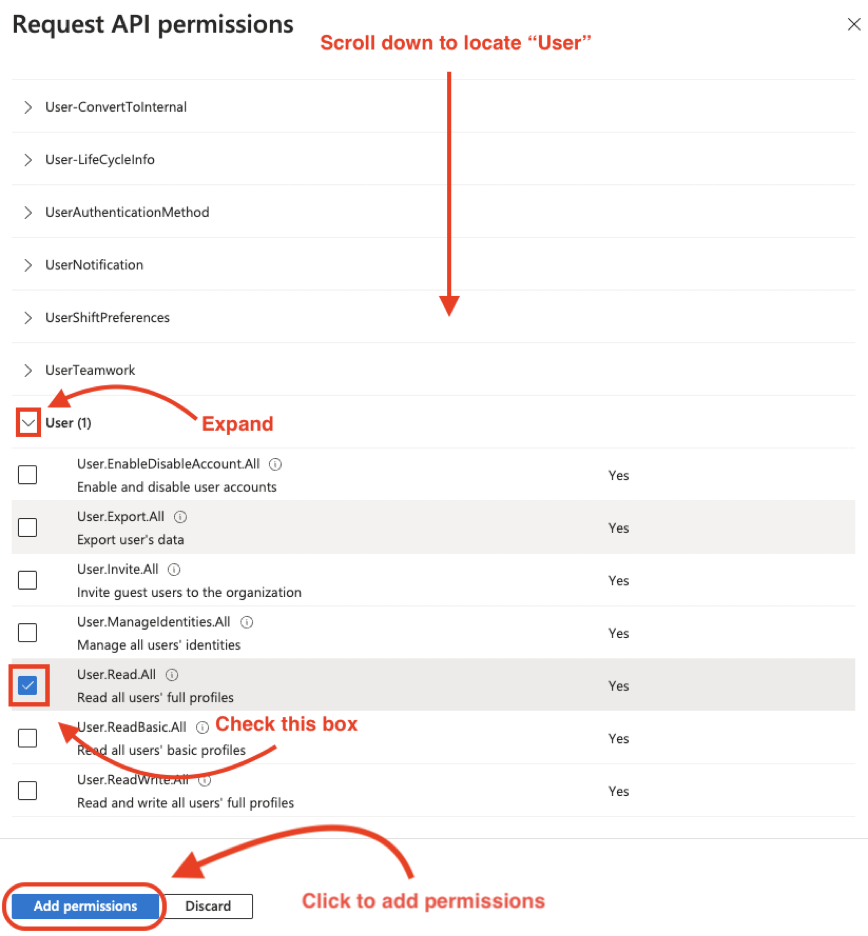
Next, filter for, “User”. Scroll down until you locate the “User” category, expand the category, and check “User.Read.All”.
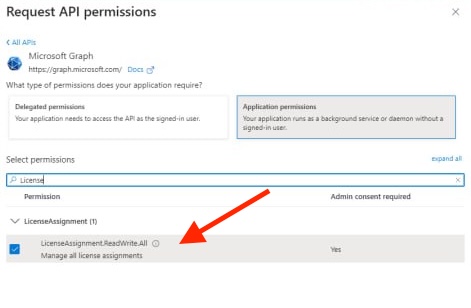
Last, to be able to import Microsoft Office 365 applications, we will filter for “License” and checkmark “LicenseAssignment.ReadWrite.All“. Then click “Add Permission“
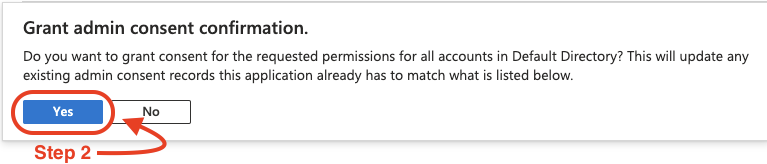
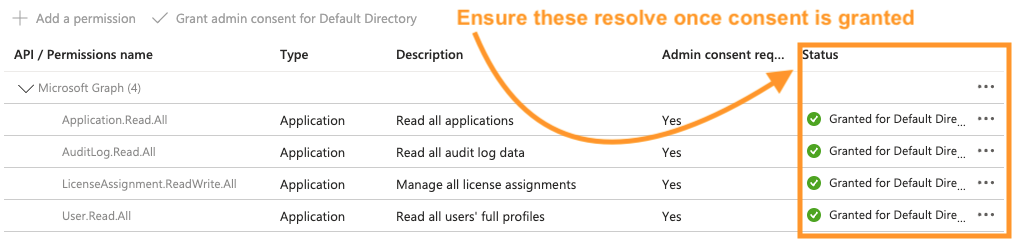
Once permissions have been added, click on “Grant admin consent”, then click “Yes” on the confirmation popup.

Next to see the login counts and usage by user, you’ll need to grant the permission “AuditLog.Read.All“.
Find “AuditLog.Read.All”, as shown below and grant the permission.

Create Certificate and Secret
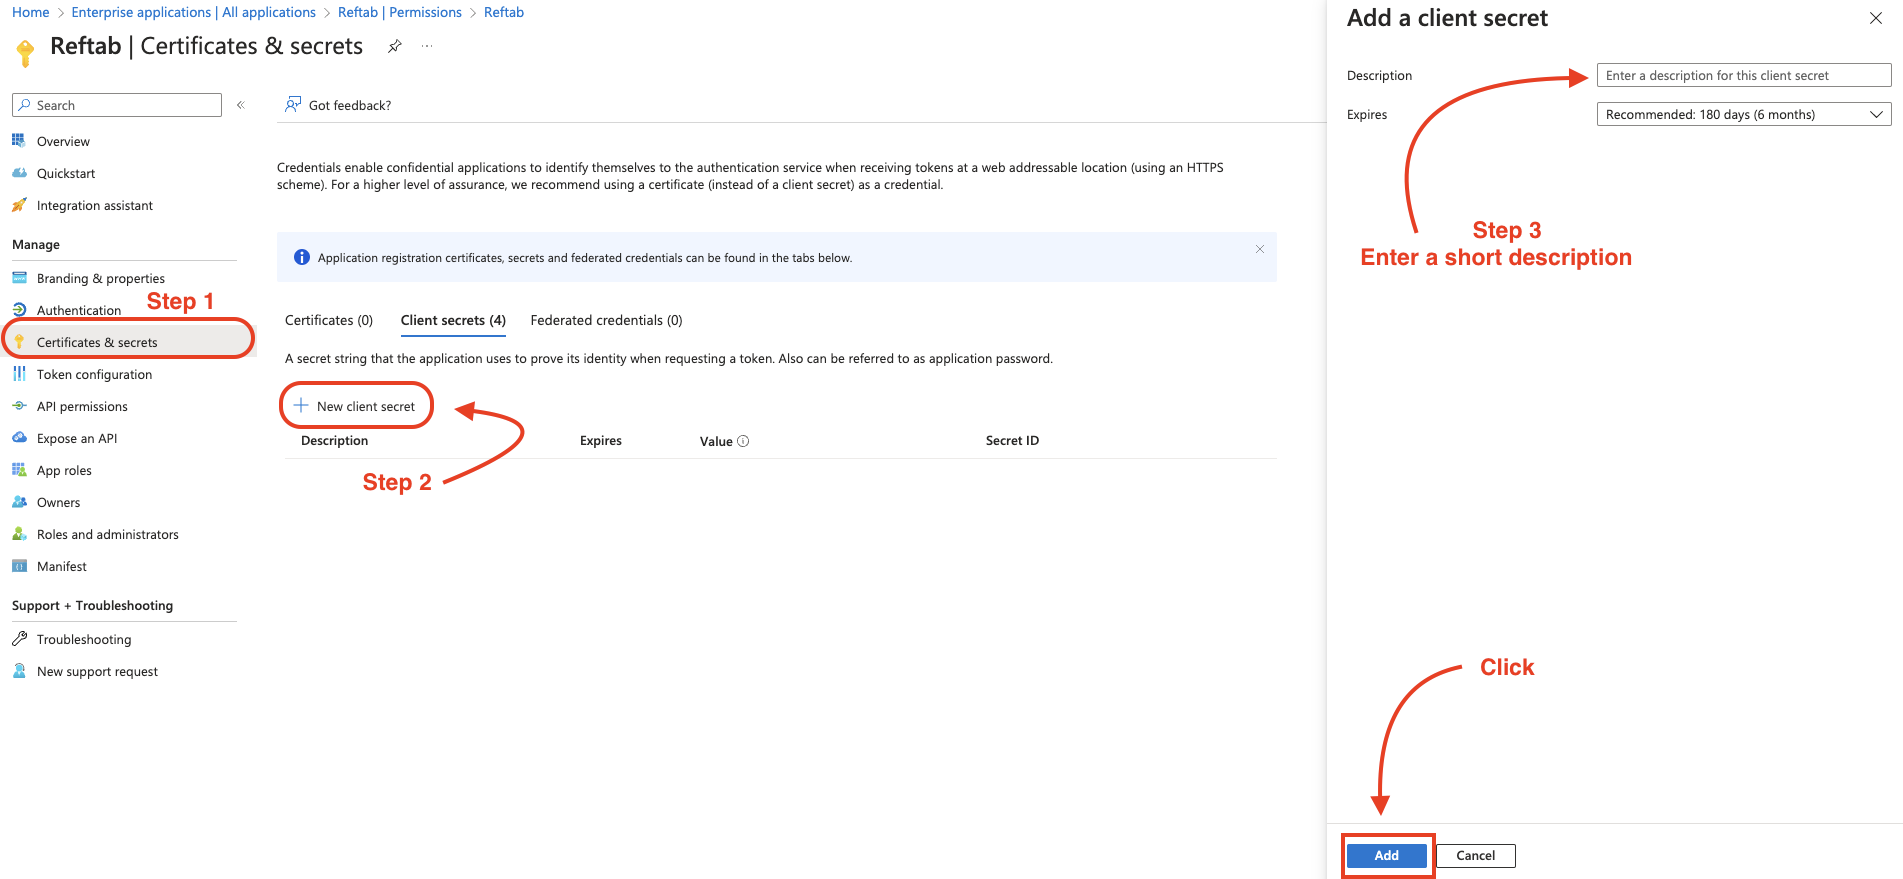
Next, create a new client secret by navigating to “Certificates & secrets” on the left-hand menu, click “New client secret”, then enter a short description, “Reftab”
Set your expiration timeframe, the recommended is 180 days by default. Then click “Add”.
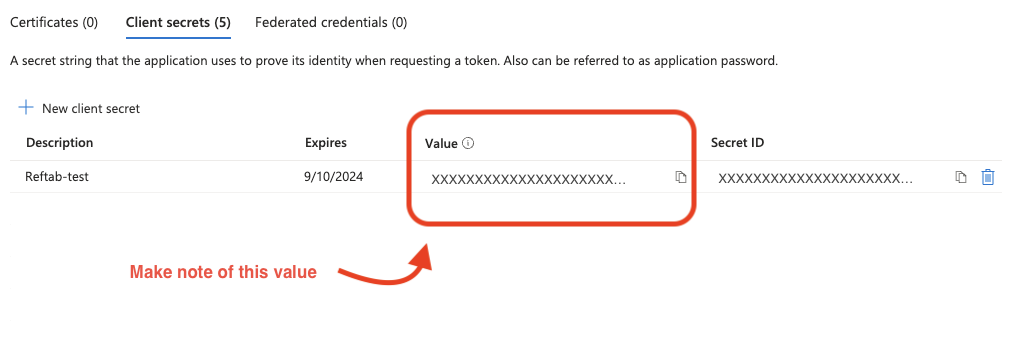
Take note of the string under the “Value” column, as it will be needed later.
**This is the only time that this value will be visible**
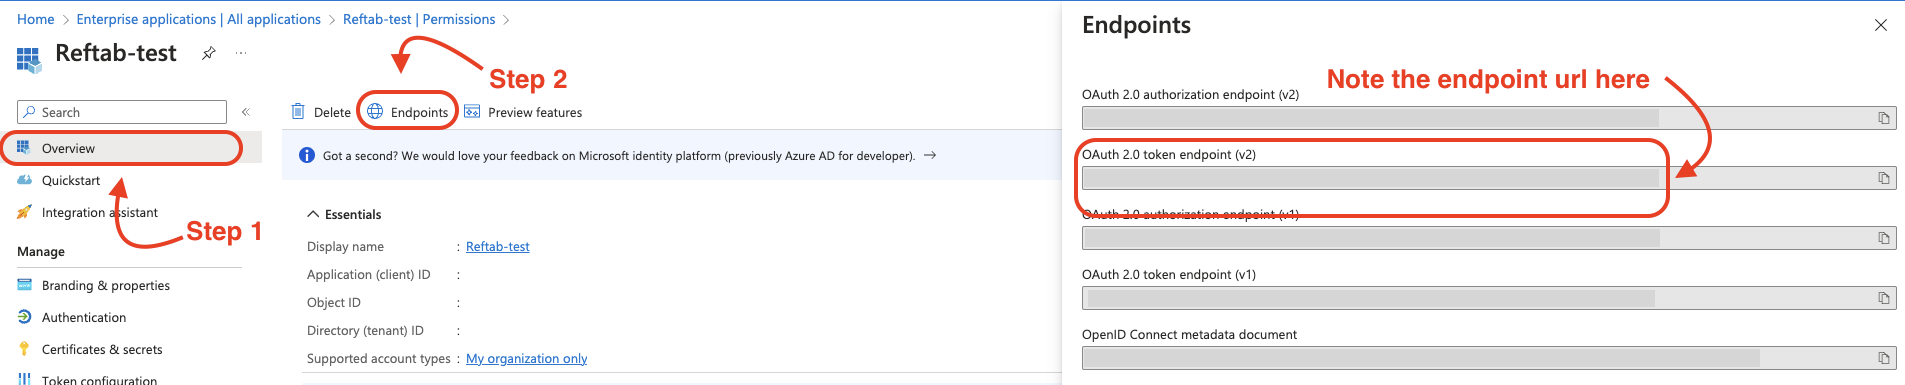
Next, click “Overview” on the same page, and click “Endpoints”.
Copy the OAuth 2.0 Token endpoint (v2), as it will also be needed in the next steps.
Reftab Settings
Now that things are setup on the Azure side, log into your Reftab account: https://www.reftab.com/login
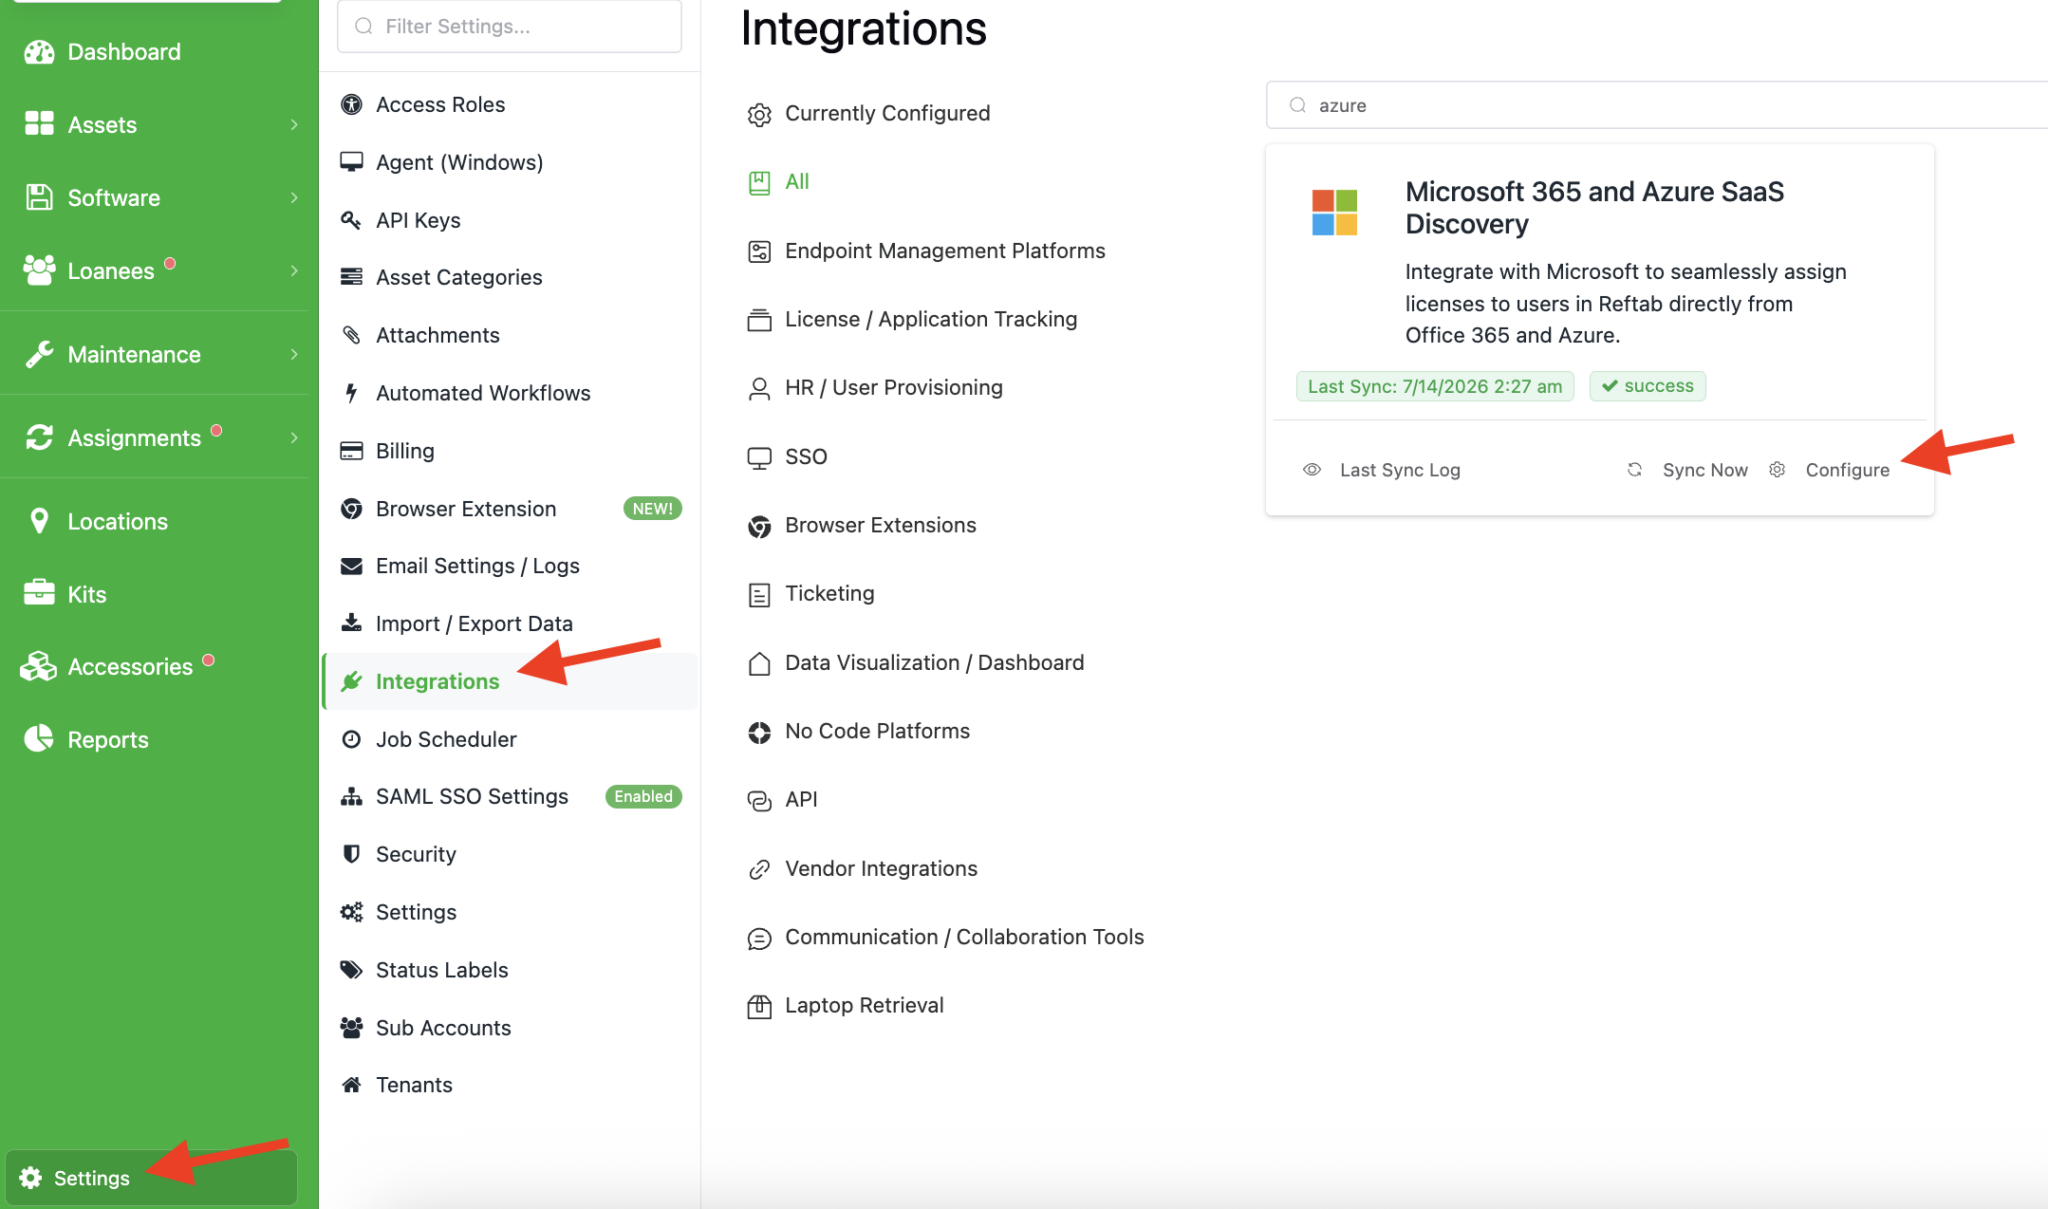
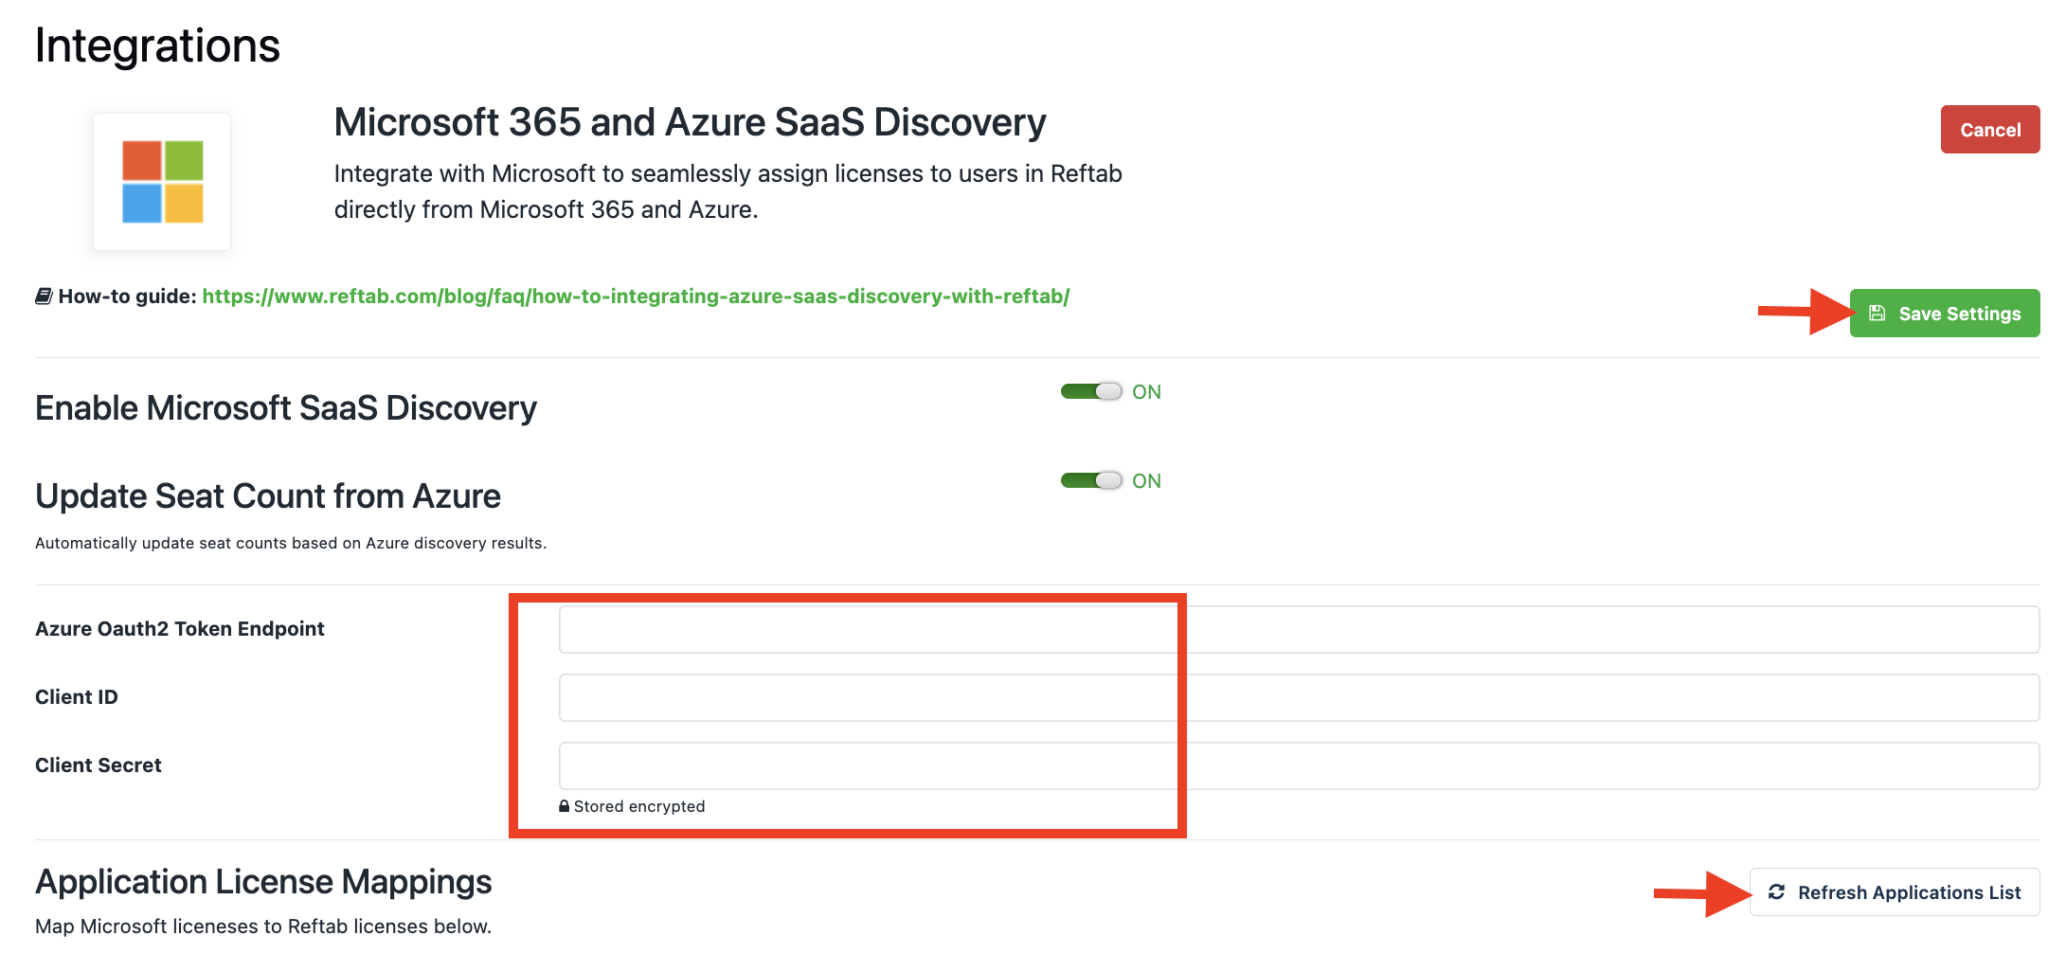
Click “Settings”> “Integrations”, find “Microsoft 365 and Azure SaaS Discovery and click, “Configure”
- Input your endpoint url into the “Azure Oauth2 Token Endpoint” field.
- Input your Application ID into the “Client ID” field.
- Input your client secret value into the “Client Secret” field.
Next click “Save Settings”.
Then click “Refresh Azure Applications”. Your Azure application will now populate.
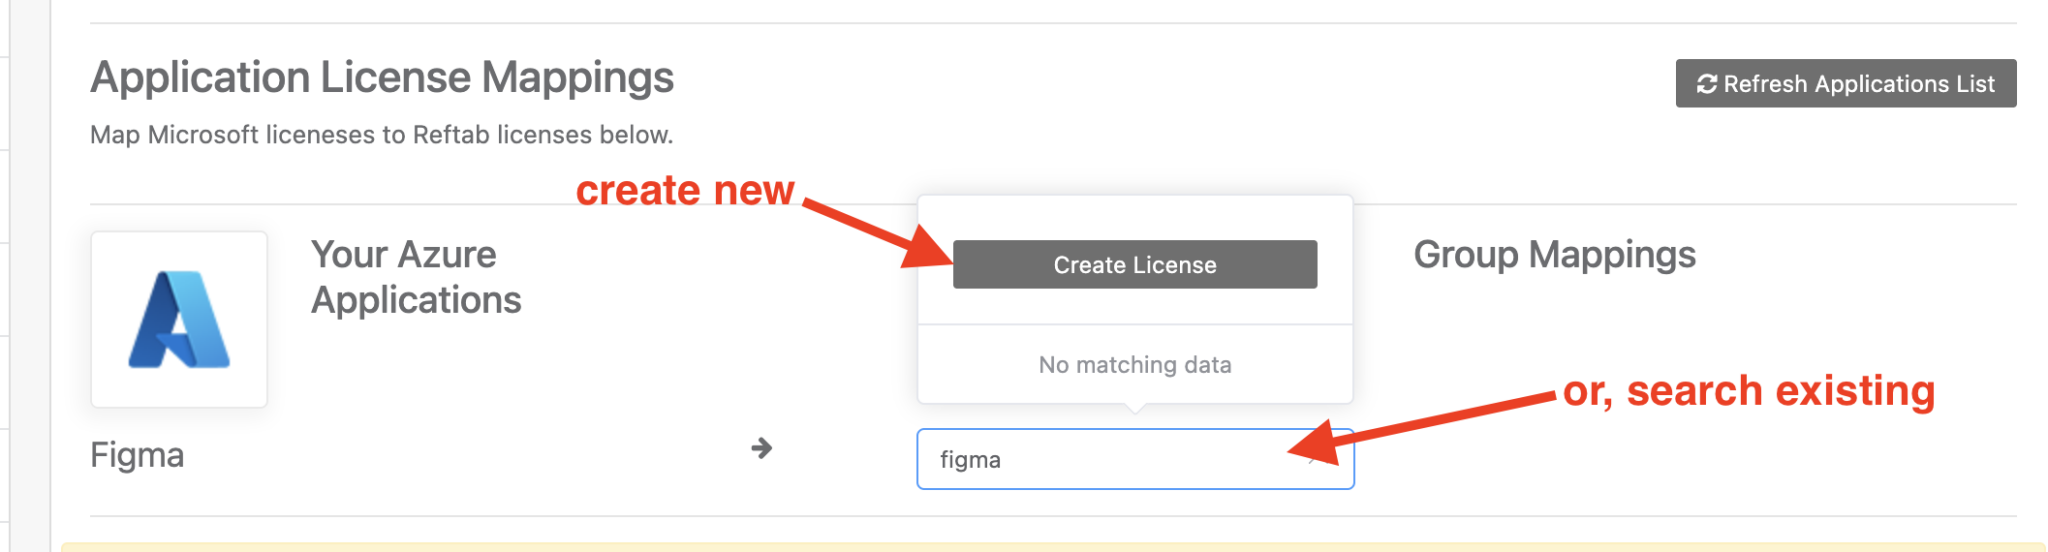
Reftab will now pull in the applications found from MS Entra environment.
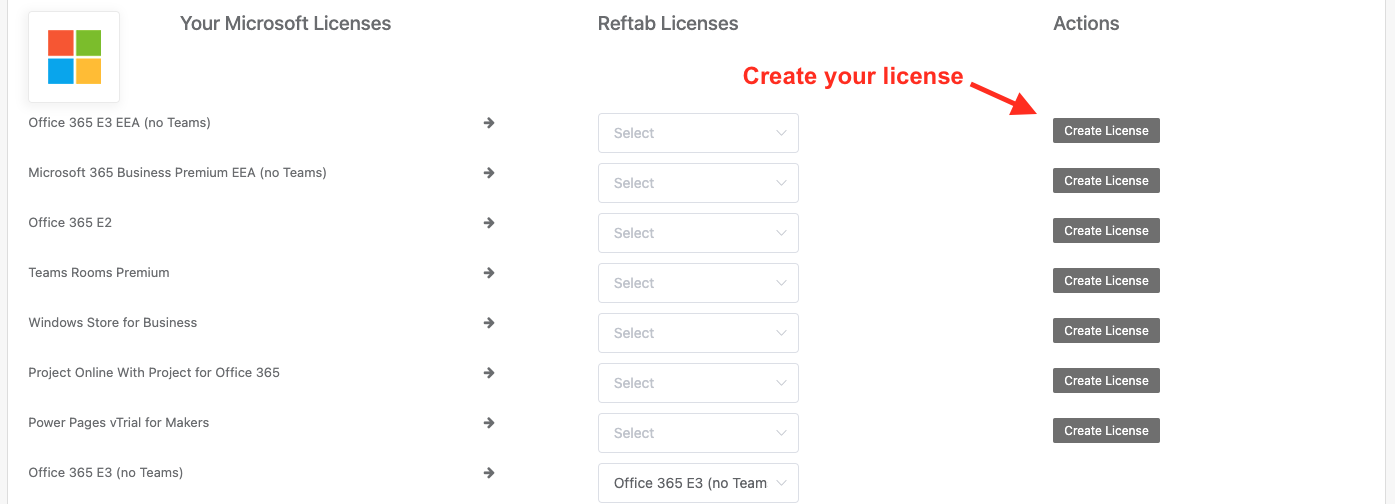
Next, Click, “Create License” button next to any you’d like to track within Reftab. Once you click “Create License” you’ll need to select it in the drop down list.
Tracking Licenses by Group Membership
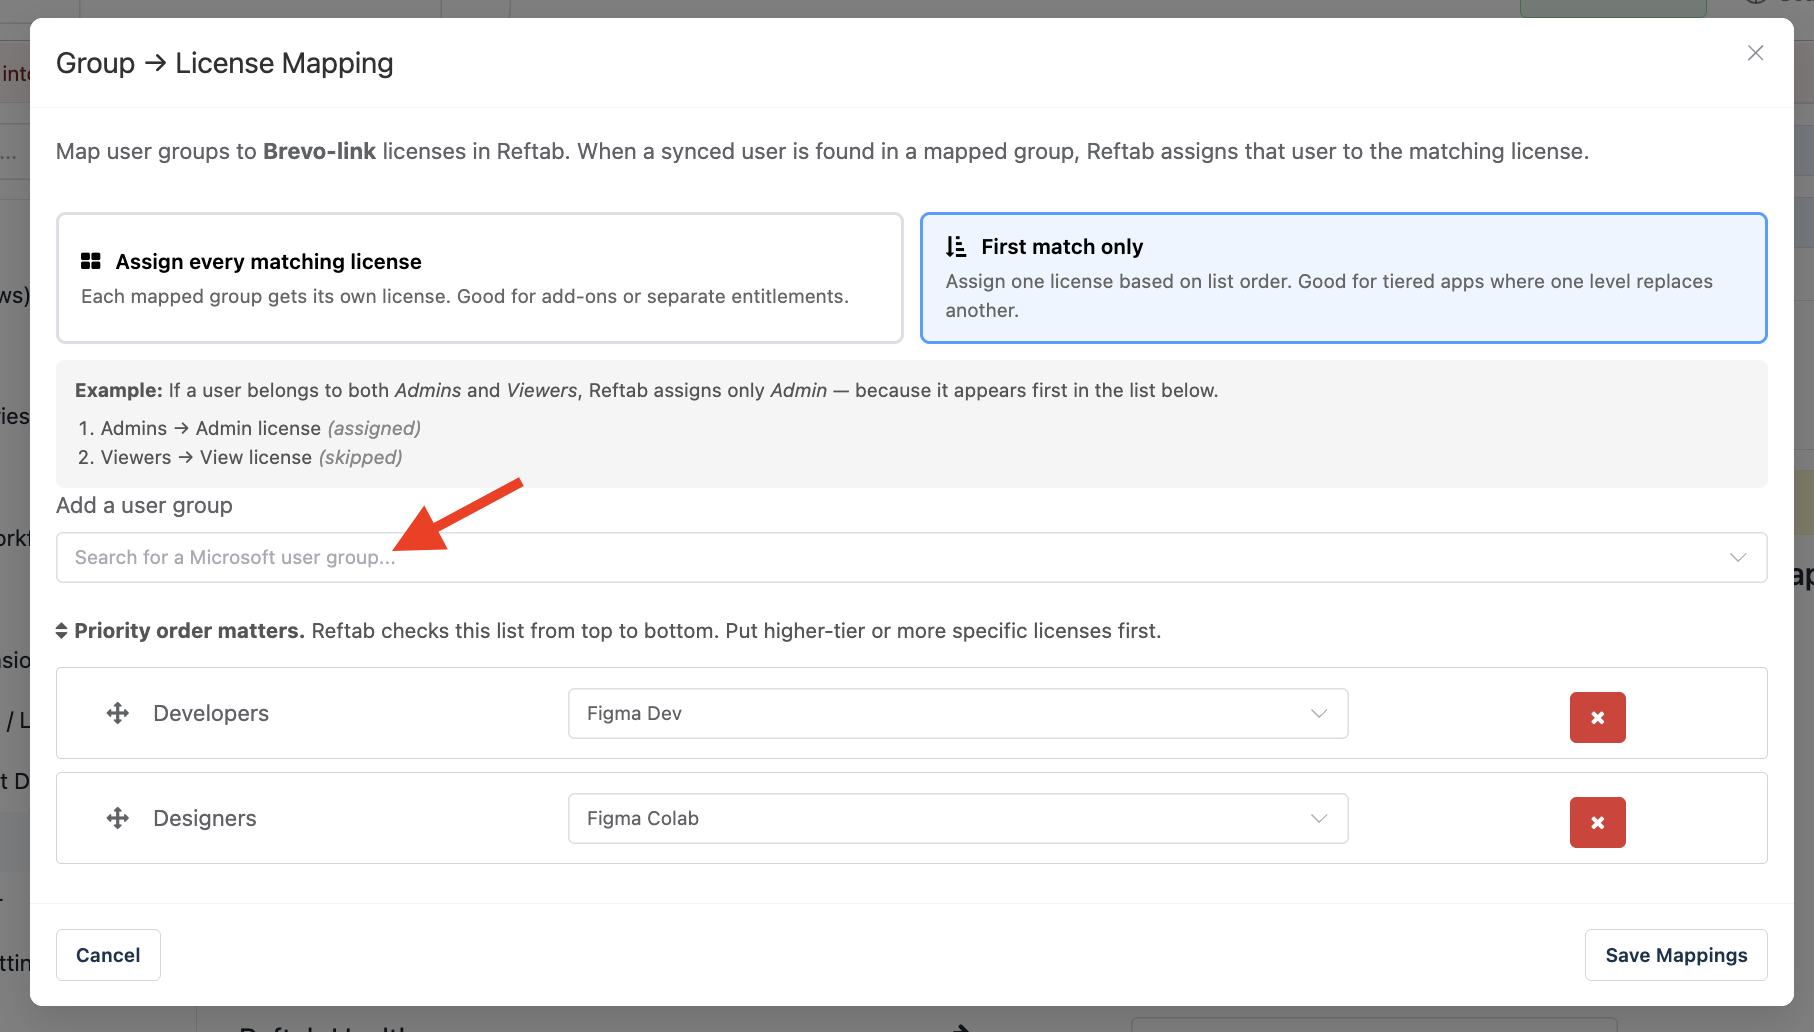
Next, after the license is selected, you can assign license by group membership. A common example would be where you’re mapping an app like “Figma” where you have different licenses used by different groups across your organization. To do this click the “edit” button:

You can then search for your groups and then assign a license for each group:
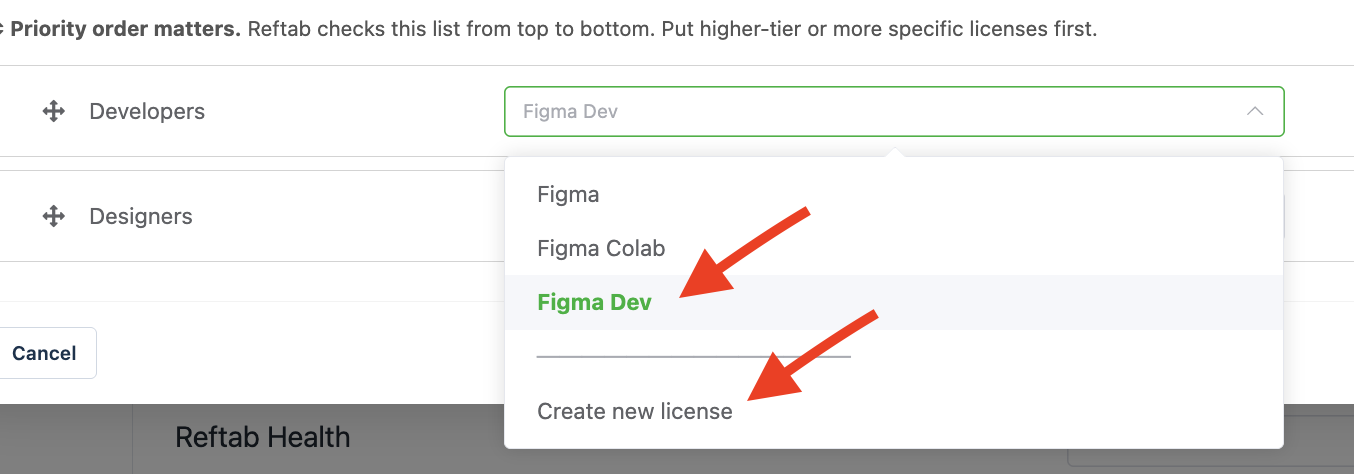
You can create a license within Reftab specifically for your groups from this screen:
Tracking Microsoft Office 365 Applications
If you scroll down, you will also see a list of your Microsoft Office 365 applications that can also be created as a license within Reftab for assignment.
After you’ve mapped your applications, click “Save Settings” then click “Cancel“

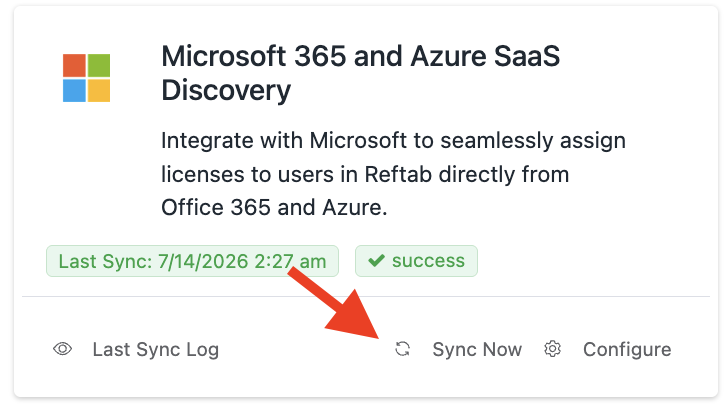
Then click “Sync Now“
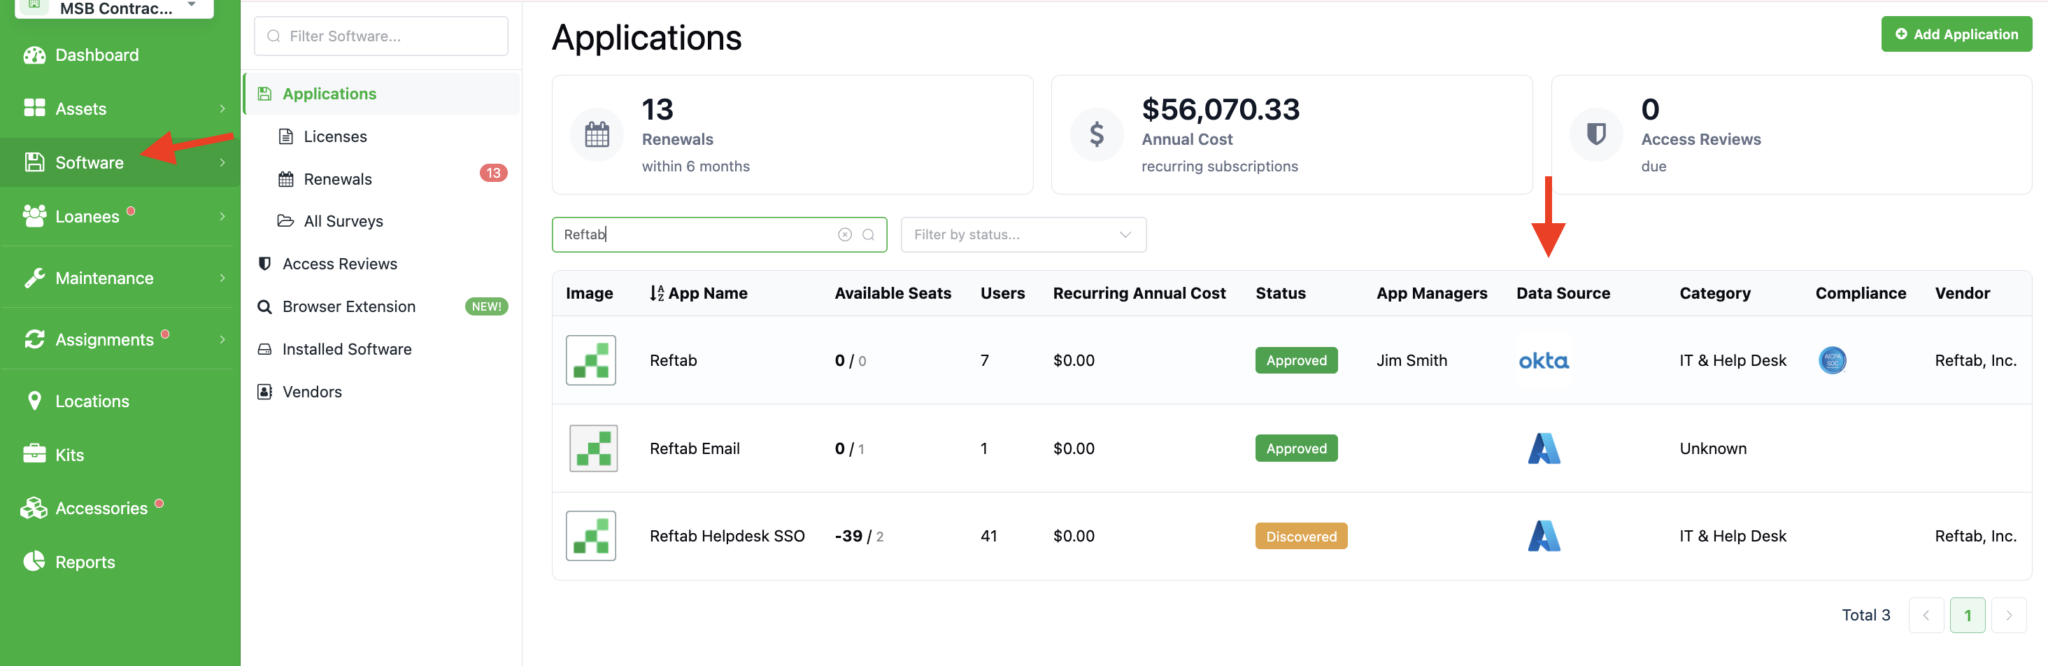
Viewing Applications and Usage by User
On the “Software” page, your applications will appear and you’ll see which ones are linked via the Data Source column:
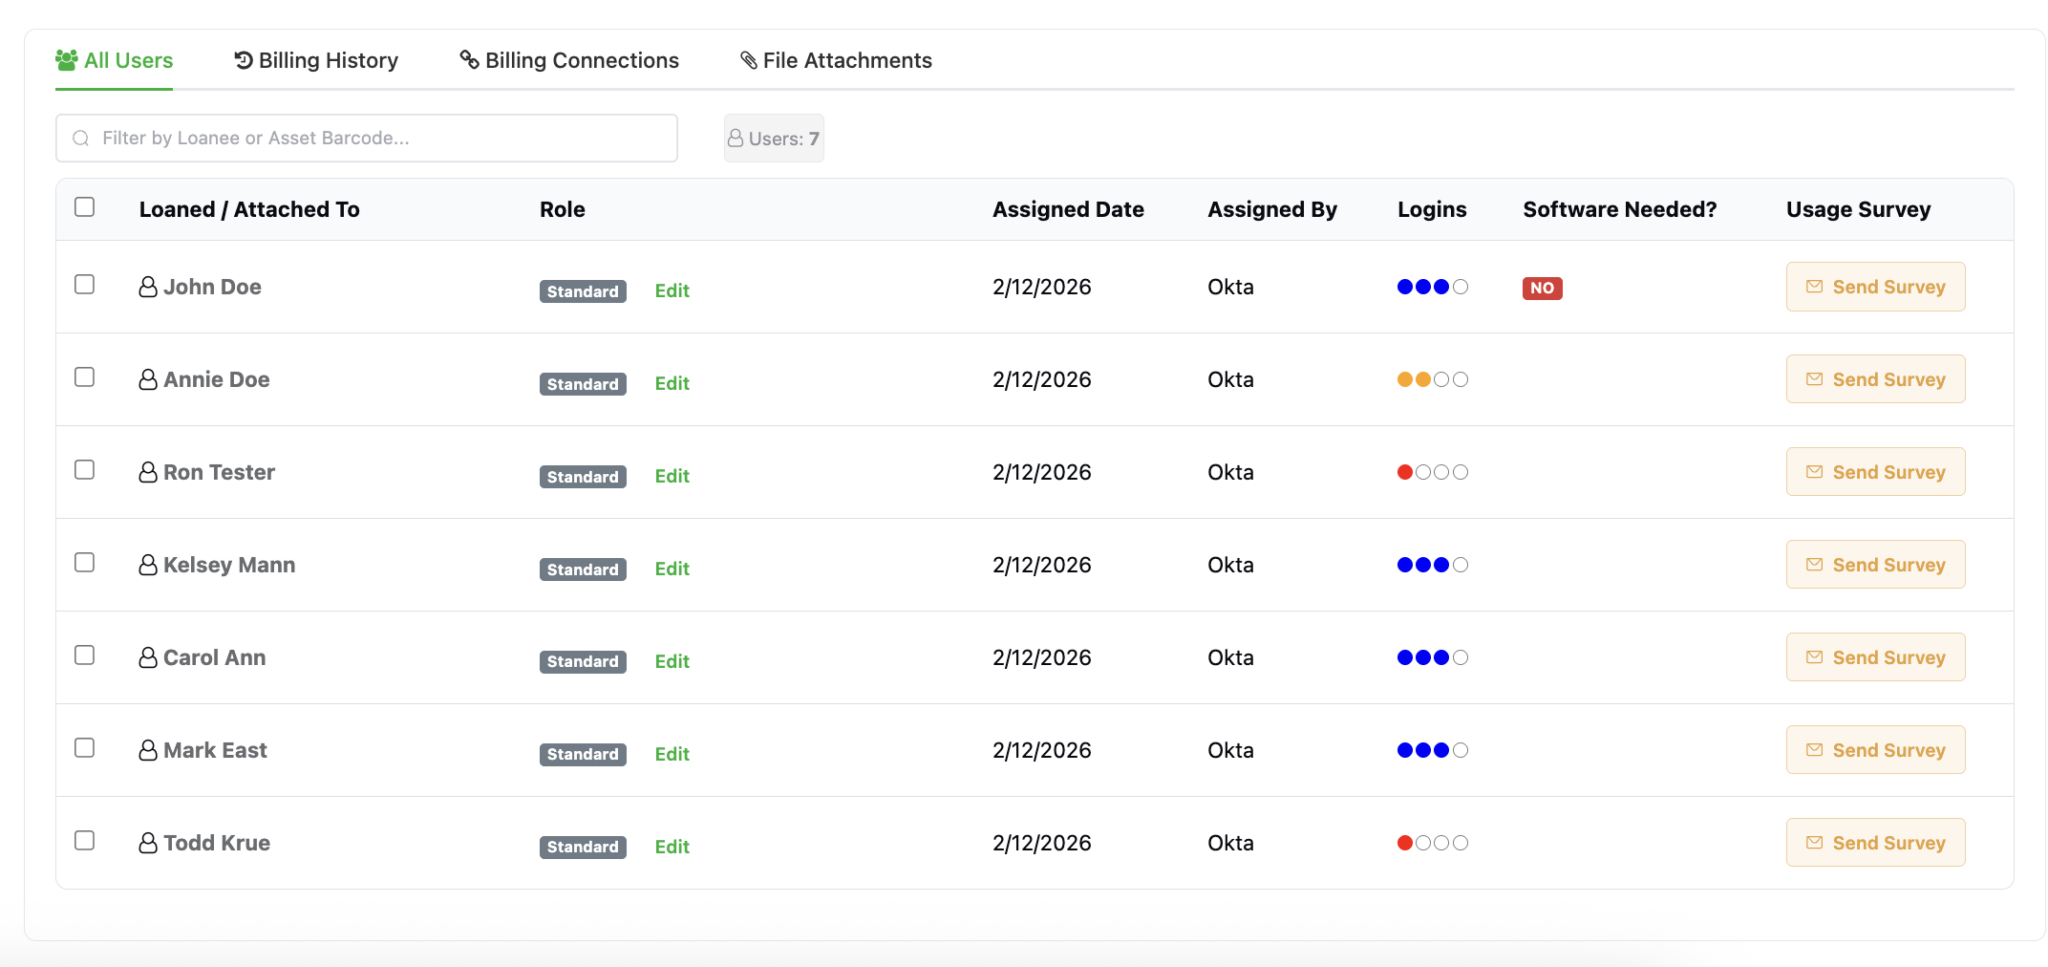
Seats, Users and Spend Tracking
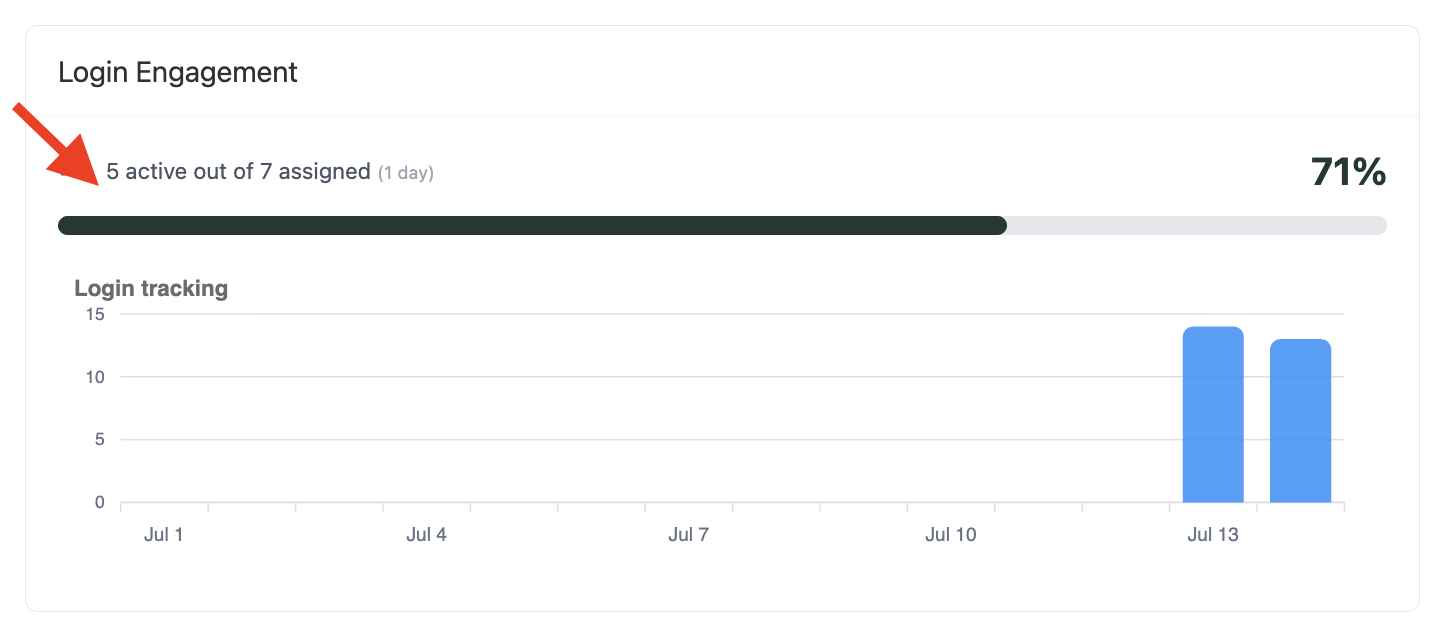
Reftab pulls in user assignments directly from Entra, so you can see exactly who has access to each application. Pair that with the number of seats you’ve purchased, and you get a clear picture of what you’re paying for versus what’s actually being used—making it easy to identify unused licenses and potential cost savings.
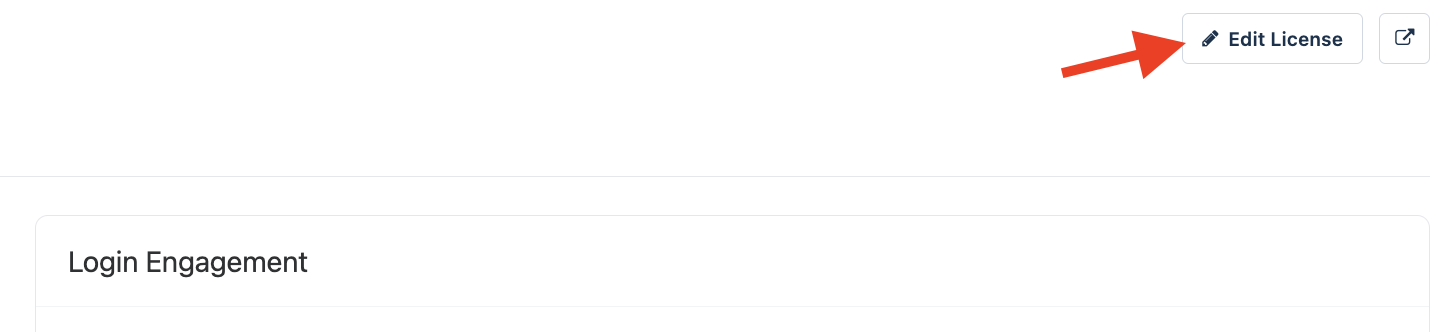
Reftab allows you to set a total amount of seats purchased. By default this will be set to the amount of users found from the sync. To override this, you can click “Edit” on any license and set a number of how many seats you’ve purchased. To do so, click, “Edit“
Simply set the input for “Seat purchased Qty.” and click “Save License“
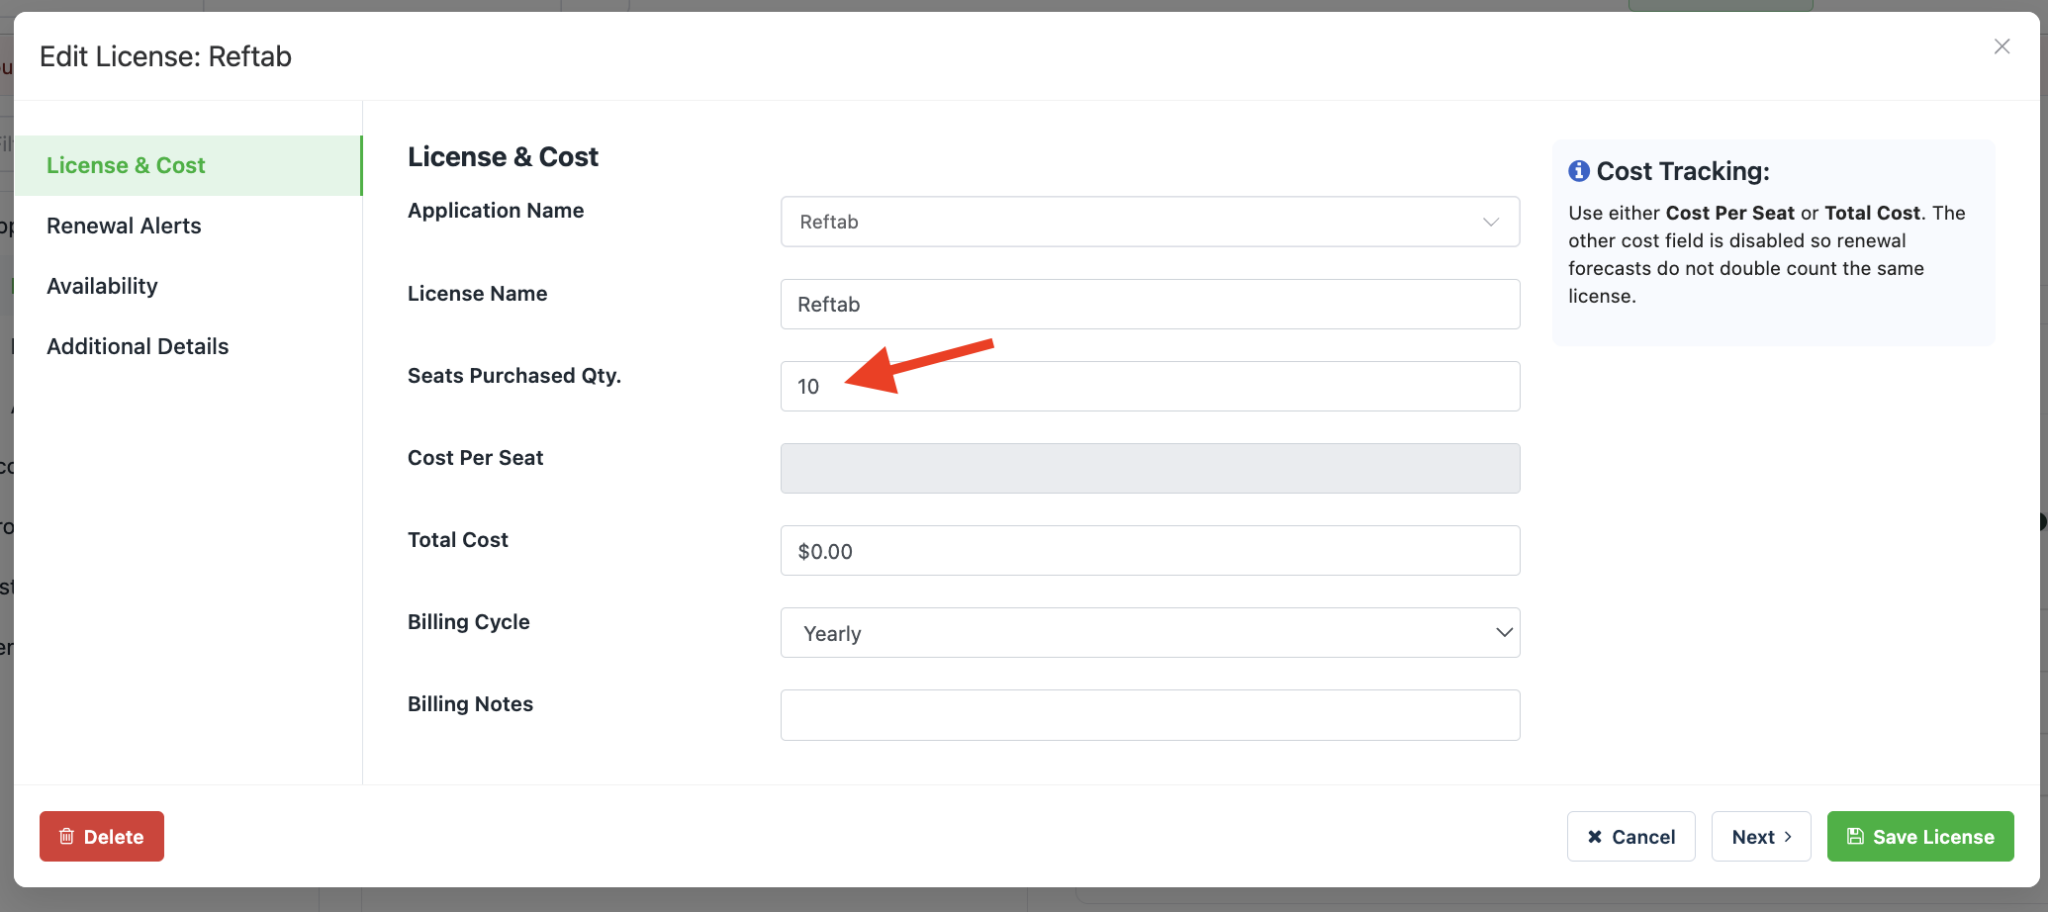
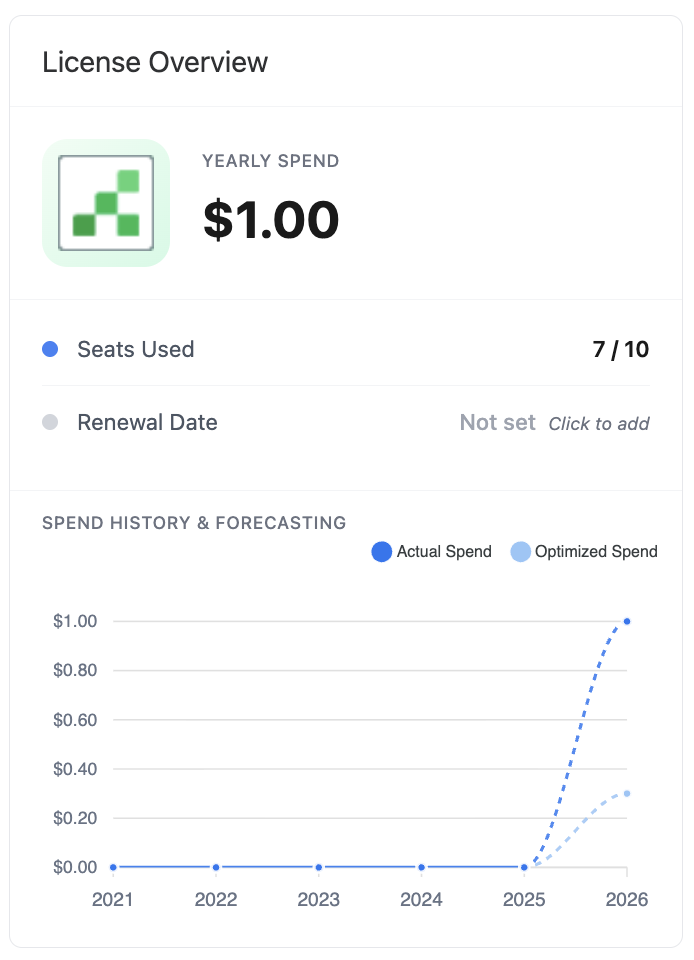
For example, if you enter 10 as your seats purchased and click “Save License,” your Cost Tracking graph will update automatically.
If Entra only shows 5 users with access to this application, the graph will highlight the difference—you’re paying for 10 seats but only using 5. This helps you quickly spot opportunities to save money.
Note on Sync Frequency: Sync occurs by default every 24 hours.
Need help? We're here for you
For any questions or assistance, feel free to reach out to us.
Your assets, simplified. Begin your journey with us!
50 assets free forever with unlimited inventory & software tracking. Includes email alerts, mobile apps, reports, custom asset tags and more.