Best Asset Management Software in 2021

Software buying

If you are reading this post, there is a good chance you are in the market for asset management software. 

Maybe you are tired of manually recording your assets on a spreadsheet? 

Or you are looking for a more efficient inventory tracking system? 

There are many software solutions out there for IT asset management, but it can be a challenge choosing the right one for your business. That’s why we’ve done the research for you. 

In this post, we’ll cover some of the best asset management software options, looking at key features, who should use it, pricing, and more.   

1. Reftab 

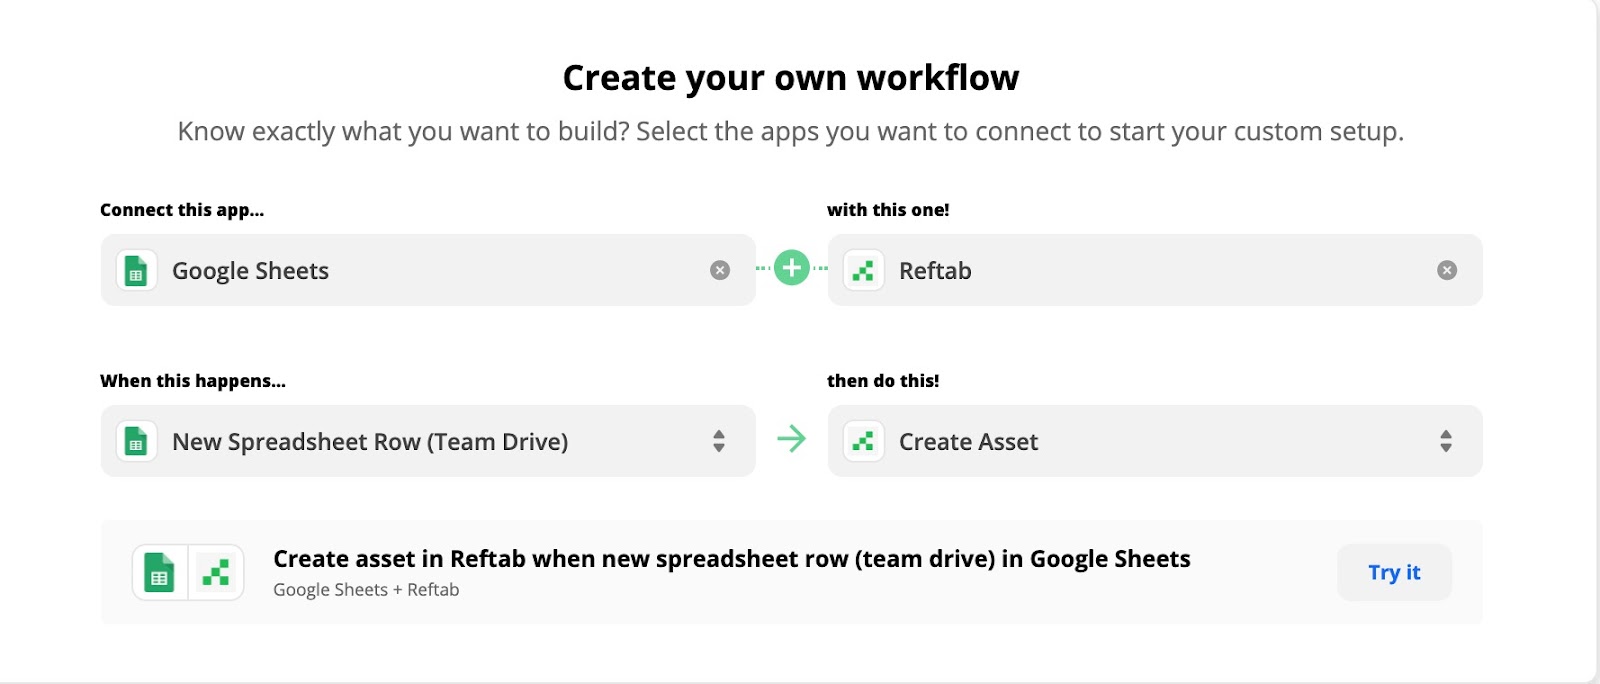
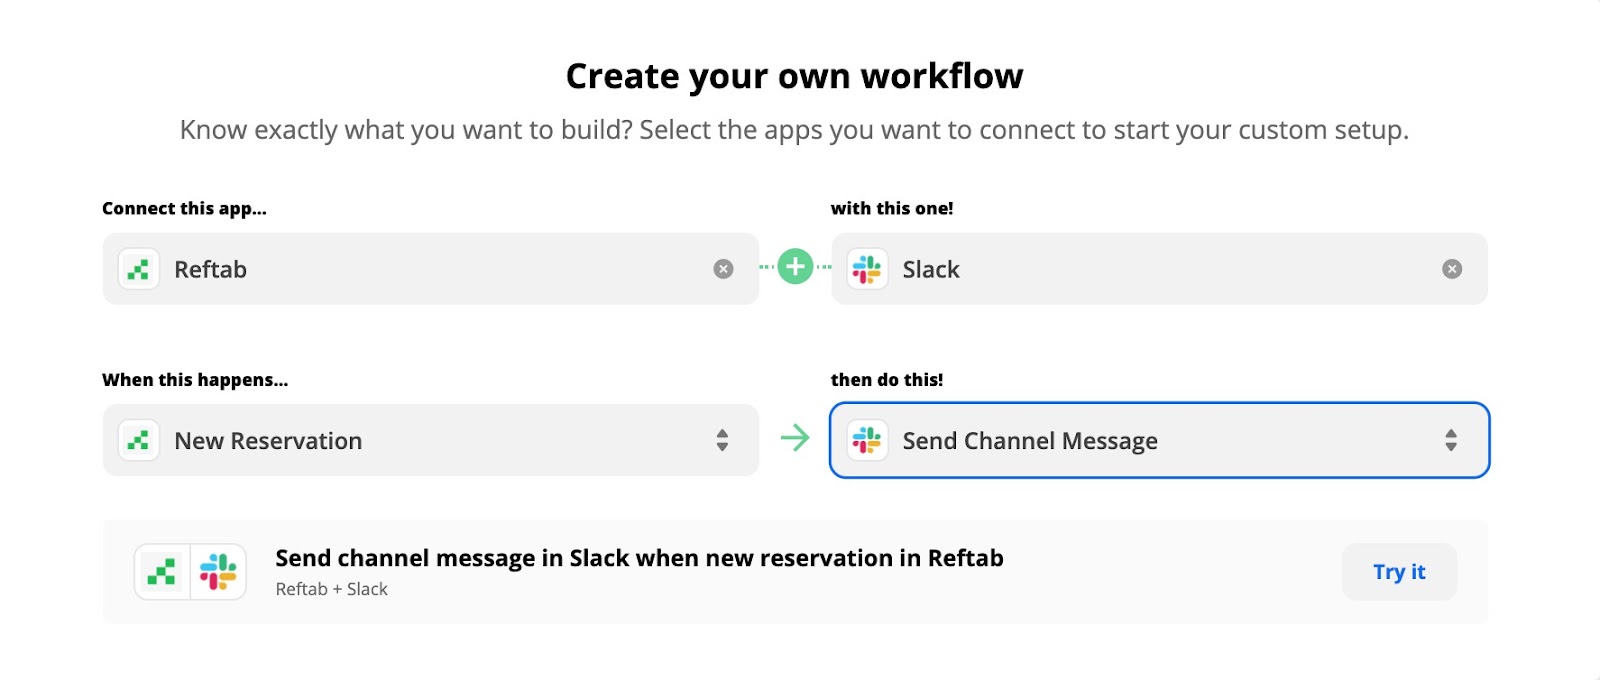
You didn’t think we’d write this post and not include our own asset management software in here. Founded in 2013, organizations of all sizes, from small businesses and nonprofits to large tech companies and public universities, are using Reftab to manage their assets. 

Some key features in Reftab include asset management and tracking, dedicated mobile apps to scan asset barcode labels, maintenance management/work orders, user request portal, inventory management, asset tagging, role-based asset controls, automated workflows, and custom reports and dashboards. 

If you are looking to track 50 or fewer assets, Reftab is free to use. Pricing for paid plans starts at $30 per month for 500 assets. 

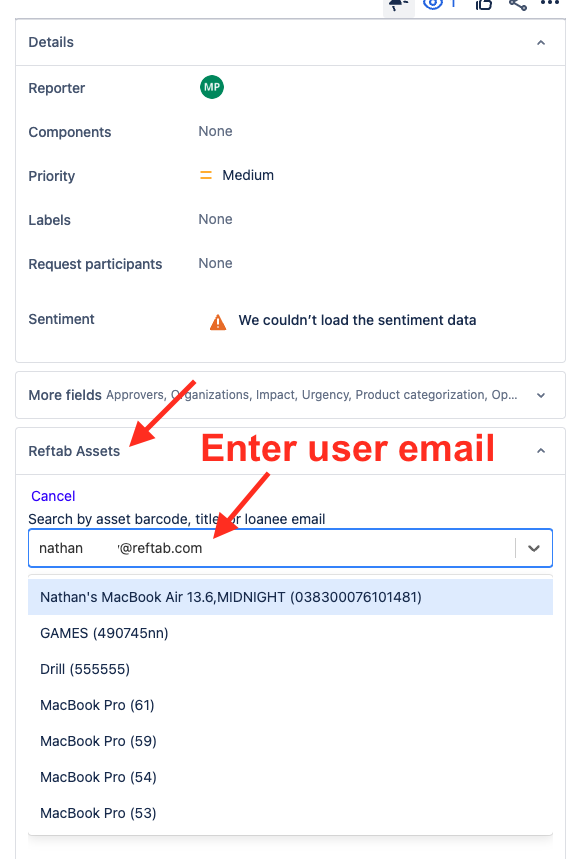
2. Jira Service Management

Jira Service Management is an enterprise asset and configuration management solution by Atlassian. The software features an open data structure that allows teams to flexibly manage company resources. Key asset management features within Jira include asset tracking, asset discovery, asset reviews, importers, and integrations. 

If you are already using Confluence and Jira for internal knowledge-base and bug-tracking (for example), then using Jira Service Management might be a solid option if you want to keep everything in one tool. The solution is customizable, meaning it can easily grow with your business as you add more assets to the mix.  

The downside of using Jira for asset management is that the tool is almost like a blank canvas that you can integrate into your existing business and IT workflows. If you don’t have well-established asset management processes in place or you are a small team that doesn’t have the bandwidth to add your own custom features, then you may find there is a steep learning curve and serious product limitations.  

For up to 3 users, Jira is free to use. Paid plans begin at $20 per agent. You’ll need to contact Jira’s sales team for an enterprise plan quote.

3. Zendesk

Zendesk is designed to be a customer service ticketing platform. Many IT teams have adapted it to manage their internal IT requests. Everything from maintenance orders to checking in and out equipment. Because it wasn’t built to be an asset management software, this means you will need to use at least a handful of third-party apps for many critical asset management features. When you have a lot of integrations, this can complicate your setup costing more money and time down the line. 

A better solution is to keep using Zendesk for your customer support. Then, integrate with a dedicated asset management software, like Reftab to pull in any necessary information. 

Pro Tip: Here is how you can integrate Zendesk with Reftab.  

Zendesk’s customer service product starts at $49 a month per user. 

4. Freshservice

Freshservice is a robust IT service management platform. It has several useful features, including IT asset management. The asset management function includes automation, no-code workflows, and an integrated platform to bridge work silos. The company also offers excellent onboarding, migration services, and 24/7 support. 

Freshservice is made for all businesses and industries to use, but due to the cost, it might be best for enterprise companies. Because plans charge per user, having your whole team join the platform can get expensive. Another issue that users have pointed out is the inefficiency of the ticket process.

Plans start at $19 per user each month and go up to $109 per user each month for enterprise accounts. Whichever plan you use, you’ll want to get an Asset Pack add-on. This costs $75 for a pack of 500 assets. If your business has a lot of assets, then you may want to consider the unlimited assets option at $1500 per month.

5. Excel Spreadsheets

Excel wasn’t designed specifically for asset management, but the versatile software can function as a basic asset tracker. 

Excel is best for small businesses, either just starting out or on a tight budget. The main benefit of using Excel is the cost. 

There are several critical flaws to relying on Excel for your asset tracking, like:  

  • You can input data, but Excel can’t update the information, pull insights and reports, or actually track your assets. 
  • The manual nature of Excel opens up your records to human error, especially as more people have access to the spreadsheet.  
  • Formulas can be touchy within the spreadsheet, and data entry is tedious. 
  • It’s less accurate, effective, and efficient than other software designed for asset management.
  • Excel was not designed for use with mobile apps, nor can be used as a barcode scanner.

As a standalone software, you can purchase Excel for a single PC or Mac for a $159.99 fee. You could also purchase Excel as a part of Microsoft 365 which includes Word, PowerPoint, Outlook, and 1 TB of cloud storage per person. Microsoft 365 plan starts at $6.99 per month and depends on how many people on your team that need an account.

***

By now, you should have a better sense of which of the top software options are right for you. Many of these solutions come with a free trial or demo, so be sure to take advantage of that to test the option before committing.

If you are interested in trying out Reftab, get started for free here. 

A detailed guide for nonprofit inventory management

Do I really need dedicated software for managing all of my assets and inventory in my nonprofit? 

If you are like most nonprofits we talk to, this is a valid question. 

After all, you don’t have a massive warehouse or warehouses full of products that you are selling like a retail store. 

However, if you are operating at any level of scale, there is a great chance that you have amassed millions of dollars in expensive gear and equipment, including laptops, laptop accessories, camera gear, AV equipment, books, furniture, and more. 

Keeping track of all of that is important for insurance and funding purposes (i.e. think government grants). If you are barely managing it or simply using spreadsheets, that’s not ideal. 

In this post, we’re sharing some actionable strategies for why you should consider moving off the spreadsheets and using dedicated inventory management software that is designed for nonprofit organizations like yours. 

What is inventory management software? 

Inventory management software helps nonprofit organizations keep track of all of their assets and inventory at scale. Once you have hundreds of expensive items or are operating from more than one location, it is no longer practical to manage everything from a spreadsheet, pen or paper, or worse internal tribal knowledge. 

The best inventory management software is quick and easy to use and doesn’t feel like a chore to update. 

What are the benefits of inventory management software for nonprofits? 

With many nonprofits operating at a global scale, this means they have likely acquired millions of dollars or more in expensive equipment. Some of which might be hard to replace if it is lost, damaged, or stolen. 

For example, most megachurches in the U.S. have a room – or many rooms – full of expensive video production and AV equipment. This gear is being used and loaned out all of the time to staff and volunteers. 

That’s where using intuitive inventory management software can be a lifesaver. 

For starters, it is a better alternative to clunky Excel spreadsheets. Spreadsheets become unmanageable once you have more than a few people actively updating them and thousands of line items. The loading speeds alone are enough to discourage your team from regularly signing in and out items and updating the spreadsheet. Plus, spreadsheets can’t provide a way to allow staff to reserve or book equipment for future use in upcoming projects or events.

If you want people to regularly do something, it is important the process is as simple, efficient, and streamlined as possible.  

Not to mention, spreadsheets don’t have great revision histories, which can open up your nonprofit to human errors, a lack of perceived trust in the “data” you are collecting, and little to no oversight and accountability among your team. 

While you can technically run custom reports in your inventory spreadsheet, if the spreadsheet isn’t updated regularly or you don’t trust the inputs, then the reports you create—tracking everything from the number of items to location, condition, cost, and utilization trends— won’t mean much. 

Bottom line – the biggest benefit of switching to dedicated inventory management software is that it creates a single source of truth for your nonprofit. 

4 use cases for how nonprofits are using Reftab for inventory management 

Still not convinced? Here are three of the biggest use cases that we see from our nonprofit customers. 

1. Checking in and out equipment 

Whether you are loaning out computers, video cameras, or books to team members or volunteers, there are four critical things you need to keep track of. 

  • Who did you loan the item(s) to? 
  • What item(s) do they have in their possession? 
  • When are they supposed to bring the item(s) back? 
  • Did they bring the item(s) back on time? 

This isn’t exactly rocket science. If your nonprofit is still small and you are only loaning out a few items a week, this process is easy enough to keep track of with a simple Google Doc sign-out sheet. 

However, once you are loaning out a half dozen or more items each day, the number of items you need to keep track of adds up. It becomes easy for items to go unaccounted for.  

An added bonus of using software, such as Reftab, to manage the process of lending out this gear and equipment is that you can use barcode scanners to speed up this process. Instead of having to manually log all of the lending details, the process can be as simple and painless as taking a photo with your phone when an item is checked in and out. And, you can quickly pull up all of the details you care most about, like the location of the item, purchase price, vendor, condition, etc.    

2. Location-tracking 

As your nonprofit grows in scale and impact, it is likely that you’ll have a main headquarters as well as satellite offices. While this can help with mobilizing crews, it also means that your inventory and assets are spread across multiple cities, counties, states, and in some cases countries.

For example, if your organization sets up hundreds of computer labs for impoverished youth, you may have 10,000+ laptops, hotspots, and computer accessories. All of which are spread out between hundreds of computer labs as well as in your various offices. At this scale, you need a system where you can see all of this inventory quickly. It would be nearly impossible to keep track of all of that if you weren’t using software.  

3. Maintenance requests

Going back to our computer lab example, laptops can get lost, damaged, or stolen. All it takes is one student to spill a drink on the keyboard, and the computer is now out of commission. From preventative maintenance to troubleshooting problems when things go wrong (think spilling liquids on your computer), having a portal where you can document issues and log status updates is vital. 

4. Tracking consumables

With all the non-profits we speak to, one of the lesser known items to keep inventory on are consumable items. Things like, notepads, tissues, clothing, food, batteries, pens and paper, etc. These items can actually add up and cost an organization a fair amount of money. It’s important to track these items so that you don’t over order.

For example, if you have multiple locations where paper towels are stored, your team can use the Reftab mobile app to log how many paper towels they’re taking out of the stock closet. When it comes time to order more, you know exactly which location has enough that you can take from instead of guessing how much more you need. These items can add-up in cost and it’s important to be mindful not to waste anything if you can.

This F.A.Q guide gives a quick overview of consumable tracing on the Reftab mobile app: https://www.reftab.com/faq/mobile-consumable-transactions/

***

In sum, inventory tracking is too important to manage from a spreadsheet. 
Want to make this process even simpler with asset management software designed for nonprofits? Try Reftab for free.

How to integrate Reftab and Zapier

How much time do you spend each day completing boring, repetitive tasks? 

If you are like most knowledge workers, you are spending an average of 3-4 hours. That’s 15-20 hours per week on busywork or the equivalent of binge-watching two seasons of your favorite show on Netflix. 

No-code/low-code apps, like Zapier, can help you streamline and remove a lot of these tasks. So, you can spend more time on more engaging and strategic work. 

In this post, we’re explaining how Zapier works along with a half-dozen ways you can use it alongside Reftab to automate administrative tasks. 

What is Zapier?

How does Zapier work?

How to create a zap?

6 common use cases for Reftab and Zapier

1. Google Sheets and Reftab

2. Google Forms and Reftab

3. Slack and Reftab

4. Gmail and Reftab

5. Microsoft Teams and Reftab

6. SurveyMonkey and Reftab

What is Zapier? 

Founded in 2011, Zapier is a no-code app that makes it easy to automate tasks by connecting two or more software applications together. It is kind of like digital duct tape. 

Today, Zapier supports more than 2,000 apps. These apps include everything from Slack, Gmail, Google Sheets, and Microsoft Teams to WordPress, Airtable, Typeform, and Reftab. 

How does Zapier work? 

If you are looking to automate a task in your business, you create a “zap” in Zapier.  A zap is basically like a recipe.  

In this recipe, you have two parts.

  • A trigger – this is what starts the zap
  • An action – this is the desired result 

How to create a zap? 

Creating a zap is simple. 

Let’s say you want to add all new assets added in Reftab into a Google sheet. 

To start, you log into Zapier and click “create zap” in the left-hand sidebar menu. 

Then, you will select Reftab as the trigger since you will want this zap to fire anytime a new asset is created. 

The action is to create or update a spreadsheet row in your Google Sheets. 

6 common use cases for Reftab and Zapier 

The ways you can integrate Reftab with other software that your company is using via Zapier are nearly endless. But, here are a few ideas to inspire you. 

1. Google Sheets and Reftab 

For some of our customers, only the IT department actively logs in and uses Reftab on a daily basis. This works fine 90% of the time. 

Occasionally, someone in HR might need to make an update. If they don’t have access (or don’t want access), you can have them make the updates in a Google Sheet. Then, create a zap that automatically adds it into Reftab when a new row in the spreadsheet is created or updated. 

2. Google Forms and Reftab 

Another simple way for teams to add or update assets into Reftab without having to log in is to set up a quick form in a form builder, like Google Forms, Airtable, JotForm, or Typeform. 

Let’s say you work at an advertising agency and one of your creative directors needs to book a bunch of equipment for a commercial shoot.  You can set up a simple form that allows employees to schedule the equipment they need.  Then, you can create a zap to automatically update the “reservation details” in Reftab. 

Furthermore, you can set up an automated Slack message or email that goes to the employee checking out the gear with extra instructions or a reminder of check-in and check-out protocols. 

3. Slack and Reftab 

This brings up another popular use case which is syncing Reftab and Slack. 

For example, you set up a zap to trigger a reminder message in a specific Slack channel or as a DM whenever an employee books equipment, like a camera. 

You can set up these triggers based on new assets, loans, and reservations in Reftab. 

4. Gmail and Reftab 

Since it is easy for Slack messages to get buried, you may want to send an email reminder instead.

For example, you can set up a zap to send an automated email in Gmail to a recipient when they book a piece of equipment. 

5. Microsoft Teams and Reftab 

If you are in an organization that uses Outlook and Microsoft Teams instead of Google Apps and Slack, you can set up the same reminder chat messages and emails through Reftab and Zapier. 

6. SurveyMonkey and Reftab

This could be particularly useful if you set up an informal booking portal for college students to rent equipment. You can create a multi-step zap that sends them a link to complete a feedback survey XX days after they use the equipment.

This can help you further streamline and improve your existing processes. 

Take a look at Reftab’s Zapier page for additional pre-made templates: https://zapier.com/apps/reftab/integrations

***

When you combine Reftab and Zapier, you can streamline your workflows, automate repetitive tasks, and spend more time on strategic tasks. 
Ready to get started? Try Reftab for free.

Reftab – How to integrate Jira and Reftab to manage IT and service desk requests

Did you know the average white-collar worker spends almost three hours just reading and responding to emails

That’s just email. It doesn’t take into account Slack or Microsoft Team requests. 

If your IT department is bogged down with these administrative requests, this means they are spending less time on strategic projects.  

One way to mitigate this is to use a service desk system like Jira software. 

In this post, we’re going to share how you can sync assets from Reftab with Jira to create a more efficient workflow.  

5 ways to use Jira and Reftab 

Here are some of the ways Reftab customers are using our Jira integration. 

1. Manage maintenance requests and updates faster

Tell me if this scenario sounds familiar. You are putting together some reports for your boss when Jamie in sales pings you over Slack because he has a demo in an hour and his USB-C port won’t work. You spend 10 minutes digging through your records to see if this issue has come up before. In the time you are working to fix this USB-C issue, you receive 2 emails and 4 more Slack notifications with IT-related requests.  

Since these requests are coming from different places, you struggle to know what is urgent and what to prioritize first. So, you constantly feel behind. Worse, you occasionally have to deal with the fallout from employees when you missed their initial request or didn’t get to it fast enough.

This is when switching to a service desk solution can make a lot of sense. Instead of getting support requests from email, Slack, Microsoft Teams, in-person updates, etc, every single IT support request gets routed to a central inbox. This creates a single source of truth, ensures nothing goes missing and helps you and your team triage requests based on priority.   

For example, if you use Reftab and Jira, you can tie Reftab assets to Jira tickets and vice versa. So, you can link and categorize all of your Jira tickets tied to a specific asset or asset category in one place. 

The result is that you can manage these requests faster, so you can spend more time working on strategic initiatives for the company instead of being bogged down in administrative tasks. 

2. Create a self-service portal for employees

As we alluded to above, when individual employees ping you through Microsoft Teams, Slack, or email, it is easy for things to fall through the cracks. This means employees wait longer to get devices fixed or updated, and your team is spending more time in admin mode instead of working on strategic tasks. 

That’s why setting up a self-service portal can be so helpful. You can create a form that you can add the right Reftab asset (i.e. laptop, printer, phone) to a Jira ticket so that all requests get routed to a single inbox. 

3. Route specific requests to different team members

An added benefit of this approach is that you can route specific IT support requests to individual team members. 

For example, if you have one person devoted solely to AV equipment, you can route all of the tickets tied to AV equipment directly to him. You can also use the document collaboration features to keep everything in one central place. 

4. Prioritize requests and bugs in Jira

Not every request that comes in will be urgent. If your company is already using agile planning for product management and engineering, you can modify your Jira design workflow for your IT department. 

If you use agile project management, this means as new requests and issues are logged, you can prioritize all of your requests that come in by issue type. You can build out a backlog based on your team’s priorities.  

5. Run IT support request reports 

Another benefit of routing all of your IT support requests through Jira is that you can establish a dedicated team dashboard and run custom reports. You can track everything from overall IT team efficiency to CSAT and SLAs.  

For example, if you notice a significant uptick in support requests over the last two months, you can use this report to ask for more headcount. 

Connecting Jira to Reftab 

As one of the official marketplace apps, integrating Jira and Reftab is simple. All you need to do is go to the Jira Marketplace and search “Reftab”. Install the plugin by providing Reftab login details which will start the process of syncing assets from Reftab to Jira.

We won’t go through the entire step-by-step guide to get this setup. If you are looking for that, check out our Knowledgebase article here. 

Syncing Jira and Reftab will allow you to link individual assets to Reftab to Jira tickets and vice versa.   

Not a Reftab customer? Get started today for free. 

How to Keep Track of School Equipment and Tools

If you are like most schools and universities, your process for managing your equipment room(s) is complex and leaves a lot of room for dropped balls. 

Additionally, you might be feeling the process to run and maintain your equipment room with less budget available. This is where having a dialed-in system and processes can come in handy.  

In an earlier guide, we shared how you can create a system for managing your equipment room and why using dedicated asset tracking software can help you streamline all aspects of the process.  

In this post, we’re expanding on this topic and sharing tips for how you can effectively monitor your school’s equipment and tools efficiently. 

1. Implement barcode scanning

Barcode scanning allows you to centralize and standardize equipment management by allowing you to scan asset tags from anywhere with a QR code or Radio Frequency Identification Device (a.k.a RFID code).

The reason you should place barcodes on fixed assets is to document every piece of equipment you own, including how many items you have and the important details about each item. Essentially it’s your company’s internal serialization of equipment which ultimately reduces the risk of misplacing or losing expensive tools.  

You can decide on the types of equipment, tools, and other inventory that you would like to track with a barcode scanner. Barcode labels can be attached to assets and based on category, room, department, or other variables that help you better identify and monitor the item. 

You can implement a barcode tracking option for any piece of equipment that you need to lend out, including:

  • Laptops 
  • Cameras
  • Film and camera accessories 
  • AV equipment 
  • Textbooks and library books 
  • Laboratory equipment 
  • Gym equipment and uniforms 
  • Musical instruments 
  • Art supplies

2. Add product warranty information in your asset management software 

If you need to make use of the warranty, you’ll want to access it quickly. Unfortunately, for many equipment managers, this means spending hours digging up receipts in a random box or file cabinet or logging into multiple different online vendor accounts with cumbersome navigation. 

A better solution is to use a centralized, easy-to-use asset management software that catalogs and includes all warranty details on all your different types of equipment.  Therefore, when equipment fails, you can easily access the warranty so you can solve the problem faster. 

3. Run reports on how frequently equipment is used 

One of the biggest advantages of using software instead of spreadsheets is more detailed reporting around equipment usage. 

Within a few minutes, you can see a detailed usage chart around how frequently each piece of equipment is used, information on all of your equipment purchases, when it is time to order more equipment, how many products are out of warranty, or when you need to do preventive equipment maintenance. All without leaving your equipment management solution. 🙂 

This allows you to be proactive instead of reactive. 

For example, you may learn you don’t need as much of certain equipment or need more of other items to meet students’ demands. Therefore, knowing how often items are used (or not used) can help you budget more effectively. This information also can provide necessary data to your board of directors or school board as needed to justify purchases. 

In the chart above, we can see how many MacBook Pros are available compared to how many checked out. This easily informs us that there is no need to purchase more.

Pro Tip: Did you know you can integrate Reftab with Google Data Studio? This allows you to sync your equipment management data with other software your schools might be using and build custom dashboards. 

4. Schedule time for repairs, upgrades, and maintenance 

Equipment and tools eventually break or need repairs. Having dedicated equipment tracking software to monitor the health and condition of your school’s tools and equipment can help improve the accuracy of your budgeting. You’ll be able to set up and keep tabs on maintenance schedules for all of your equipment, which can be helpful for budget planning. 

Knowing how long certain items last or when equipment typically needs to be repaired can help minimize unexpected maintenance issues. It helps you stay focused on safety, and minimizes the chance of an asset management nightmare from unexpected faulty equipment. 

5. Standardize your asset tagging processes 

When you are managing expensive gear and equipment for students, you’ll want a written policy to establish the allowable time frame for new equipment to be barcoded.. For instance, you may want all equipment or tools that cost a set amount of money to be tagged within 30 days of purchase. In addition, having a protocol will help ensure that your inventory system is updated regularly and represents an accurate picture of what your school or university has. 

6. Maintain complete records of your assets for tax and insurance purposes 

You’ll want to keep an updated record of all of your inventory. This includes maintaining the information for assets that have been disposed of, sold, damaged, or otherwise written off. 

Keeping an accurate record can save you money on your taxes and reduce time spent dealing with insurance matters in the event you need to replace a damaged or broken item. 

When maintaining your asset records, here is some key information to track:

  • Amount
  • Condition
  • Warranty information 
  • Estimated value
  • Serial number
  • Location information such as room or building

*** 

Monitoring the use of your school’s equipment, and tracking how it is being used can save you time and money. Having a dedicated asset management system and detailed business processes lets you easily update your assets, do detailed inventory tracking faster, get real-time updates on asset availability, and maintain pertinent details about ages of tools, warranties, and maintenance times. As a result, you’ll be able to make better purchasing decisions and respond quickly if something is broken, needs repairs, or is lost.

Want to make this process even simpler with asset management software designed for educational institutions? Try Reftab for free. 

How to Integrate Reftab and Zendesk

Did you know that Zendesk has more than 170,000 customers

While many think of them as a customer support platform, the truth is a large number of IT departments use them to manage service desk requests. 

The best part is if you use (or are planning to use) Reftab for asset management and Zendesk for service desk requests, our Zendesk integration makes this process simple. 

This means you can see asset details displayed on Zendesk tickets, so you don’t have to move between multiple applications to see important information.

In this post, we’re sharing more details about our Zendesk integration, and some of the use cases for IT teams, including: 

What is Zendesk?

4 ways that IT teams use Reftab and Zendesk

1. Provide timely IT support to employees

2. Create more efficient workflows

3. Streamline the process for getting new employees onboarded

4. Maintain company assets and inventory

Connecting Zendesk to Reftab

What is Zendesk?

A quick refresher: Zendesk is one of the largest help desk systems on the market. It provides a centralized workspace that gives companies all the tools they need to handle personalized communications at scale.

Most companies get started on Zendesk to manage customer support efficiently.

Increasingly, more IT teams are using Zendesk to manage help desk tickets.  That’s because it also integrates with many apps commonly used by companies of all sizes, such as Slack, Confluence, Reftab, and more.

Note: Reftab helps you track assets and inventory by using barcodes and QR Codes to assign items to users.

Businesses can also use the streamlined dashboard to examine trends, increase their understanding of the most common issues, measure metrics critical to your business, and more.

4 ways that IT teams use Reftab and Zendesk

Here are some popular use cases for how IT teams are using Zendesk and Reftab. 

1. Provide timely IT support to employees 

Zendesk’s core feature is a centralized, ticket-based help desk. This allows IT teams to funnel, triage, and manage all IT support requests from one place. So, instead of having to field questions from individual email inboxes, Slack, in-person conversations, where it can easily get lost, it all goes into one Zendesk inbox. 

This centralized system makes it easy for IT teams to track, monitor, and collect employees issues, questions, and feedback. And, when you layer Reftab on top of Zendesk, you can pull up all of the related assets tied to an individual Zendesk ticket on the same screen. As a result, they can respond and solve problems faster. 

For example, if an employee submits a ticket in Zendesk about their laptop being broken, the details of that laptop from within Reftab are displayed within the Zendesk ticket. This allows support staff to see important details such as warranty information, serial number, images, etc., without having to leave Zendesk.

In addition, once you’ve been tracking these IT requests for a while, you’ll start to notice trends emerging. For example, this can help improve your workflows, build out more documentation, and build out new internal tooling and processes. 

You can also use this data to make a case for hiring additional IT team members—be it to handle increased ticket volumes or to build out new IT infrastructure and tools. 

2. Create more efficient workflows

Many IT support requests are common issues like password reset requests or needing to check out a particular piece of equipment. 

For password reset requests, you can create canned response templates that can automate or partially automate these replies. 

Or, for checking in and out equipment, you can use Reftab and Zendesk to create a self-service booking portal so that employees can mostly handle this process on their own. 

This does two things: 

  • Makes it easier for a smaller IT team to manage demand without having to hire more people. You can scale your IT infrastructure and workflow as the company grows. 
  • Frees up your team’s time to focus on more strategic, higher-level projects. 

3. Streamline the process for getting new employees onboarded

One of the most time-intensive tasks for IT teams is onboarding new employees. This process is extremely important not only for productivity but also for new hire morale. It doesn’t look great if the new hire starts, but their computer doesn’t arrive until 2 weeks after they start.  Or, they don’t have all of the necessary equipment they need to do their job. 

While this process is important, it is also repetitive and easy to build out and automate parts of the process. 

For example, when a new employee starts, they will need a laptop. This information can be recorded in Reftab. So, the hiring manager can submit an IT request in Zendesk about getting their new employee set up with a laptop. Someone on your IT team can view the ticket and see all of the available computers in Reftab without leaving the ticket window. If one is available, they can assign it to the new employee. If not, they can make sure to order a new laptop before the new hire’s start date.  

4. Maintain company assets and inventory

Businesses often need to keep tabs on all of their equipment and inventory for tax, liability, and maintenance purposes. 

For example, integrating Reftab and Zendesk makes it easy to do the following: 

  • Get alerts for low quantity of a specific piece of equipment, like chargers or laptops 
  • Track product warranty information
  • Manage asset maintenance, like necessary software and hardware updates

Connecting Zendesk to Reftab 

As one of the official marketplace apps, integrating Zendesk and Reftab is simple. All you need to do is go to our Integrations section and click on Zendesk. You’ll enter your login details and start the process of setting up your account. 

You can also install our app through the  Zendesk marketplace.

https://www.zendesk.com/apps/support/reftab/

Syncing Zendesk and Reftab will allow you to link individual assets to Reftab to Jira tickets and vice versa.   See our How-to guide here: https://www.reftab.com/blog/faq/how-to-display-zendesk-tickets-on-linked-assets-in-reftab/

Not a Reftab customer? Get started today for free. 

July / August 2021 Release Notes

Release notes image

Hello!

We’re excited to bring to you the latest Reftab updates for July and August of 2021. We’ve introduced quite a lot in the past two months and as always, features and improvements are made via customer requests.
We feel customers know their business needs better than we do and should be part of adding desirable features and improvements.

2 NEW INTEGRATIONS

MS Intune  – Microsoft Intune is a cloud based service that lets IT manage mobile devices, PCs and apps. When a device is managed by Intune, it is automatically added to your Reftab account. By doing so, you drastically reduce the amount of manual data entry needed within Reftab.
View How-To Guide: https://www.reftab.com/faq/ms-intune-integration-guide/

Zendesk  – Zendesk is a software service with products related to customer support and sales. By integrating Reftab into Zendesk you can link Reftab assets on Zendesk tickets so that you can view the specific details about the assets, without having to bounce between multiple tabs.
View Reftab in Zendesk Marketplace: https://www.zendesk.com/apps/support/reftab/
This now means that Reftab has integrations with major platforms like:

  • JAMF
  • Intune
  • Jira
  • Zendesk
  • Azure
  • OKTA
  • Zapier

2 NEW FIELDS

Geo Location – by adding a ‘Geolocation’ field to your categories, you can edit the asset and capture geo location.
The app will capture the phone or tablets geo location and assign it to the asset. This way, you can see on a map where that asset is physically located. (Coordinates can be pulled in from browser as well).

Asset Linking – by adding an ‘Asset’ field to your categories, you can link one asset to another.
For example, if you had an asset that was a component of another, you can add a new field called “Asset Component” with the field type of “Asset”. Then, when editing the main asset, you can link another asset to it. If you click on the linked asset, you’ll be taken directly to view it.

2 NEW REPORT ABILITIES

Report on Loan Custody Verifications – You can now run reports to show you who has pending, completed and cancelled custody requests, and report on their specific response.
For example, you can report on all the users who responded ‘no’ to having custody over their equipment. This is helpful because you won’t need to log into Reftab to see who responded, you can rely on a report sent to your inbox which makes your day-to-day easier.


Report on Asset Changelog History – You can now run reports to show you the changelog history of assets.

For example, you can show a report on specific users and see all the changes they’ve made to assets such as moving locations or changing status labels.

3 UPDATES TO BARCODE PRINTING

1) New Avery size – 60506 for ultra duty white waterproof and UV resistant  (2” x 2”)


2) Print barcodes by supplying a list of asset id’s – Prior to this update,  you would need to check individual boxes for the assets you needed to print. Now, you can paste a list of id’s.


3) Custom fields can display on tags – You’ll see on the print page an option for “Text Replacements”. This will show a drop-down list of the fields available to print on the tag. For example, you can print things like ‘vendor’ or ‘serial numbers’ as long as the asset has that data, it’ll appear on the tag.

CONSUMABLES & KITS

Consumables can now be added to kits – When the kit is checked out, the consumables within the kits will be used up. For example, if 5 consumable items are added to a kit, when that kit is checked out, that specific consumable will be reduced by 5.

LOANEES & SUB ACCOUNTS

1) When a sub account is ‘disabled’ they will no longer appear in the list of loanees when checking out equipment.
This is helpful to reduce unnecessary users from displaying when checking out / reserving equipment.


2) Bulk convert loanees to sub-accounts.
If you have many loanees, you can now convert them to sub-accounts by using the check boxes on the loanees page and clicking “bulk actions” and select “convert to user”. As a reminder, loanees can not log into Reftab, sub-accounts can login by adding them to an access role.

IMPORTING LOCATIONS AND SUB LOCATIONS

You can now import both locations and sub locations into your Reftab account from a CSV file.
This is helpful of course if you have many locations to import and want to avoid manually adding or assigning locations as sub locations. Click the “how-to” button on the import / export data page next to “Import Locations” for more details on this process.

LOANS & RESERVATIONS

1) Default loan of ‘indefinite’ – This was asked for by many users. When checking out equipment, you can have the option for “indefinite loan” checked by default.
This is big time saver when assigning equipment. An update to the mobile app is coming out shortly to support this.
2) Time blocks for asset reservations –  You can now have pre-set time blocks for reservation dates. So for example, if you’re a school and want to set times for class periods, you can set each period as its own time block.


This saves both time and avoids unintended or accidental submission of reservations for incorrect times. This feature is currently in version 1 and an update to the mobile app is coming out shortly to support time blocks.

CREATE CUSTOM DESIGNED MAINTENANCE PDFs

For our customers using the maintenance feature, you can now create custom PDFs for your maintenance reports.


On the maintenance form designer page, you’ll see a button with an Adobe PDF icon. Click that and you’ll be able to design custom PDF forms for each of your maintenance types. When maintenance is completed, you’ll see a “Download PDF” button.


You can put details of the maintenance (such as who completed the work, date and time, etc), add logos, custom text information, bullet points, tables and so on.


This is great for having to share maintenance work to customers or other members of your organization because it can look more professional by including your company logo for example.

NEW WORKFLOW TRIGGER: Reservation

Create Reservations is now a trigger on workflows. This allows you to build a workflow that runs anytime a reservation is submitted. For example, when a reservation is submitted you can display a message or send the reservation email to a specific person.

NEW WORKFLOW ACTION: Send Custody Verification Request

Send Custody Verification Request (verify loan) is now an action on workflows. For example, you can now create a workflow that 6 months after date of check out, have an action of “verify loan”.

SET DEFAULT VALUE FOR DEPRECATION LIFESPAN

You can now set a default value for the lifespan of an asset. Prior to this update, when new assets were created you had to manually add a value for ‘lifespan’. Now, the system will auto populate this field with a pre-set value. This helps save time and avoid any mistakes.

NEW FIELD TYPE FOR LOANEES & LOANS

You can now create select lists for custom fields on your loanees and loans. This way, you can capture more accurate data on loans and loanees without having users manually type in values.

MISC.

Keyword search now searches on status labels and loanees. Previously keyword search only returned results on assets.
Ability to edit the date of check out of an asset on loan. On the loans page, click “Actions” and you’ll see a new option to “Edit Check Out Date”.

We couldn’t be more pleased with how the platform is progressing and the feedback we’re getting from our wonderful customers. We know that these features and updates improve your day-to-day operations and as such, we’re incredibly proud to be able to serve you.
As always, keep the suggestions coming!


Thank you!

How to use Reftab with Avery Sheets (with examples)

If you are reading this, you’re already well-versed in why asset tags are needed. However, most organizations aren’t using them to their fullest potential. 

This process doesn’t have to be time-consuming. And, what you can do once your process is dialed in is nearly infinite. 

In this post, we’re sharing how you can print and assign asset tags in bulk, as well as some specific use cases.   

Let’s dive in. 

Save time managing physical assets  

If you are still relying on paper sign-out sheets or manual check-in processes, you are wasting a lot of time. The chances of introducing human errors are high. 

In the pre-smartphone days, this was understandable. There wasn’t a quick way to scan a piece of equipment from your phone and immediately see all of the details about the contents, who last checked it out, when it was last checked back in, etc. 

Fortunately, these days, there is asset management software with integrated barcode generators, like Reftab, that make this process more efficient and secure. 

For example, if you are already using Jamf or Microsoft Intune, you get all of your equipment automatically populated in Reftab. When an IT person scans an asset tag, you can see all of the details on the phone or tablet. 

5 different use cases 

As we alluded to earlier in this post, the biggest reason to use this integration is to save time. Here are some specific use cases:

Managing equipment for commercial and photo shoots 

Let’s say you work in IT for a large advertising agency. You are surrounded by mountains of physical hard drives, laptops, film gear, chargers, and boxes upon boxes of tech accessories.  

In addition to your normal day-to-day IT responsibilities, your team is also responsible for updating all of the company laptops (for security purposes), getting new employees set up with all of the gear and software they need to do their jobs, and checking in and out all of the gear that agency employees need to go on film shoots. 

You could keep all of this information logged in an Excel spreadsheet.  That can work okay when you are a small company and don’t have much physical equipment outside of laptops and cables. 

However, when you start to have hundreds or even thousands of employees and millions of dollars in expensive tech and camera equipment, it doesn’t take long for that spreadsheet to become slow and unwieldy to manage. 

On top of that, if you are looking for a specific file for a photographer, you need to know the exact hard drive it is on. Or else, you could be spending several hours frantically connecting different hard drives up to your machine until you find the one you are looking for. That’s if the hard drive was backed up properly in the first place and not lost.  

Then, when you have to loan out equipment to an employee for a commercial shoot, you need to log all of the gear, including specific cables and tech accessories they check out, and then manually check and update it once it is returned. It is easy to leave chargers, cables, and other small tech accessories behind. So, you wind up wasting time trying to look for these items or spending extra money when you are replenishing these things that may or may not be lost.  

That’s where having printed asset tags on all of your gear and an integrated barcode generator in Reftab is key to bridging the physical with the digital. Now, instead of having to spend hours in the equipment room, you can simply scan a barcode on your smartphone. You can see the exact contents of the item when it was last checked, and so forth. 

Loaning equipment to students  

The same systems and processes that apply to large advertising agencies and film studios can also be applied to schools and universities. If you have a media lab, a robotics department, or even just loan out Chromebooks and tablets to students, adding printed asset tags to each piece of equipment and using an integrated barcode generator can save a ton of time and ensure that items don’t get lost.  

Instead of having an IT team member, teacher, or even a teaching assistant log the check-in and out information in a spreadsheet or paper sign-out sheet, they can simply scan the item(s) when it is checked in and out. All of the information is accessible in one central database.  

This can also apply to laboratories. If you have students or even scientists working on research,  you can use this same system for managing lab equipment. 

Keeping tabs on employee badges 

Most medium to large companies give out badges to all employees. These badges ensure that only your employees – and no outsiders – can get into the building. You may even restrict specific areas in the building to just certain employees. For example, your large sales team probably doesn’t need full access to your equipment room. 

When you have thousands of employees and potentially a hundred or more employees joining every month, keeping up with employee badges can be a full-time job. That’s where adding barcodes to badges can be helpful. You can scan an employee’s badge to quickly check things out to them, verify a person’s information, etc. It can also make it easier to deactivate someone’s badge automatically if they leave the company. 

Scanning physical folders and files with confidential information 

In the same way that you can scan employee badges, you can do the same with physical folders or paper files. 

For example, we see a lot of big law firms, government agencies, and hospitals do this. If you need to keep a paper trail for insurance or regulatory purposes, you can add a barcode to the folder. You can automatically log the contents and necessary details to a centralized, secure digital database. This is a way to bridge the physical and digital for casework and record management. 

Securing evidence for crime scene investigations 

This one might sound a little odd, but if you work for a police department or jail, there is a good chance you are in possession of a lot of vital records, evidence, and personal property. This is usually housed in evidence locker rooms, and can be vital for investigations, court cases, etc. You don’t want every single person in your department to have access to this information for obvious reasons. That’s where having asset tags on each piece of evidence can be helpful. So, when a police officer needs a specific folder or piece of evidence, you can log who’s using it, who needs that folder and why, when it is returned, etc. 

How to connect Reftab to Avery Sheets

The process for connecting Reftab to your Avery Sheet templates couldn’t be simpler. You can print out your barcodes in a big batch using your normal printer.  

By default, Reftab prints to pre-defined Avery templates. You can print barcodes using a normal office laser-jet printer.
Ready to get started? Try Reftab for free.

A guide to using Reftab with Microsoft Intune and Jamf for asset management

Whether you are a large financial institution, an enterprise technology firm, or a large school or university, you have at least one thing in common. 

You own a lot of expensive gear and equipment in the form of laptops, monitors, cameras, furniture, film / video equipment, tech accessories, staff badges, and much more. 

Between spreadsheets, Jamf, and Microsoft Intune, keeping track of all the equipment, including who it is assigned to, as well as device updates, can be a full-time job for multiple people in your IT department. 

A simpler method is to use asset management software that integrates with QR codes and barcodes. This can provide a holistic view where you can see all the assets you own and manage the process of checking gear in and out more efficiently and with fewer errors. 

In this post, we’re sharing how you can use Reftab with Microsoft Intune and Jamf to manage all of your company’s assets. 

Connecting Jamf to Reftab 

If you are using Jamf to manage all of your company’s iOS devices, connecting Jamf to Reftab is simple. 

The 80:20 version is you’ll go to the integration section under settings in Reftab and click, “configure”. You’ll be prompted for your Jamf server settings. 

Note: This is a read-only account so that Reftab can pull in all of the devices logged in Jamf.  Then, you can sync the categories in Jamf with Reftab. 

For example, you can say something like when I get a list of Macs from Jamf, put them into the Reftab category of MacBook Pros. 

You can also map specific fields. So, not only can you log MacBook Pros, but you also bring over the details like vendors, serial number, MAC address, warranty dates, etc. 

So, you can have a single source of truth for all of your device management and details within Reftab. This means when you find a random laptop in a conference room, you can scan the asset tag with the Reftab app. You can see all of the information—no need to power on the machine or anything. 

Connecting Microsoft Intune to Reftab

For PC organizations, the process works similarly for Microsoft Intune. 

The 80:20 version is you’ll go to the Reftab integration section, add in your details, and click configure. 

You’ll be able to pull in all of your Microsoft laptops and devices. For example, you can create a category in Reftab for Lenovo computers. Then, you can also set up and map various fields, including serial numbers, operating system version, whether or not the machine is jailbroken, current logged-in user, etc. 

Click here for detailed instructions on how to configure Reftab as an App in Intune: https://www.reftab.com/faq/ms-intune-integration-guide/

How these two integrations can help your IT department 

Reftab is a platform-agnostic software that allows you to see and manage all of your PC, Apple, and Linux devices.

This allows you to create asset IDs to track all of your equipment and establish a bridge between the physical and digital.   

Here are just a few benefits of using these integrations.

Save time tracking and maintaining equipment 

Whether you are tracking equipment assigned to different users or assets across different locations, you can manage all of your devices under one view in Reftab. 

In fact, Reftab customers save an average of 7 hours per week on administrative tasks related to tracking and maintaining equipment. 

For example, in Reftab, you see more than just iOS devices in Jamf. You are seeing all of the iOS and Android devices along with everything else your company owns like Lenovo computers, Macbook Pros, printers, monitors, headsets, your docking stations, office furniture, and anything else. 

You can also automatically log maintenance requests and send an email to a specific user to confirm they still have custody over the equipment you loaned them. 

It also makes the process of preparing gear for new employees simpler. You don’t have to worry about looking up information in different systems, figuring out what’s unassigned, and then trying to guess what type of machine and software the new hire needs. 

If you are using Reftab and know the department the new employee is in, you can simply search, “creative department”. Then, you can see new employees in that department need this specific Macbook Pro, Creative Cloud software pre-installed, and so forth. You can also quickly look up if there is an unassigned computer that you assign to the new employee instead of having to buy new.  

Reduce the number of data entry tasks 

Your IT team can spend more time on strategic initiatives and high-level tasks instead of manually updating information in spreadsheets, paper forms, etc.

For example, when you loan equipment to a team member, you can use your phone to scan a barcode on the item(s) when it is checked in and out. It will instantly update in the software. 

Spend less time building custom reports 

Whether you are just running standard inventory and equipment reports or going through a routine audit, reporting can take a ton of time. 

If you have all of your equipment in asset management software, like Reftab. You can automate these reports. 

For example, you can get a notification when a specific device has a low quantity. 

Or, if you have a hybrid or fully remote team, you can log into Reftab and automatically see how many devices have been assigned, which team members currently have access to what equipment, or if you have an unassigned computer that you can give to the new hire that’s starting – instead of having to buy new. 

That’s where having asset management software comes in because it provides a multi-system view to see which devices are assigned, what devices aren’t assigned to anyone, what devices are currently out of service, etc.   

*** 

In sum, managing all of your company’s assets shouldn’t require you to jump between multiple software and spreadsheets. Using asset management software that syncs with Microsoft Intune and Jamf makes this process a lot simpler. 

Ready to get started? Try Reftab for free. 

A detailed guide to asset management software for nonprofits

If you are like most of our nonprofit customers, you are likely using a spreadsheet or, more likely multiple spreadsheets to keep track of all your assets. 

If you have ever tried to load a spreadsheet with 15+ tabs and 10,000 rows (let alone search or update it), you know how slow and unwieldy this task can be. 

Add in all of your admin assistants and program managers reviewing and updating rows on the spreadsheet and checking in and out equipment, and you have a recipe for inefficient processes.  

Asset management software simplifies these processes. 

In this post, we’re sharing what asset management software is, the benefits of using it (over spreadsheets), and some popular use cases. 

Let’s dive in. 

What is asset management software? 

Asset management software, such as Reftab, allows you to keep track of everything your nonprofit owns so that you can stay organized, plan better, and understand usage patterns. 

In addition, most asset management software also have a request portal feature so you can keep track of any equipment or devices that you loan to others.  

What nonprofits should look for when evaluating asset management software 

When thinking about making the switch, here are some of the key things to consider when evaluating different asset management software options. 

Ease of use 

If you want the software to be adopted by everyone in your nonprofit, then it needs to be simple and straightforward to use. 

A steep learning curve or a hard-to-navigate UX means that your team will revert back to their old habits and start using spreadsheets again. 

Barcode scanning 

Using barcode scanners is a simple solution for reserving, checking in, and checking out equipment. This means you can always see whether a particular piece of equipment is available, as well as how often it is loaned out right within your request portal.  

Location tracking 

If you are a larger nonprofit with multiple locations, having geo-tracking enabled means you can easily see whether an item is checked out or what location it is at across your phone, computer, or tablet. 

You can also keep tabs on all of your assets in a single central hub – i.e., your asset management software, regardless of where they are physically located (be it your headquarters or satellite offices within the state) 

Reports and dashboards

This brings us to a related feature – reporting. Instead of having to create your own reports in spreadsheets, the software can do this for you. 

If you receive any government grants, you are required to keep detailed records for every asset you own. That’s where reports can save you a bunch of time since you can quickly see all of your assets alongside purchase price, depreciation value, location of items, condition, tag number, vendor details, and any additional financial metrics. 

Forecasting 

An added benefit of using software instead of spreadsheets is you can now run detailed forecasts. 

For example, with a couple of clicks, you can see how many people are using a specific piece of equipment and how often it is loaned out. You can project out these utilization trends into the future, which can tell you if you need to add budget for additional equipment or when to prioritize maintenance updates. 

Budget

Chances are, if you are a nonprofit, you don’t have an unlimited budget for software. So, it is important to make sure the software you are evaluating is not only easy to use and has the features you need, but it also fits your budget. 

4 use cases for how nonprofits are using Reftab 

Here are some popular use cases for how nonprofits are using Reftab for asset management. 

1. Loaning out equipment 

This is one of the most popular use cases. Many nonprofits have equipment like laptops, hotspots, books, and AV gear that they need to loan to staff.

Then, they need to track who it was loaned to and when it was returned. When you start having multiple people checking in and out items each day, a request portal and role-based access rights can make this process a lot more efficient. 

2. Insurance tracking 

If you have expensive assets, like vehicles, generators, computers, or heavy machinery, that are insured, you need to track that somewhere for insurance and financial reasons. 


So, if the item breaks or your building gets flooded, you have a digital paper trail. This makes it easier to file a claim down the line. 

3. Government funding and grants 

This brings us to another reason why you need a digital paper trail. That’s if you apply and receive any federal funding or grants. 

As we alluded to earlier in this post, you are required to keep digital records on where all of your assets are located, condition, vendor information, purchase price, etc. You also need to have everything serialized, which means asset tags are essential. 

4. Events management 

This is particularly common for religious nonprofits. For example, if you work in a megachurch, you probably throw a fair amount of events for your congregation. You need a way to keep track of all of your production gear and props. 

*** 

In sum, these are a handful of ways that nonprofit organizations can benefit from using asset management software. 

Want to make this process even simpler with asset management software designed for nonprofits? Try Reftab for free.