How to Enable Okta SaaS Discovery with Reftab
Reftab can automatically discover who has access to your SaaS platforms by integrating with your Okta instance. In this guide, we’ll give you a step-by-step look at setting this integration up and even let you know some tips and tricks for this.
How this Works
When a user is given access to an application in Okta, this license will be loaned to them in Reftab. If the license is then revoked in Okta, the license will also be revoked in Reftab.
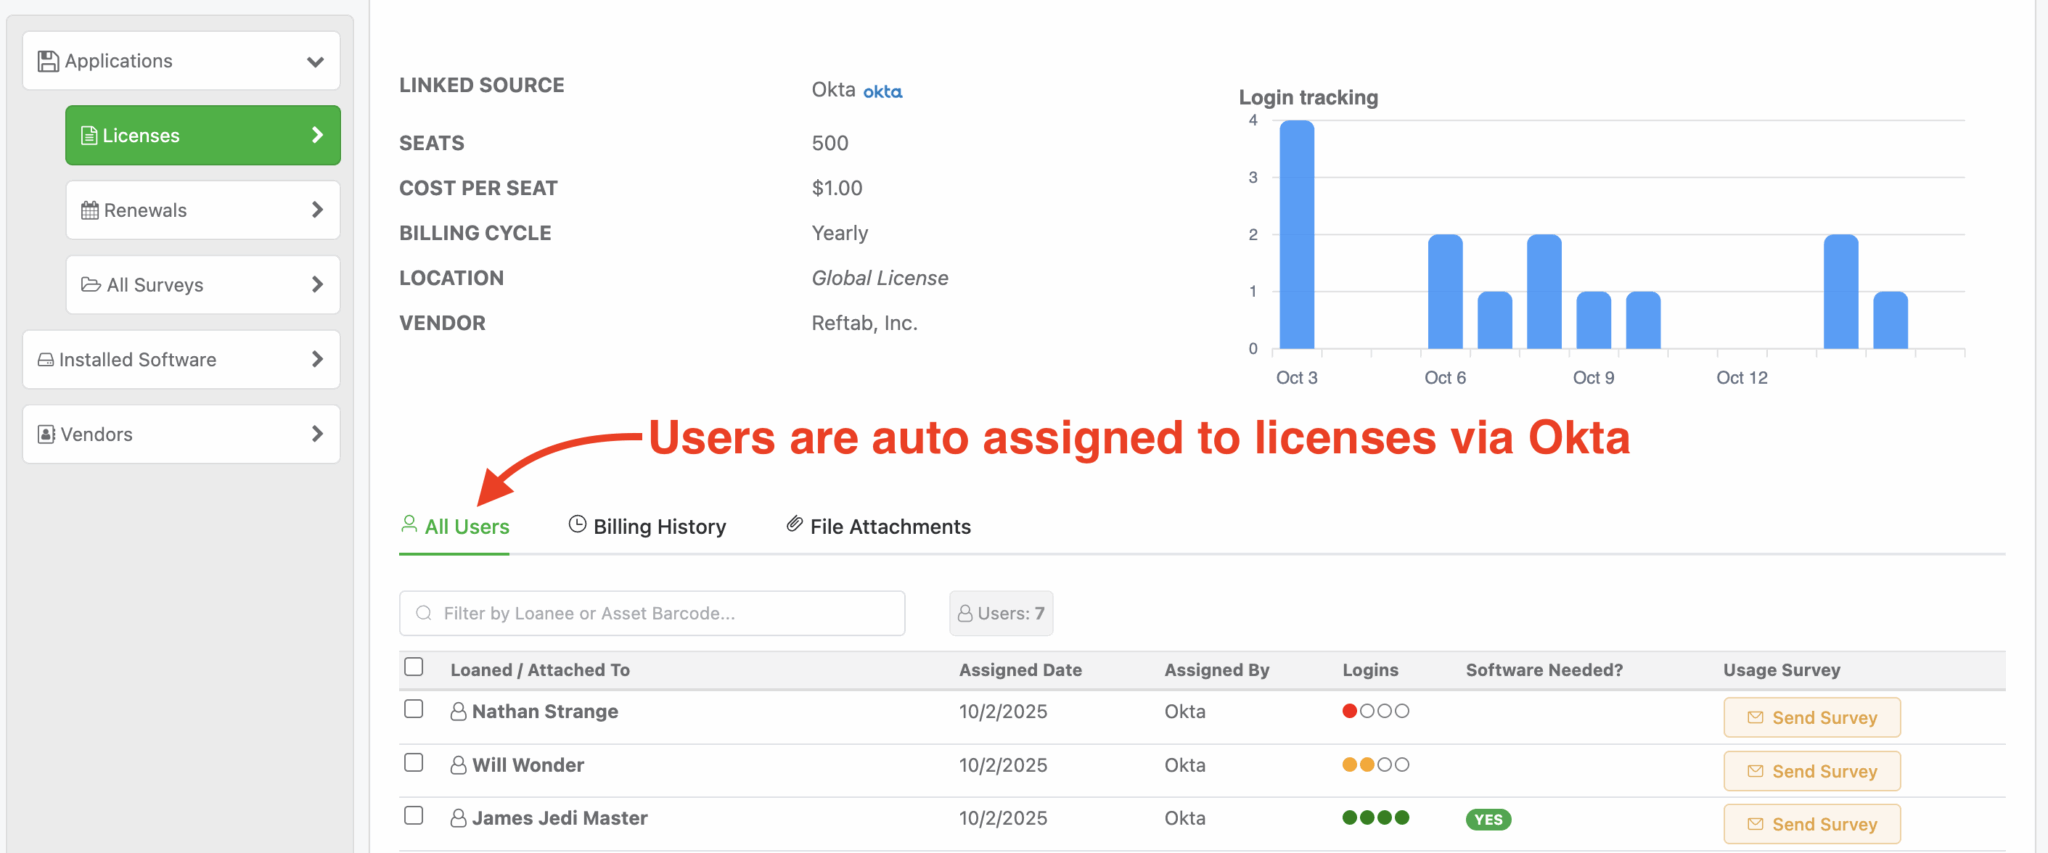
Important Note: This integration is a one-way feed, from Okta to Reftab. If a user is assigned a license in Reftab, they will not receive access in Okta. Similarly, if their access is revoked in Reftab, it will not be revoked in Okta.
Settings in Okta
The first step in this integration would be to enable the Reftab integration in the Okta admin panel.
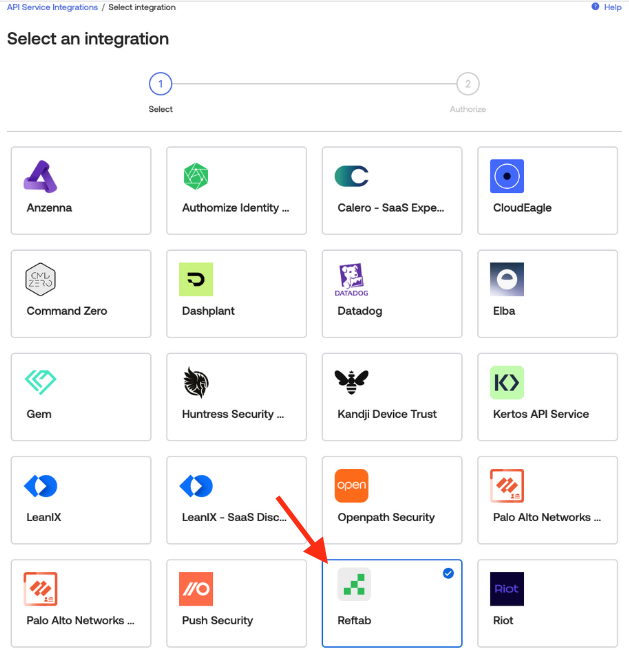
First, open the Okta admin panel and go to Applications > API Service Integrations and click Add Integration.

Next, Select Reftab on this list and click Next at the bottom of the page:
Okta will automatically select the required permissions. After reviewing these, you may click Install and Authorize.

After this, you will be presented with your Client Secret. Copy your Client Secret and save it locally for the timebeing. This is the only time you will be presented with your Client Secret.

After this, you will need to copy your Okta Domain and Client ID.

Settings in Reftab
After creating the credentials in Okta, head to Settings > Integrations > Configure Okta SaaS Discovery within your Reftab account.

From this page, you’ll need to enter your Okta Domain, Client ID and Client Secret that we previously copy and pasted locally.

After clicking Save Okta Settings you will be given the option of mapping Okta applications to Licenses in Reftab:

Licenses that currently exist in your Reftab account will be listed in the dropdown. If a License does not exist, feel free to click Create License this will create a License in Reftab with the Okta Applications title. You can then choose this License from the dropdown.

Sync Frequency
Once this setup is completed, your account has been placed in the queue to sync all current applications.
This sync happens once daily, you will need to wait up to 24 hours to receive all current license assignments. To confirm proper setup, you can add a user to a new application within Okta.
If this License has been checked out within Reftab, you have successfully completed the integration.
Need help? We're here for you
For any questions or assistance, feel free to reach out to us.
Your assets, simplified. Begin your journey with us!
50 assets free forever with unlimited inventory & software tracking. Includes email alerts, mobile apps, reports, custom asset tags and more.