Importing Assets From a Spreadsheet into Your Reftab Account: How-to Guide
This is a quick guide that users can refer to when importing assets from an Excel spreadsheet into Reftab. This guide will show you how to configure your Reftab account beforehand so that your data can be mapped properly and ensure all the data from your file is brought into your Reftab account.
Step 1)
Open your current Excel file containing your assets that you want to import into Reftab.
Step 2)
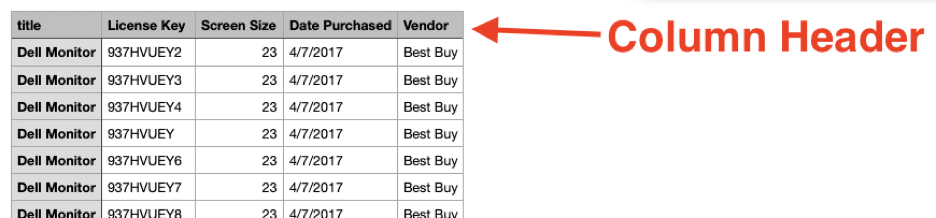
Locate your column headers and take a screenshot of them, or write them down in a notepad.
(This is the first row of your Excel file that indicates the data being held for each column.)
For example, in the screenshot below, the first row is the column header of my sample CSV file.
Step 3)
Export your Excel file as a CSV File.
Step 4)
Log into Reftab and click Settings > Asset Categories


Step 5)
Create a field for each of your column headers you identified in step 2. Click New Field.
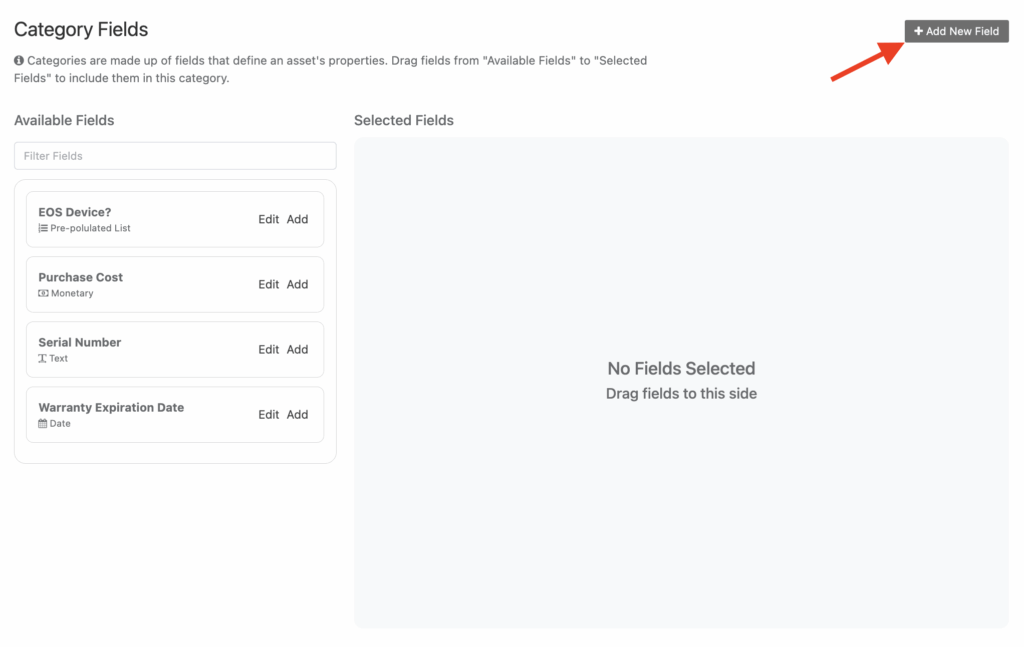
5a) Enter a Field Name that matches to your column header and set the field type to match the type of data being held.
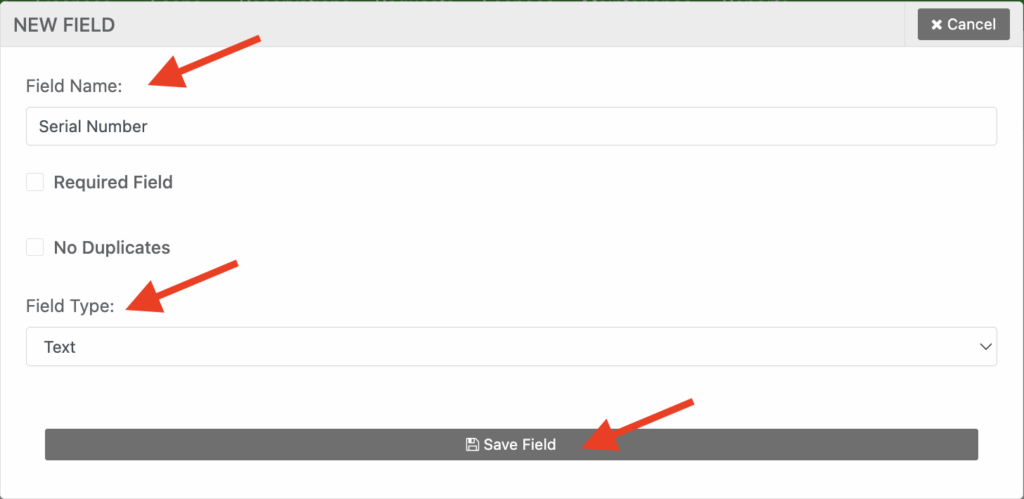
NOTE: IF YOU’RE ADDING DATE FIELDS MAKE SURE TO CHOOSE FIELD TYPE OF “DATE”
NOTE: IF YOU’RE ADDING MONETARY FIELDS MAKE SURE TO CHOOSE FIELD TYPE OF “MONETARY”
For example, my CSV File has 5 columns in the header row:
- Title
- License Key
- Screen Size
- Date Purchased
- Vendor
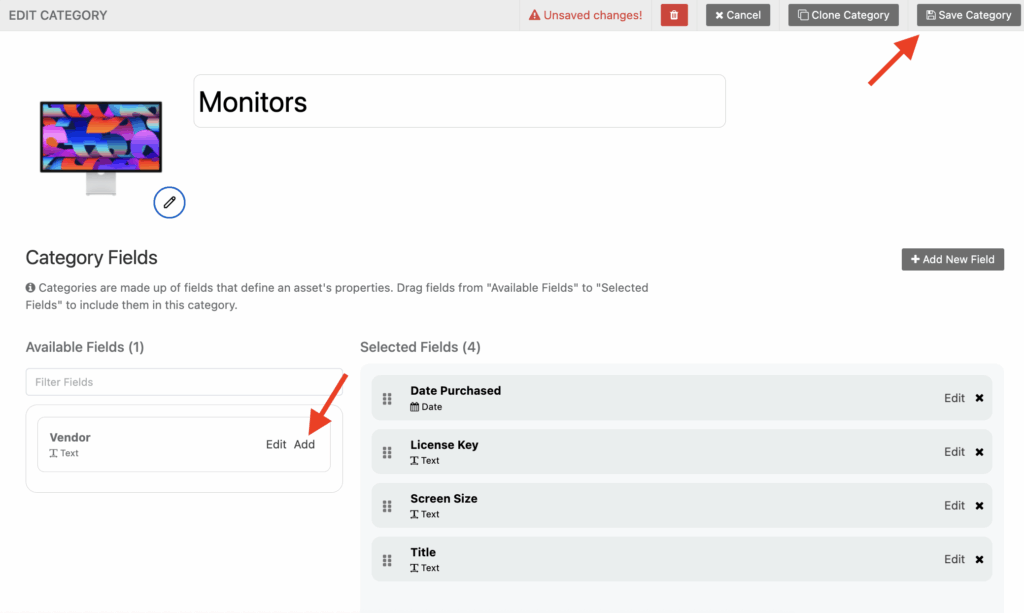
Therefore, in order for me to import this data into Reftab, i need to create a field for all 5 of these fields. Continue to create as many fields as you need to match to your file.

Notice how all five of my fields on my Monitors category matches to the column headers in my CSV file seen in Step 2. You will need to do this for each category of assets you’re importing into Reftab.
Step 6)
Once done creating your fields, ensure you click Add next to each, and click Save Category.
Step 7)
Click Settings > Import / Export Data
Then click Import under Assets.

Step 8)
Choose a default location that your assets will import to if your CSV file has no location.
Then choose a category for your import and click Next.

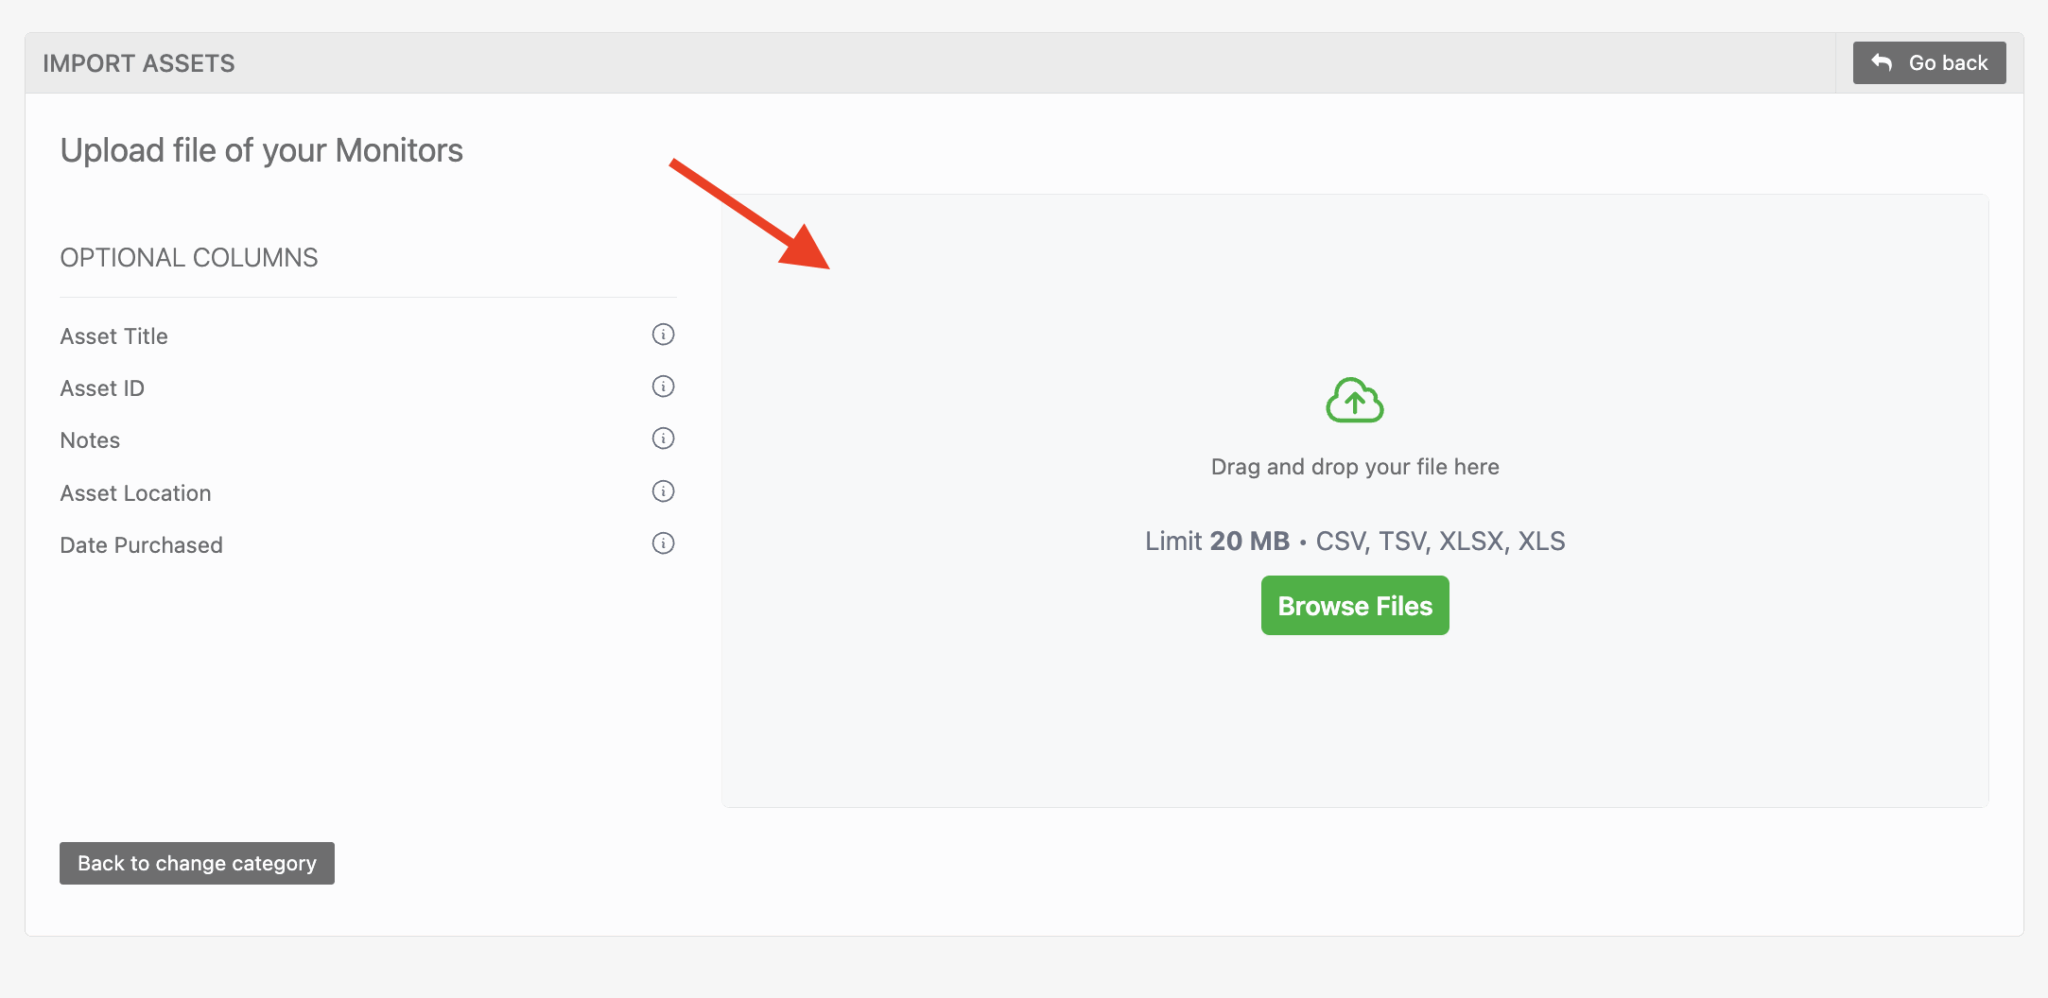
Step 9)
Drop your CSV into the right side, or click Browse Files to navigate to your CSV.
Step 10)
Once uploaded, you can review your mappings and preview the data to ensure everything aligns as expected, then click Next.

Step 11)
On the next screen you will be able to review any issues and make adjustments.
Note: If you do not have an Asset ID column in your CSV, we will automatically generate them on import. When you reach this screen, you have the ability to edit the individual cells and input ID’s manually if needed.
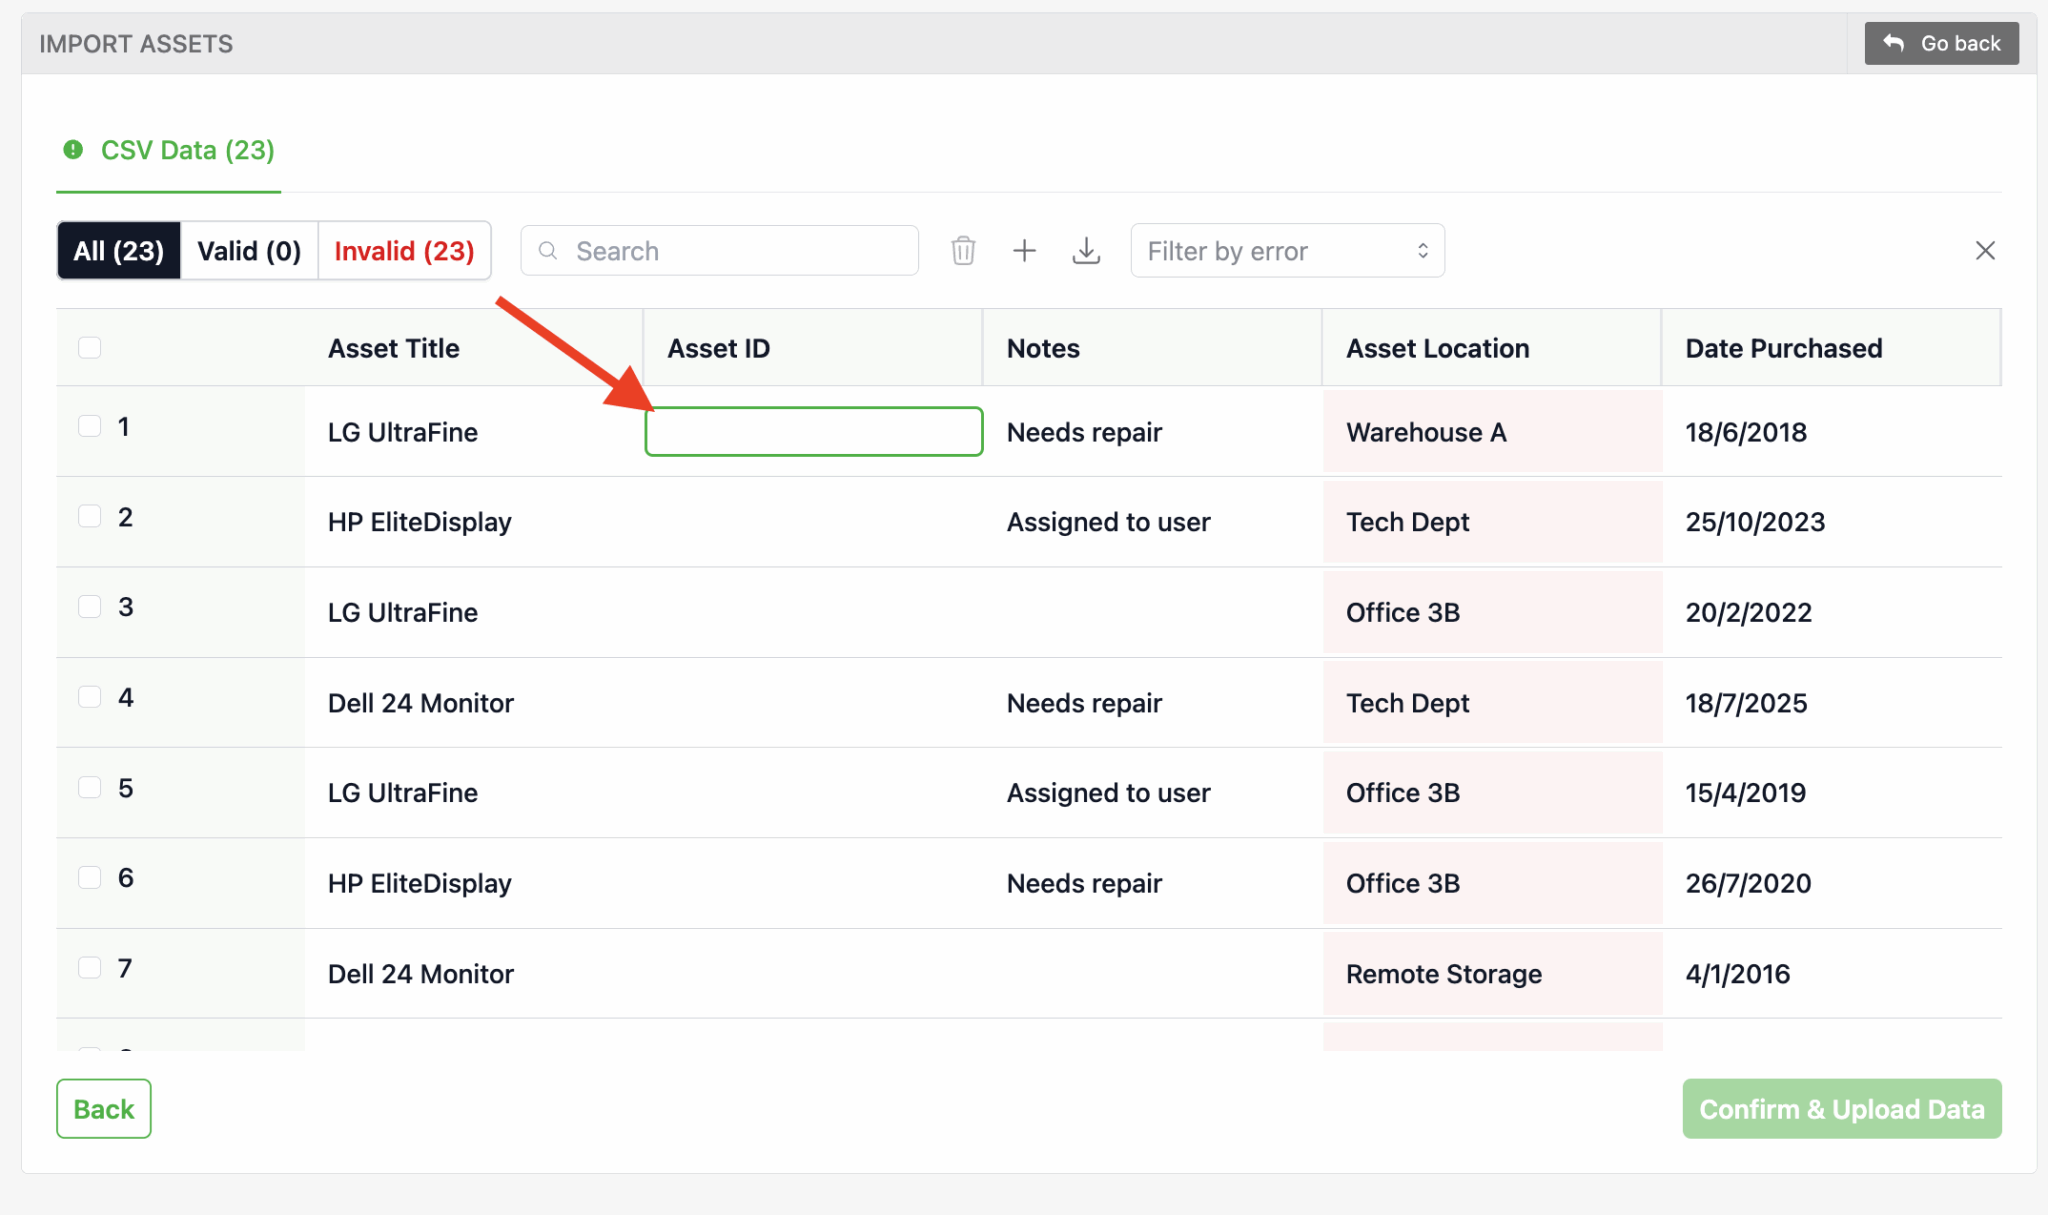
In this example, I have invalid locations for in my CSV, to resolve this I simply click on the cell and change the location for each invalid row.

There are additional tools for you to utilize at the top of the editor. These will allow you to add and remove rows, as well as downloading the sheet in its current state.

Step 12)
Once you have made your edits click Confirm & Upload Data

Your assets should now be imported into your selected category. For example, if I view one of my imported assets, I can see all the data about the asset that I imported via the CSV.

Need help? We're here for you
For any questions or assistance, feel free to reach out to us.
Your assets, simplified. Begin your journey with us!
50 assets free forever with unlimited inventory & software tracking. Includes email alerts, mobile apps, reports, custom asset tags and more.