
How to Set Up the ConnectWise Integration with Reftab
The ConnectWise PSA integration allows you to synchronize configuration data from ConnectWise directly into Reftab, helping you maintain accurate and up-to-date asset records across both platforms.
This guide covers the initial setup in ConnectWise, connecting your account to Reftab, and configuring which assets and information are imported through the integration.
In this guide:
Creating a Security Role in ConnectWise
Configuring Security Role Permissions
Creating an API Member
Generating API Key
Configuring the Reftab Configuration
Testing the Connecting
Mapping the ConnectWise Configuration Types
Configuring Field Mappings
Step 1: Create a Security Role in ConnectWise
1. Log in to your ConnectWise PSA account.
2. From the left-hand navigation menu, go to System > Security Roles.
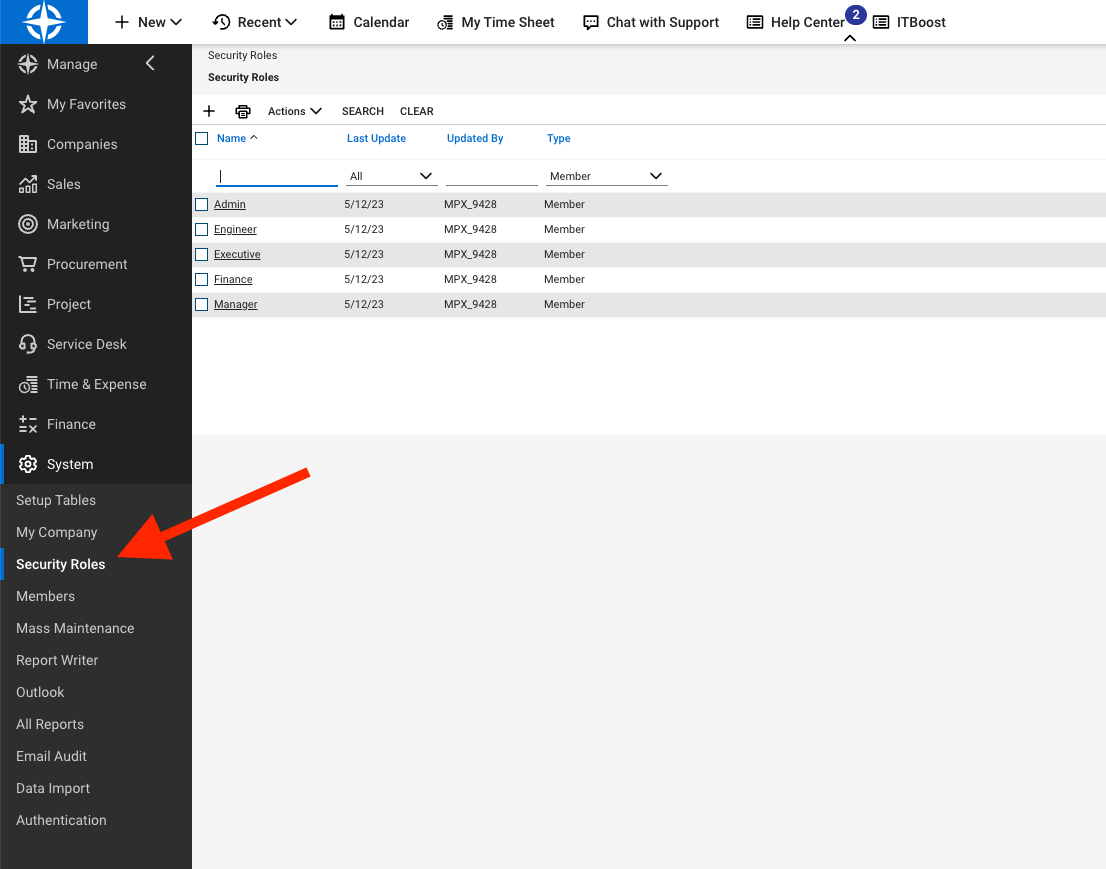
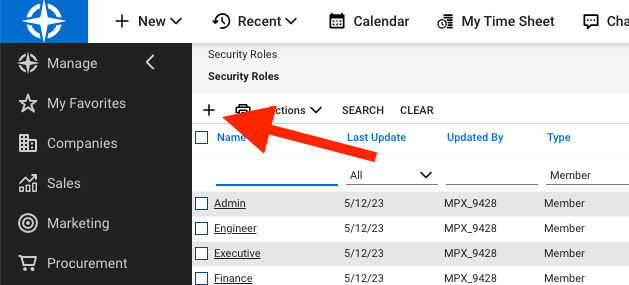
3. Click the + icon to create a new security role.
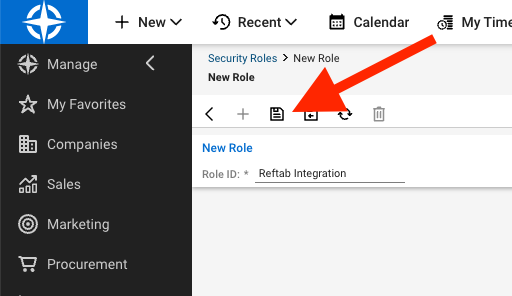
4. Enter a name for the role, such as Reftab Integration, and click Save.
Step 2: Configure Security Role Permissions
1. Open the newly created security role.
2. Locate the Companies section and expand it.
3. Find Configurations (customize).
4. Set Inquire Level to All.
5. Leave the remaining permissions set to None.
6. Save your changes.
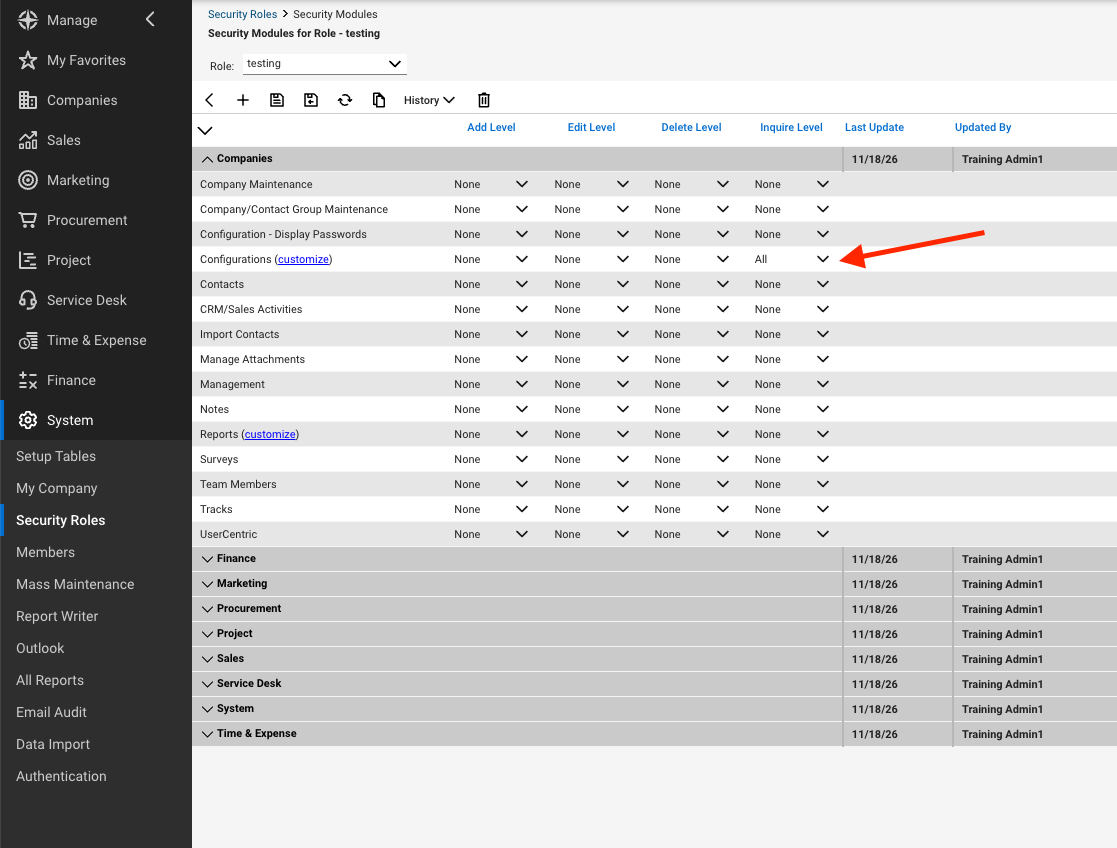
This grants the integration permission to retrieve configuration records without providing unnecessary modification privileges.
Step 3: Create an API Member
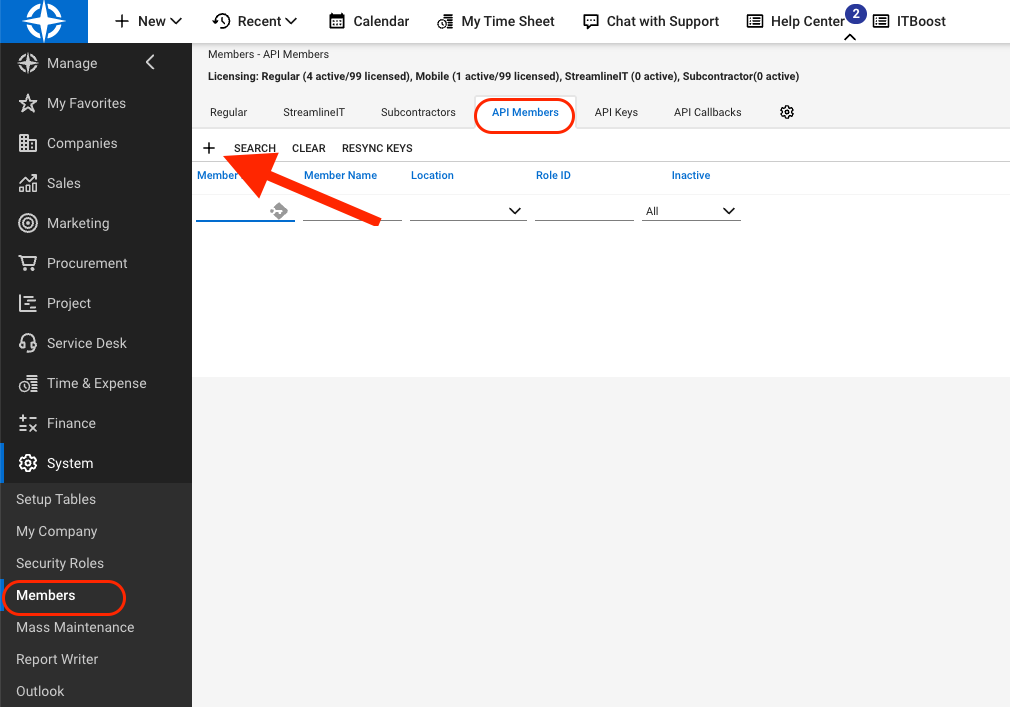
1. From the left-hand navigation menu, go to System > Members.
2. Select the API Members tab.
3. Click the + icon to create a new API member.
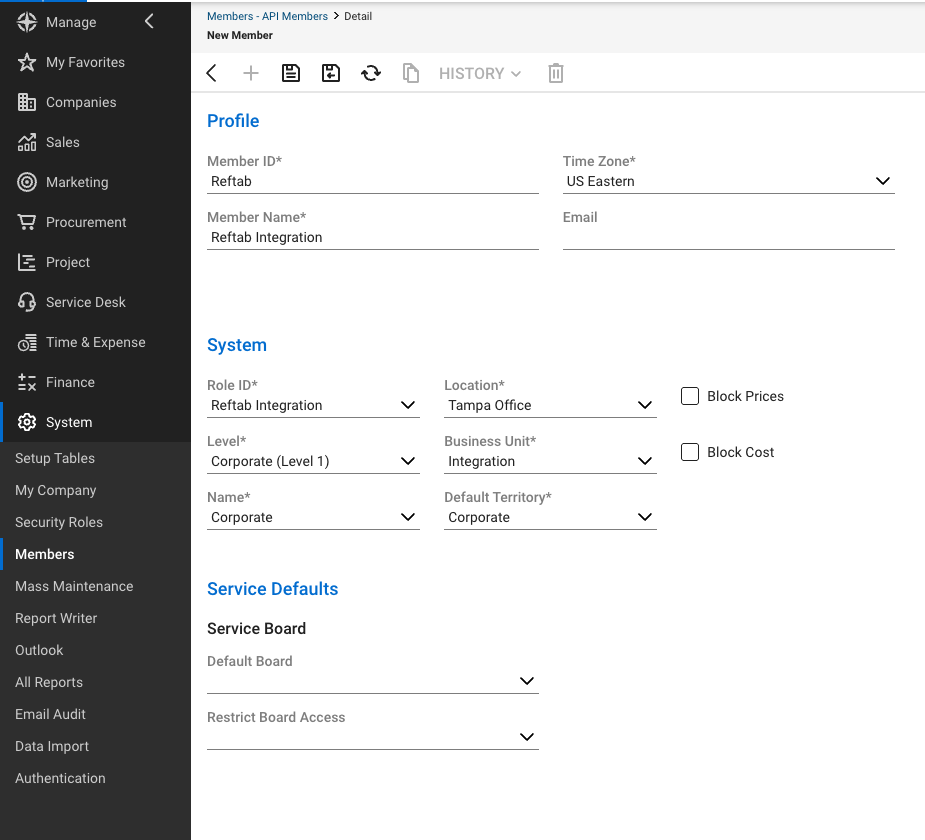
4. Complete the required fields, including:
- Location, Business Unit, Level, Name, and Default Territory: Select the appropriate values for your organization.
- Member ID: Reftab
- Member Name: Reftab Integration
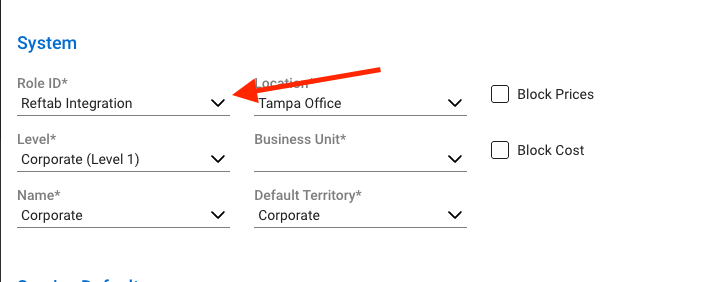
- Role ID: Reftab Integration (the security role created earlier)
- Time Zone: Your applicable time zone
5. Click Save.
Step 4: Generate API Keys
1. Open the API member you just created.
2. Select the API Keys tab.
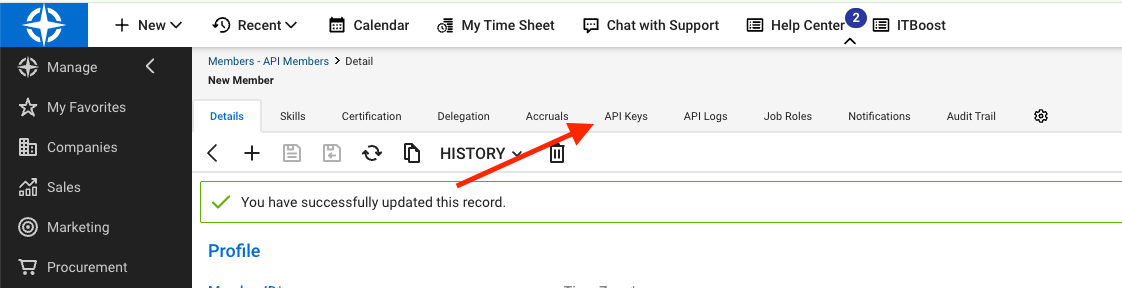
3. Click the + icon to generate a new API key.
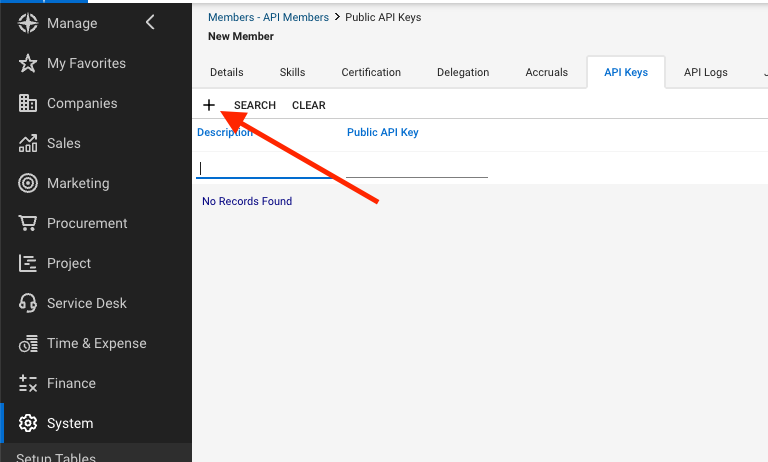
4. Enter a description, such as Reftab Integration.
5. Save the new API key.
6. Copy both the Public Key and Private Key.
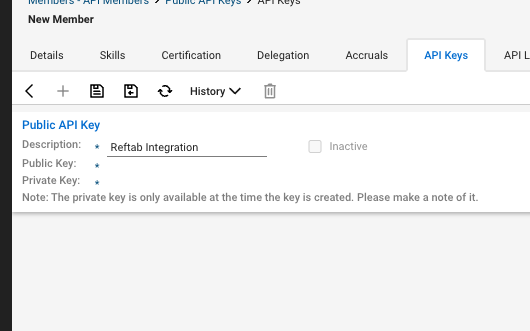
Important: The private key is only displayed when it is initially generated. Make sure to copy and securely store it before leaving this page, as it cannot be retrieved afterward.
Step 5: Configure the Integration in Reftab
1. Log in to your Reftab account.
2. Navigate to Settings > Integrations and locate the ConnectWise PSA integration.
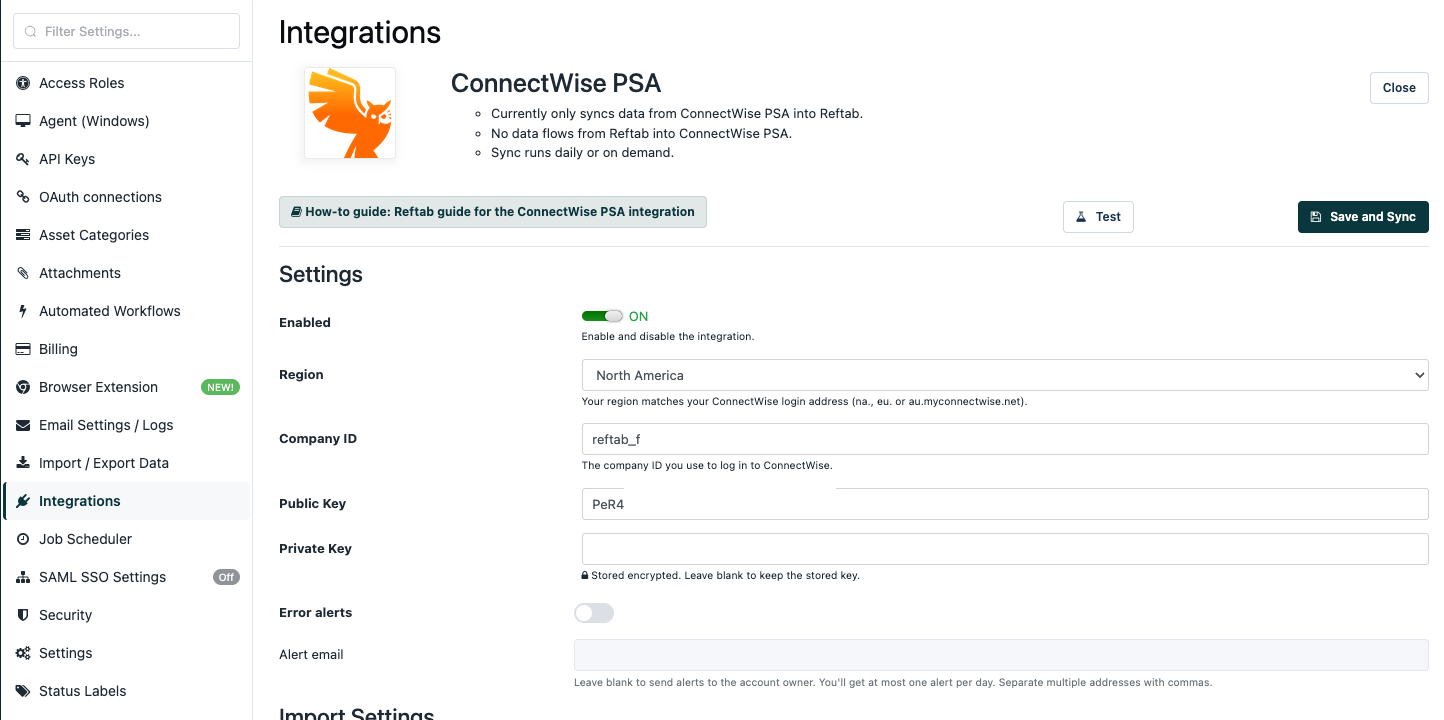
3. Enable the integration and enter the following information:
- Region: Select your ConnectWise region.
- Company ID: Enter the Company ID used to log in to ConnectWise.
- Public Key: Paste the Public Key generated in Step 4.
- Private Key: Paste the Private Key generated in Step 4.
4. Optionally, enable error alerts and provide an email address to receive integration error notifications.
Step 6: Test the Connection
After entering your ConnectWise credentials, click Test.
Important: ConnectWise supports custom configuration types. Testing the connection allows us to retrieve the configuration types available in your ConnectWise environment.
You must test the connection before configuring your category and field mappings.
Step 7: Map ConnectWise Configuration Types
Once the connection test is successful, locate the Configuration Type Mappings section.
1. Review the configuration types retrieved from your ConnectWise environment.
2. For each configuration type you want to import, select the corresponding Reftab asset category.
3. If you do not want to import a particular configuration type, leave it set to Don’t import.
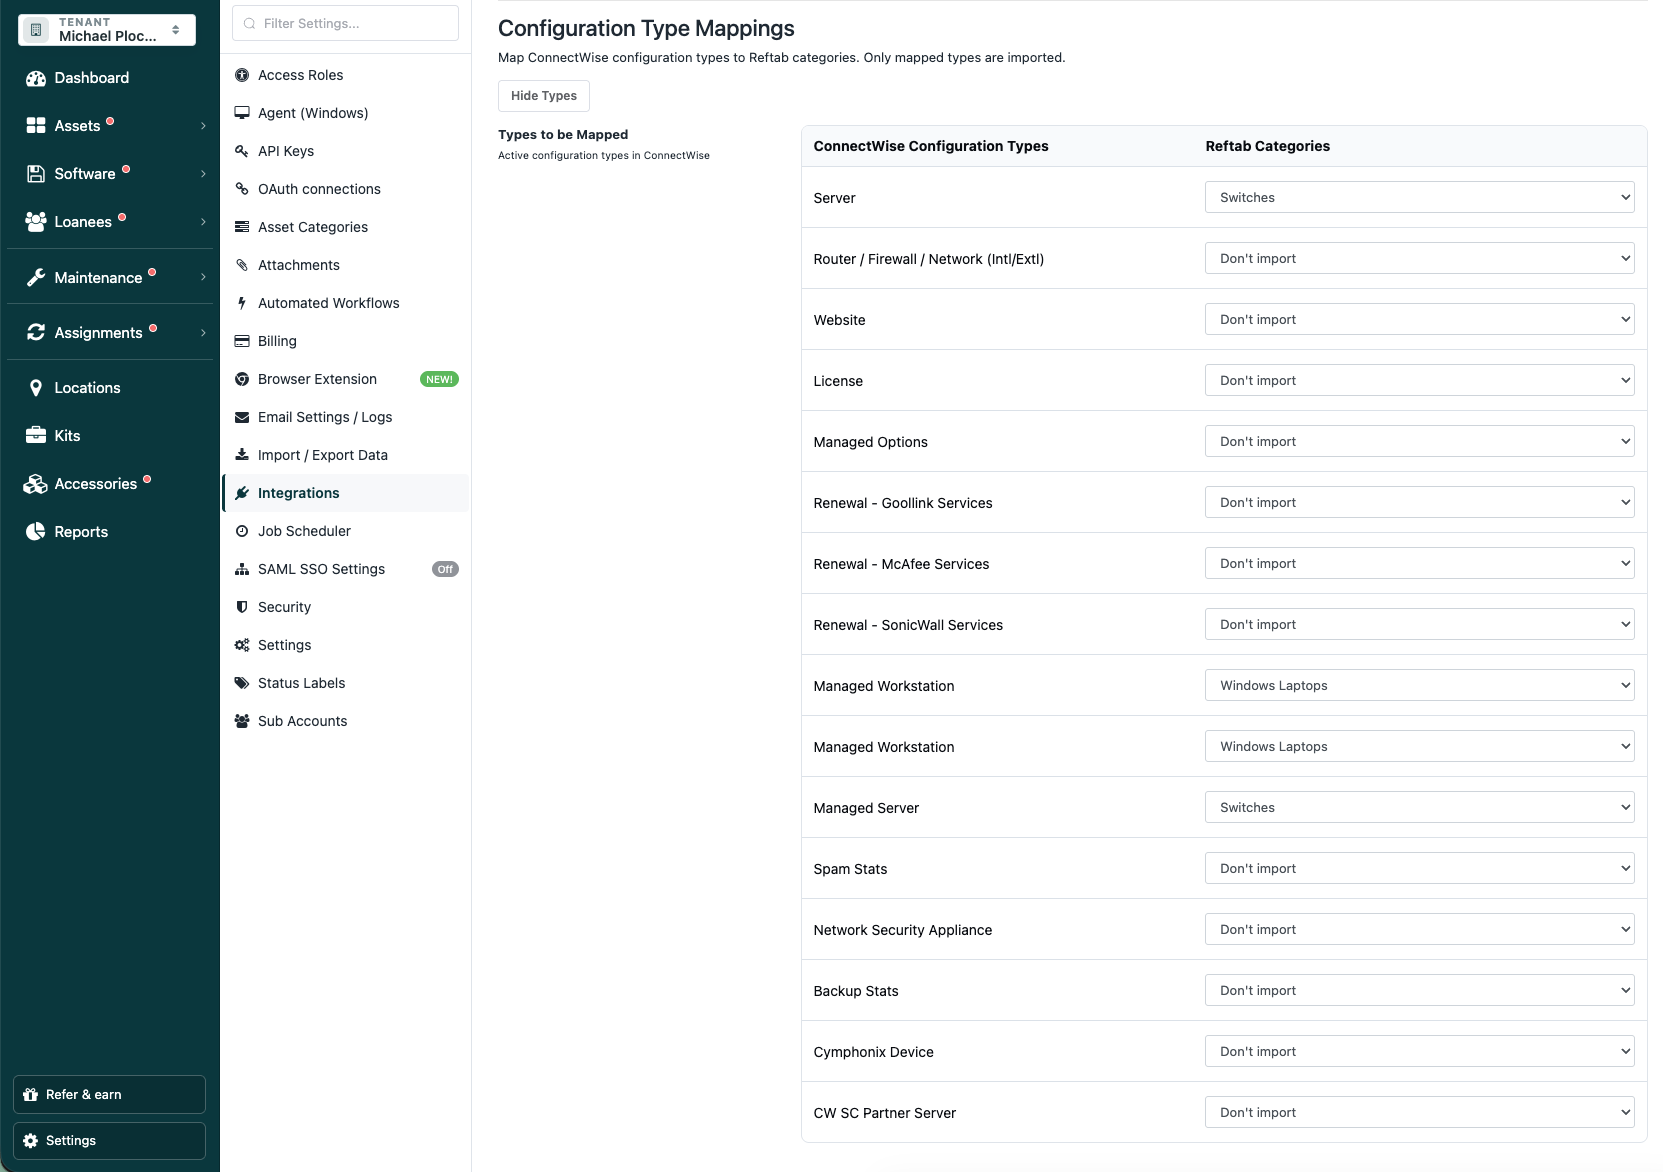
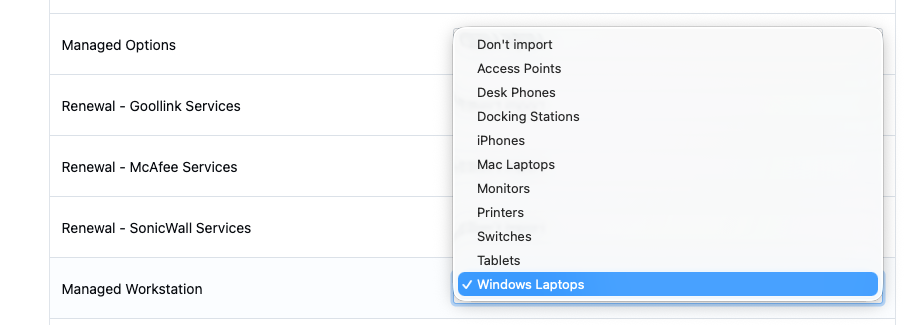
Note: Only configuration types mapped to a Reftab category will be imported. Configuration types set to Don’t import will be excluded from synchronization.
Step 8: Configure Field Mappings
Next, locate the Field Mappings section.
1. Review the available ConnectWise configuration fields.
2. Select the corresponding Reftab field for each value you want to synchronize.
3. If a suitable Reftab field does not exist, click Create field to create one.
4. Ensure the selected fields exist in the Reftab categories you mapped in Step 7.
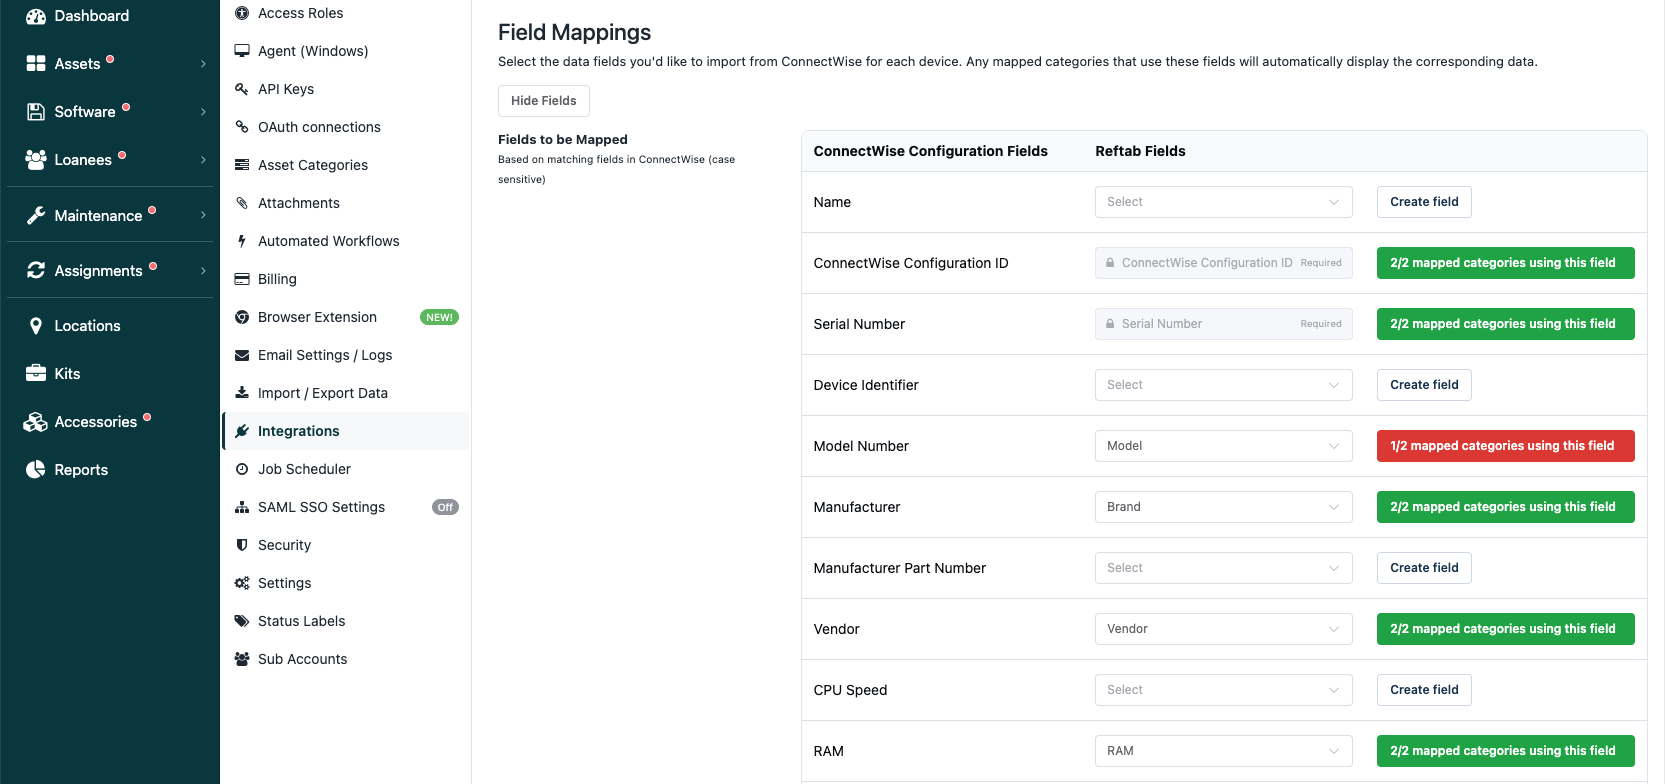
The integration displays how many mapped categories contain each selected field. Use these indicators to identify fields that may be missing from one or more categories.
Note: The ConnectWise Configuration ID and Serial Number fields are required mappings.
Step 9: Save and Sync
Once you have configured your integration settings, configuration type mappings, and field mappings:
1. Review your selections.
2. Click Save and Sync to save the configuration and initiate synchronization.
Notes
The integration imports data from ConnectWise PSA into Reftab. Data does not flow from Reftab back into ConnectWise.
Synchronization runs daily or can be initiated on demand.
Need help? We're here for you
For any questions or assistance, feel free to reach out to us.
Ready to simplify IT asset management?
No credit card. No watered-down trial. Create a free account and see firsthand what Reftab can do.