How do I setup and utilize Onboarding and Offboarding?
Onboarding and offboarding are key aspects of IT Asset Management (ITAM), ensuring that employees receive the necessary hardware, software, and access when they start and that all assets are properly reclaimed when they leave. In this guide, we’ll walk through setting up onboarding and offboarding tickets in Reftab to streamline asset assignments, recoveries, and ensure a smooth transition for employees.
What we’ll cover:
- Navigate to the Onboarding Settings
- Managing Onboarding Tasks
- Managing Offboarding Tasks
- Onboarding Users
- Offboarding Users
- Important Notes
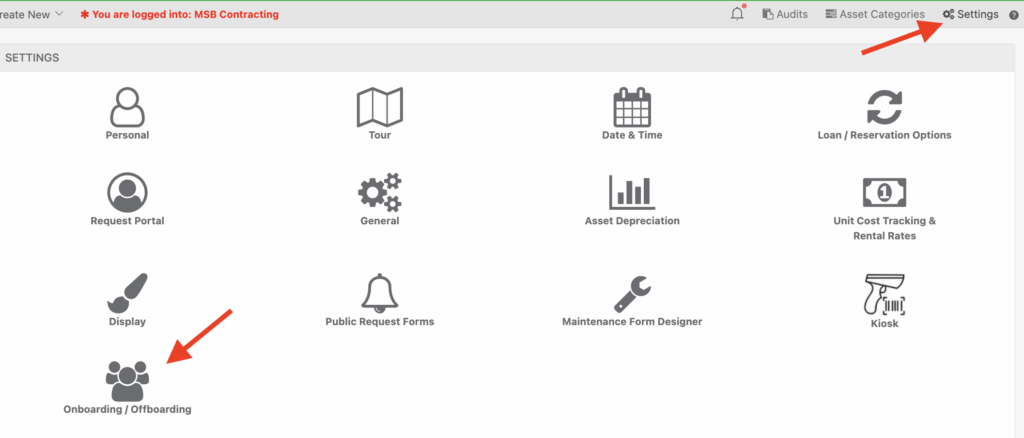
Navigate to the Onboarding Settings
From the top navigation bar, click the “Settings” button. In the Settings panel, locate the “Onboarding / Offboarding” icon and click it.
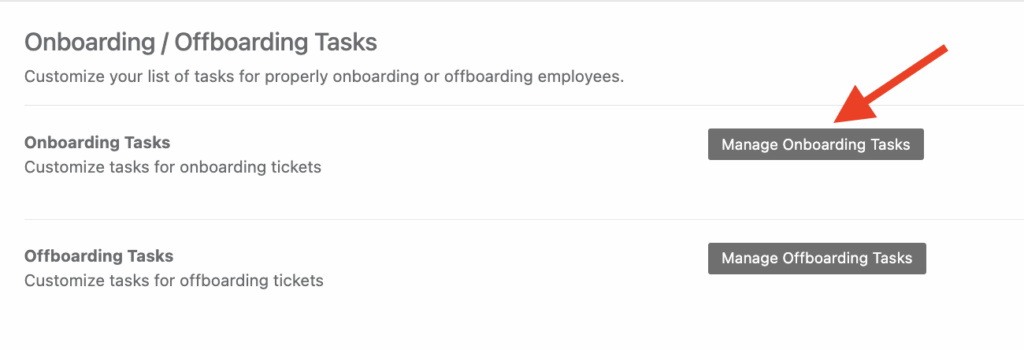
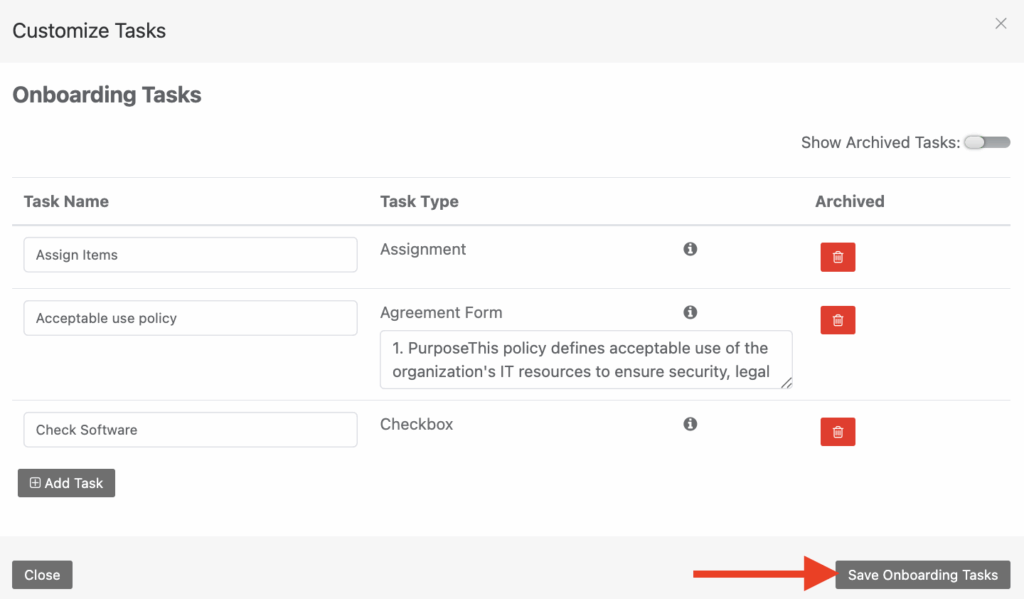
Managing Onboarding Tasks
On the Onboarding / Offboarding Tasks screen, click “Manage Onboarding Tasks” to open the window where you can define or edit tasks for onboarding users.
In the Customize Tasks window you can add new tasks for onboarding. Onboarding comes default with the “Assign Items” task. To add a new task, click “Add Task” and enter a task name (e.g., “Sign Agreement,” “Set Up Email Account,” etc).
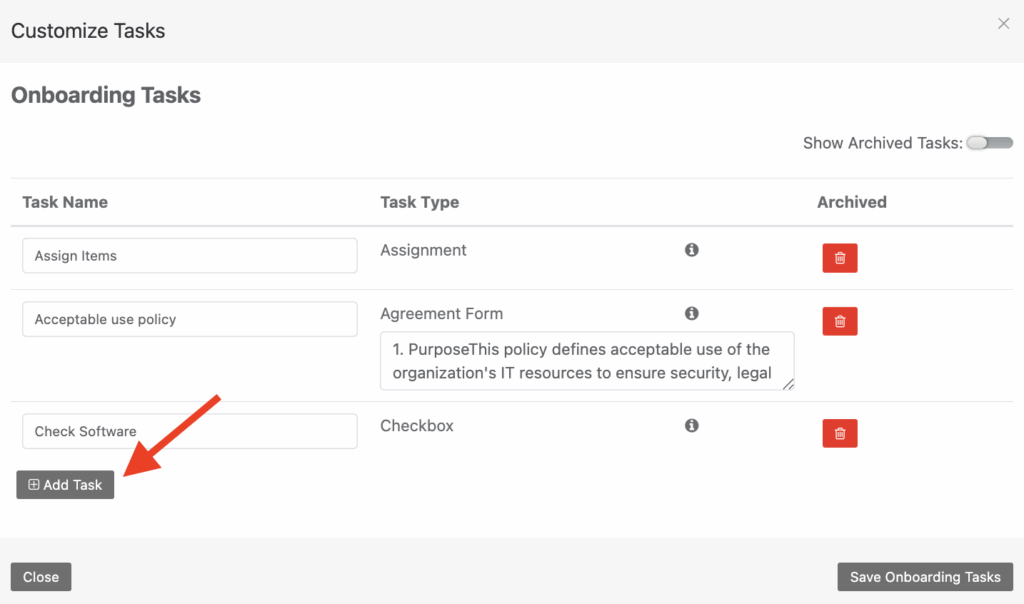
(If older tasks have been archived, toggle Show Archived Tasks (top right) to view them.)
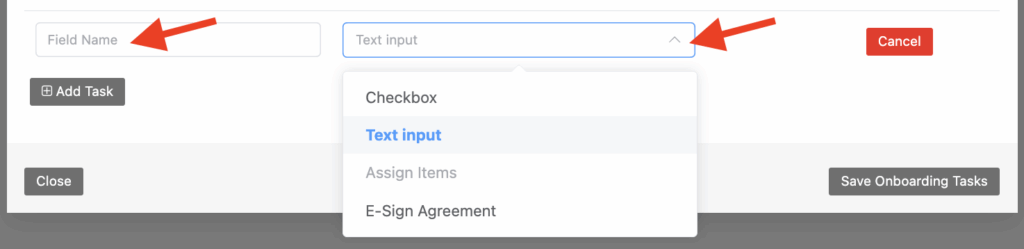
Choose a Task Type from the dropdown:
- Checkbox – For yes/no confirmations.
- Text Input – To capture additional details.
- Assign Items – Link specific assets or items to a new hire.
- E-Sign Agreement – Insert agreement text for a digital signature.
Click “Save Onboarding Tasks” to finalize your changes.
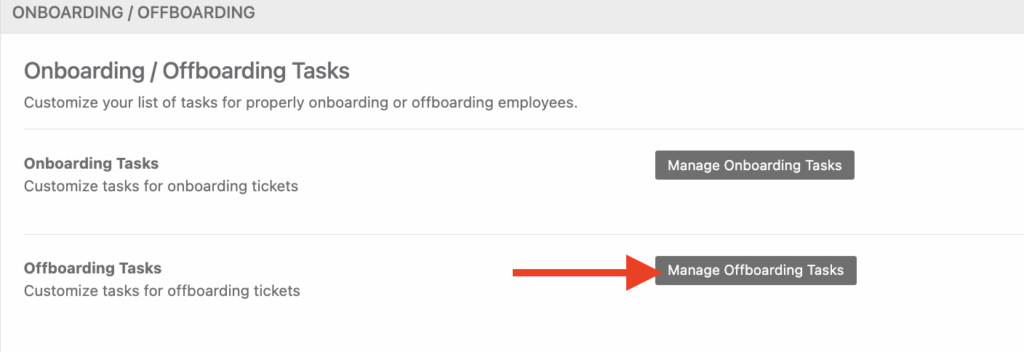
Managing Offboarding Tasks
You can additionally customize tasks for when you offboard users. On the Onboarding / Offboarding Tasks screen, choose “Manage Offboarding Tasks“.
The Offboarding task comes with “Return all items” by default.
To add more offboarding tasks, click the “Add Task” button and choose a task type.
- Checkbox – Use for simple yes/no tasks like confirming a returned ID.
- Text Input – Capture information such as reason for departure or notes on returned equipment.
- Return Items – Automatically generate a step to gather any assigned items from that employee.
- E-Sign Agreement – Insert departure agreements for a digital signature.
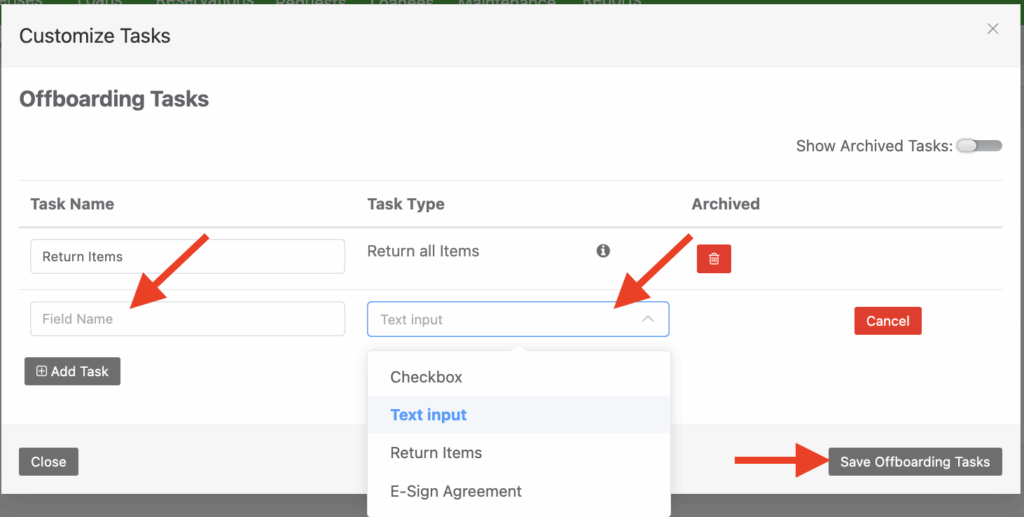
Click “Save Offboarding Tasks” to finalize your changes.
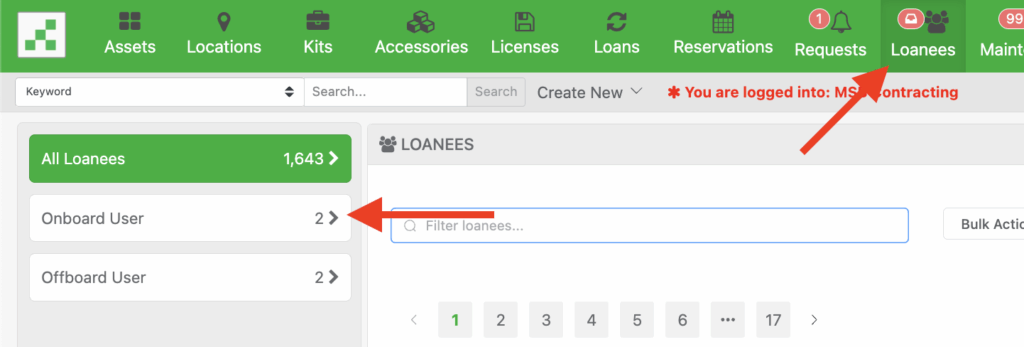
Onboarding Users
From the top navigation bar, click Loanees. The left sidebar will display All Loanees, Onboard User, and Offboard User queues. In the left sidebar, click Onboard User to view any open onboarding tickets.
If no users are currently onboarding, you’ll see a “No users currently onboarding” message. There are a couple ways an onboarding ticket can be opened:
- When adding a new user, setting their status to “Onboarding” will create a ticket upon save.
- Or, from the onboarding ticket queue, you can click “Onboard New User“.

This opens the New onboard user ticket screen. From the “User to Onboard” dropdown, you can choose an existing user that is in a “Pending Onboarding” status, or click “+ Add New User“.

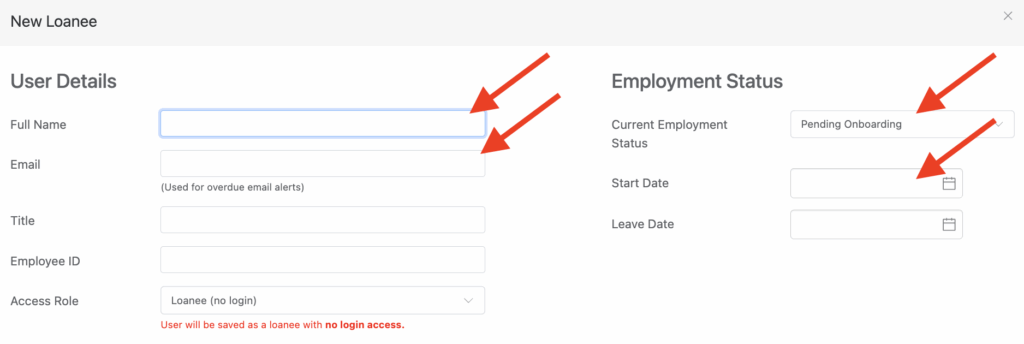
Adding a new user allows you to fill out details like Full Name, Email, Title, and set Current Status to “Pending Onboarding“. Click “Save” or “Save & Close” to create the user.
It’s important to note that if you set a Start Date, an onboarding ticket will be automatically created at that start date selected, the same is true for Leave Date for offboarding.
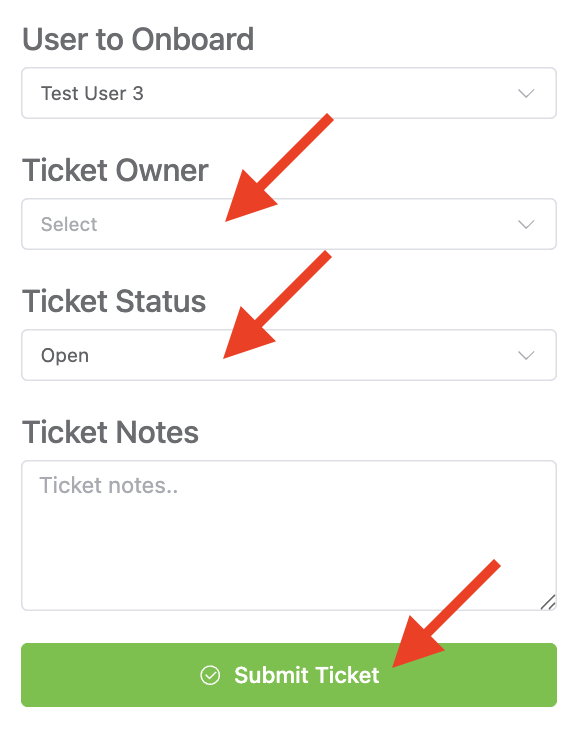
Next you will want to complete the initial ticket details, and optionally assign who will manage this onboarding process. You can also place ticket notes for any special instructions or context. Click “Submit Ticket” to generate the user’s onboarding ticket.
Once the ticket is created, you’ll see an onboarding ticket with a list of your configured tasks, for example I have:
- Assign Items (default, for issuing assets like laptops).
- Sign Agreement (e-sign a form).
- Building Keycard Assigned, etc.
To complete a task, click the corresponding button (e.g., Assign Items to select and assign assets, Send Agreement, or Complete). If a task is not needed, check Skipped beside the corresponding task. You can also enter task notes under each task as needed.
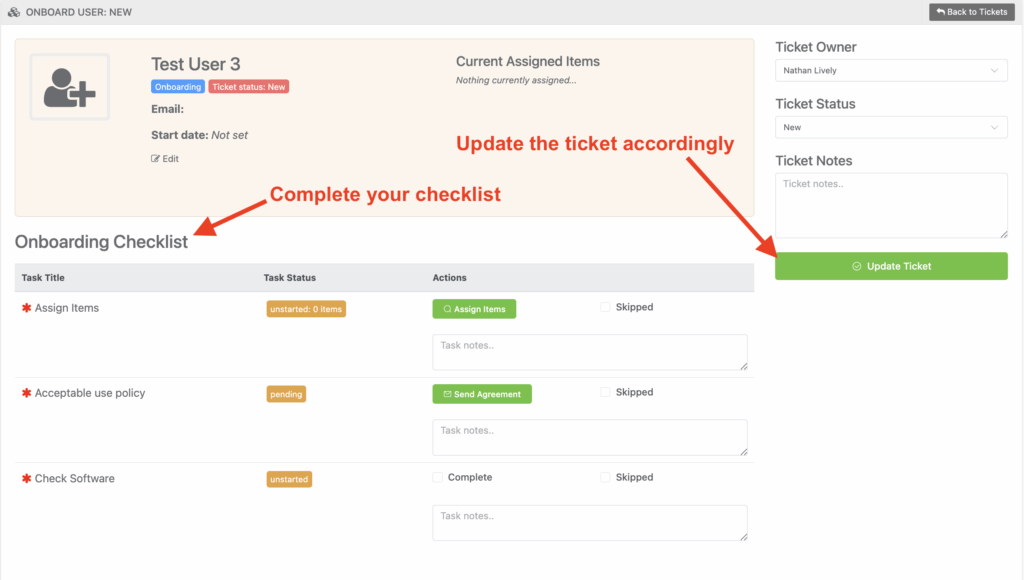
Once all required tasks are completed (or skipped if unnecessary), set Ticket Status to “Closed” in the right-hand panel, then click “Close Ticket“. This action completes the onboarding process for the new user.
As you move through the checklist, all actions will be recorded to the Ticket Log, located at the bottom of the page:

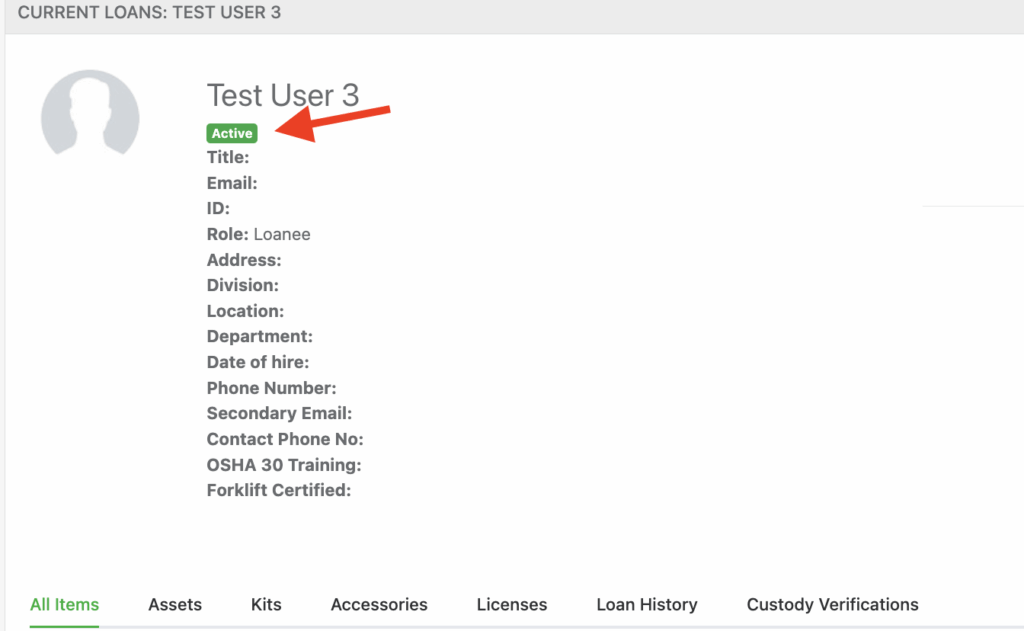
After closing the ticket, the user’s status changes to Active.
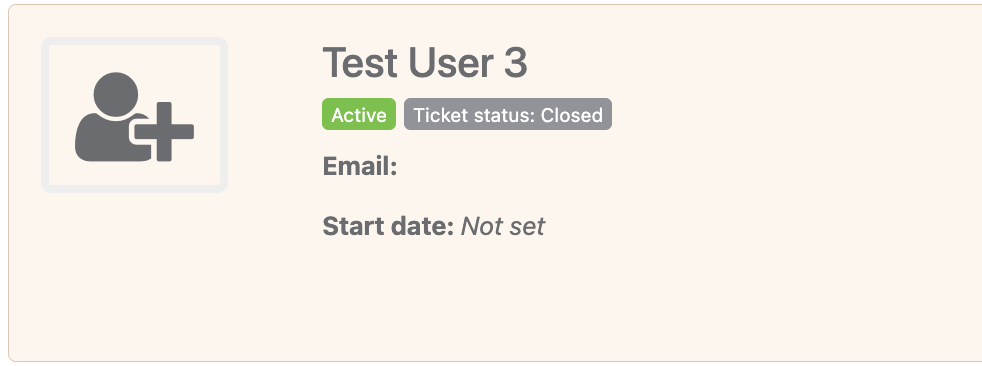
When viewing a users’ profile, the active status will also be reflected there as well, as shown below:
Offboarding Users
To offboard a user you will head top the top navigation bar, click Loanees. In the left sidebar, click Offboard User to view any open offboarding tickets, or create a new one. You can also edit any users, and by changing their status to “Offboarding” a new ticket will be created.
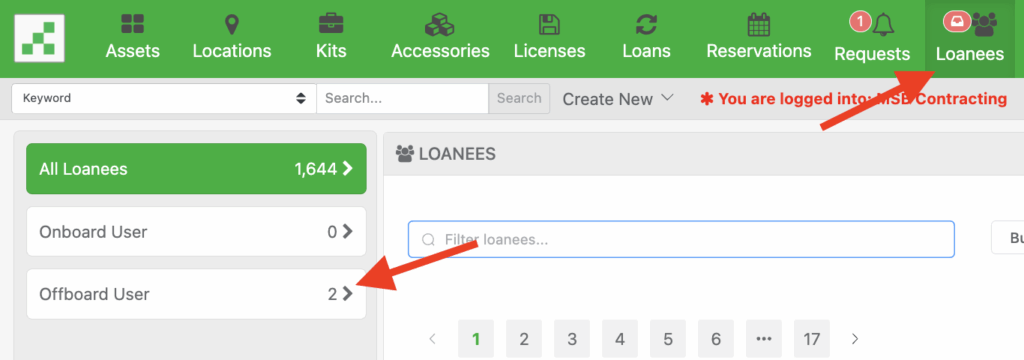
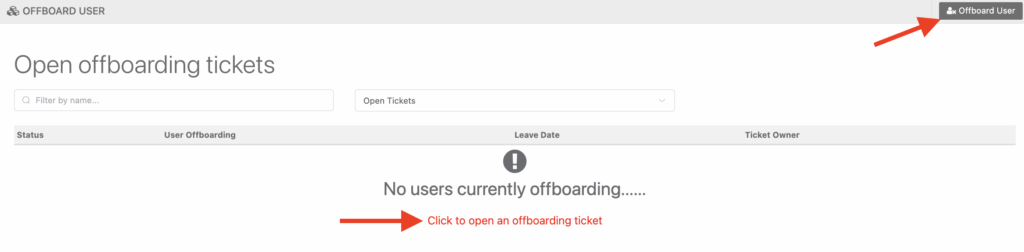
If no users are currently offboarding, you’ll see a “No users currently offboarding” message. To begin you will want to click “Offboard New User.”
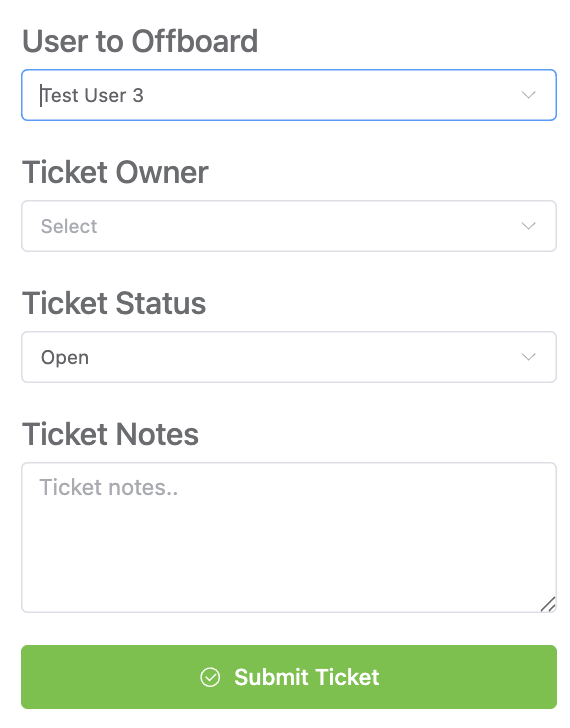
This opens the new offboard user ticket screen. From the “User to Offboard” dropdown, you can choose an existing user that is in an active status to offboard.
Once the ticket is created, you’ll see an offboarding ticket with a list of your configured tasks, for example I have:
- Return all items (default, for returning loanee assets).
- Sign Disclosure Agreement (e-sign a form).
- Return building keycard.
- Terminate email account check.
To complete a task, click the corresponding button (e.g., Go to current loans to check in assets, Send Agreement, or Complete). If a task is not needed, check Skipped beside the corresponding task. You can also enter task notes under each task as needed.
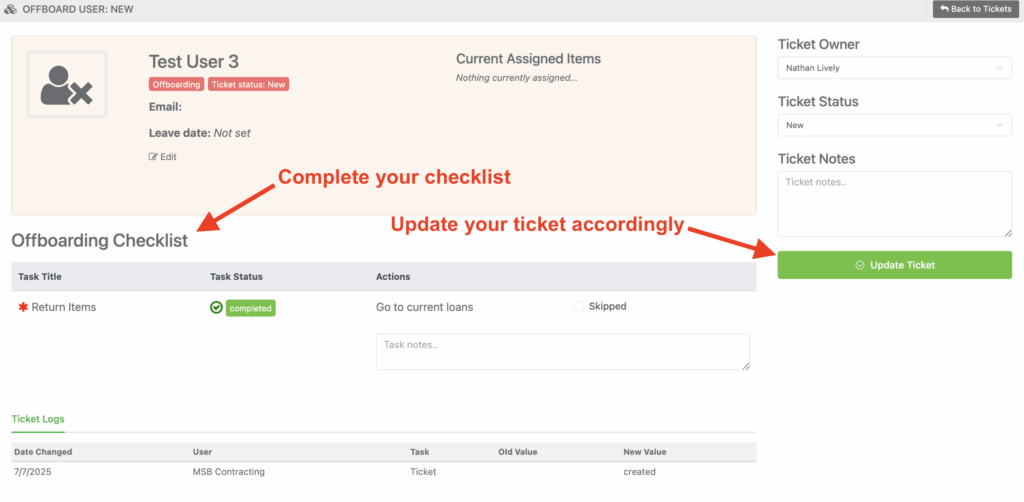
Once all required tasks are completed (or skipped if unnecessary), set Ticket Status to “Closed” in the right-hand panel, then click “Close Ticket“. This action completes the offboarding process for the user.
As you move through the checklist, all actions will be recorded to the Ticket Log, located at the bottom of the page:

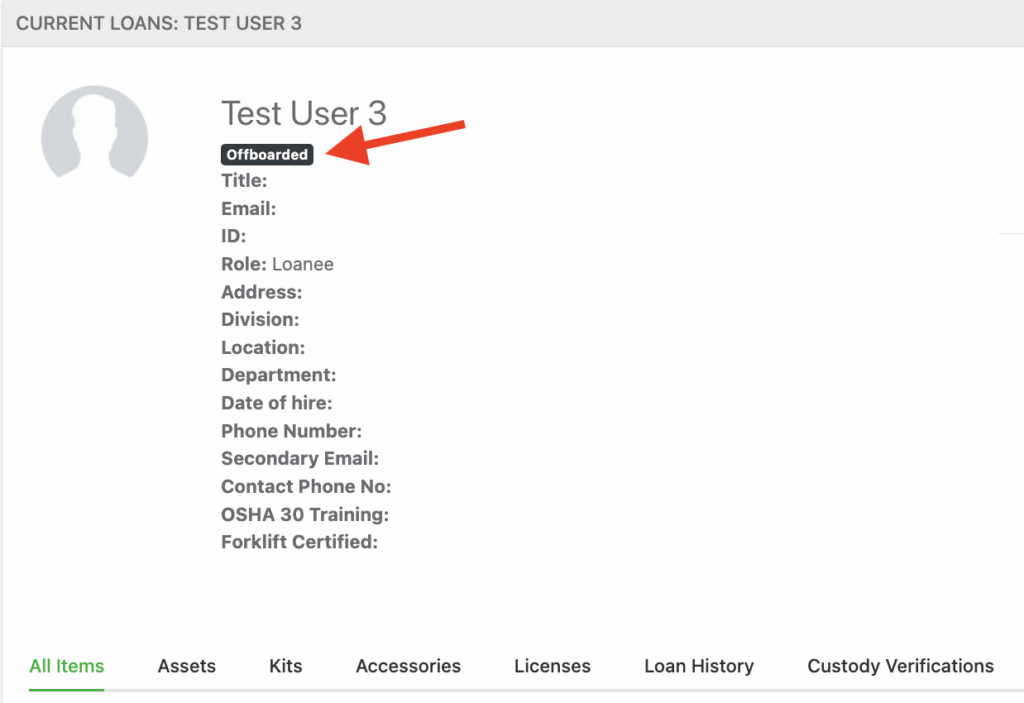
After closing the ticket, the users’ status will switch to “Offboarded“.

When viewing a users’ profile, the offboarded status will also be reflected there as well, as shown below:
Important Notes
- Only users’ that are in a pending status can be selected for onboarding
- Only active users’ can be selected for offboarding
Need help? We're here for you
For any questions or assistance, feel free to reach out to us.
Your assets, simplified. Begin your journey with us!
50 assets free forever with unlimited inventory & software tracking. Includes email alerts, mobile apps, reports, custom asset tags and more.