
How can I verify custody of assets?
After you have all your equipment, gear and items saved as assets in Reftab and assigned to users, how can you be sure your users still have custody over the equipment originally given to them? The ability to have users confirm ownership of equipment originally given to them is extremely important – especially with so many employees working from home. This guide explains how you can accomplish this task by verifying custody of assets.
Custody verification is where users receive an email with a link to a generated form. Beyond a “Yes, I have it” and “No, I don’t have it”, there is an option for the user to add notes when they respond. Notes are important for a “No” response, so you know why they lost an asset, never had it, gave it to another user and so on. By using custody verification, you can streamline the auditing process of deployed assets, which results in more accurate data.
In this post we’re going to describe how to have employees or staff confirm that they are in possession of the equipment given to them.
You can:
Manually Request Custody Verification
Automatically Request Custody Verification
Configure Automated Reminder Alerts
Hardware Custody Verification Settings
Run Reports to see who has pending verifications
Manually Request for Custody Verification
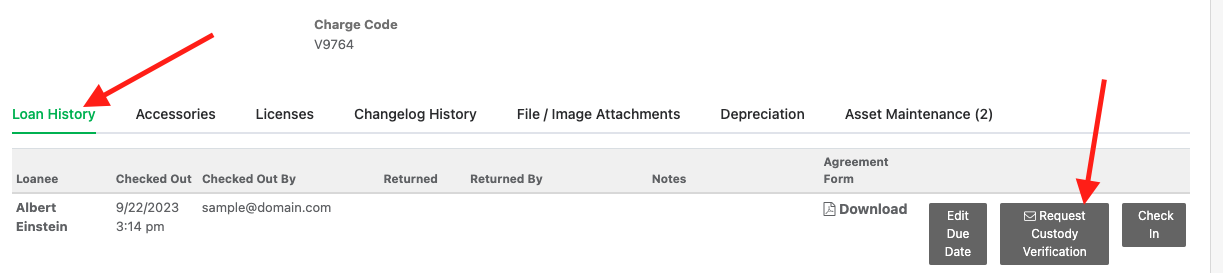
To verify that a user has custody of an asset, click the “Loan History” tab when viewing an asset. Then, click “Request Custody Verification“
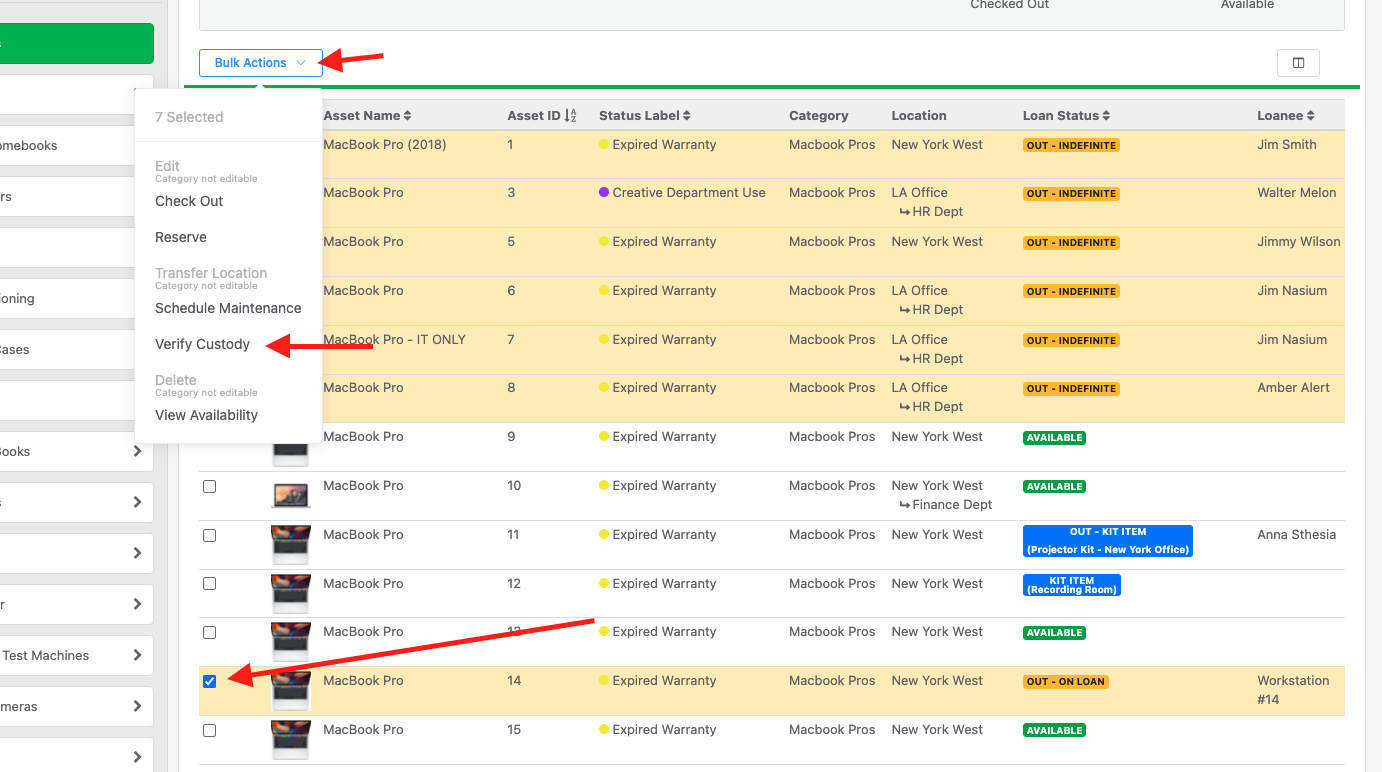
OR: Use the check boxes on the asset table to select multiple assets on loan:
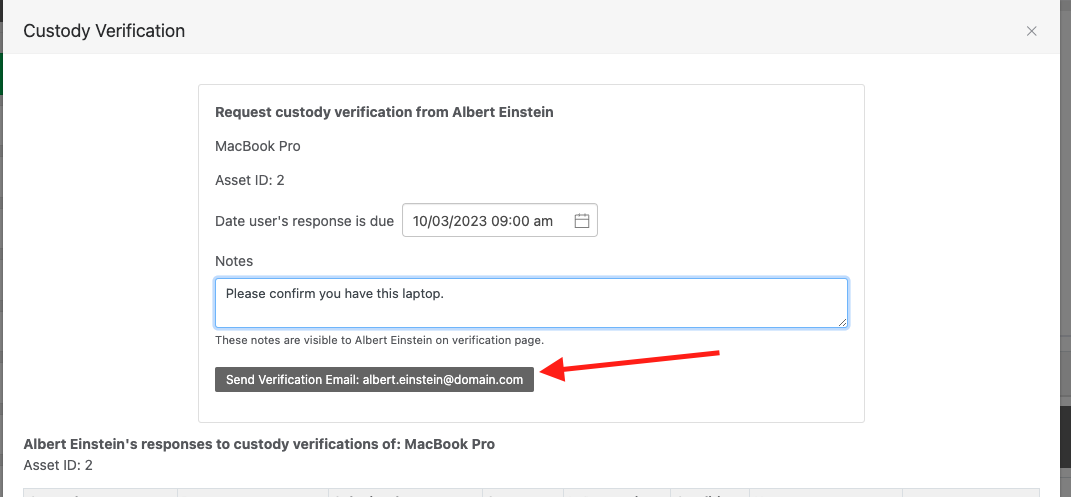
Next, set a due date and provide any notes. These notes are visible to the user. Click, “Send Verification Email:“
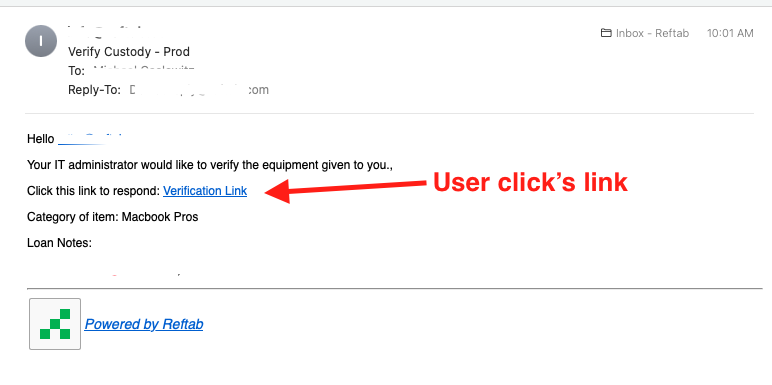
Next, the user will get an email, (these email templates are customizable). They will click the verification link which will take them to the custody form.
They will answer the questions on the form and click “Submit“. (Note, you can optionally have the user electronically sign. See Settings > Loans to enable / disable.)
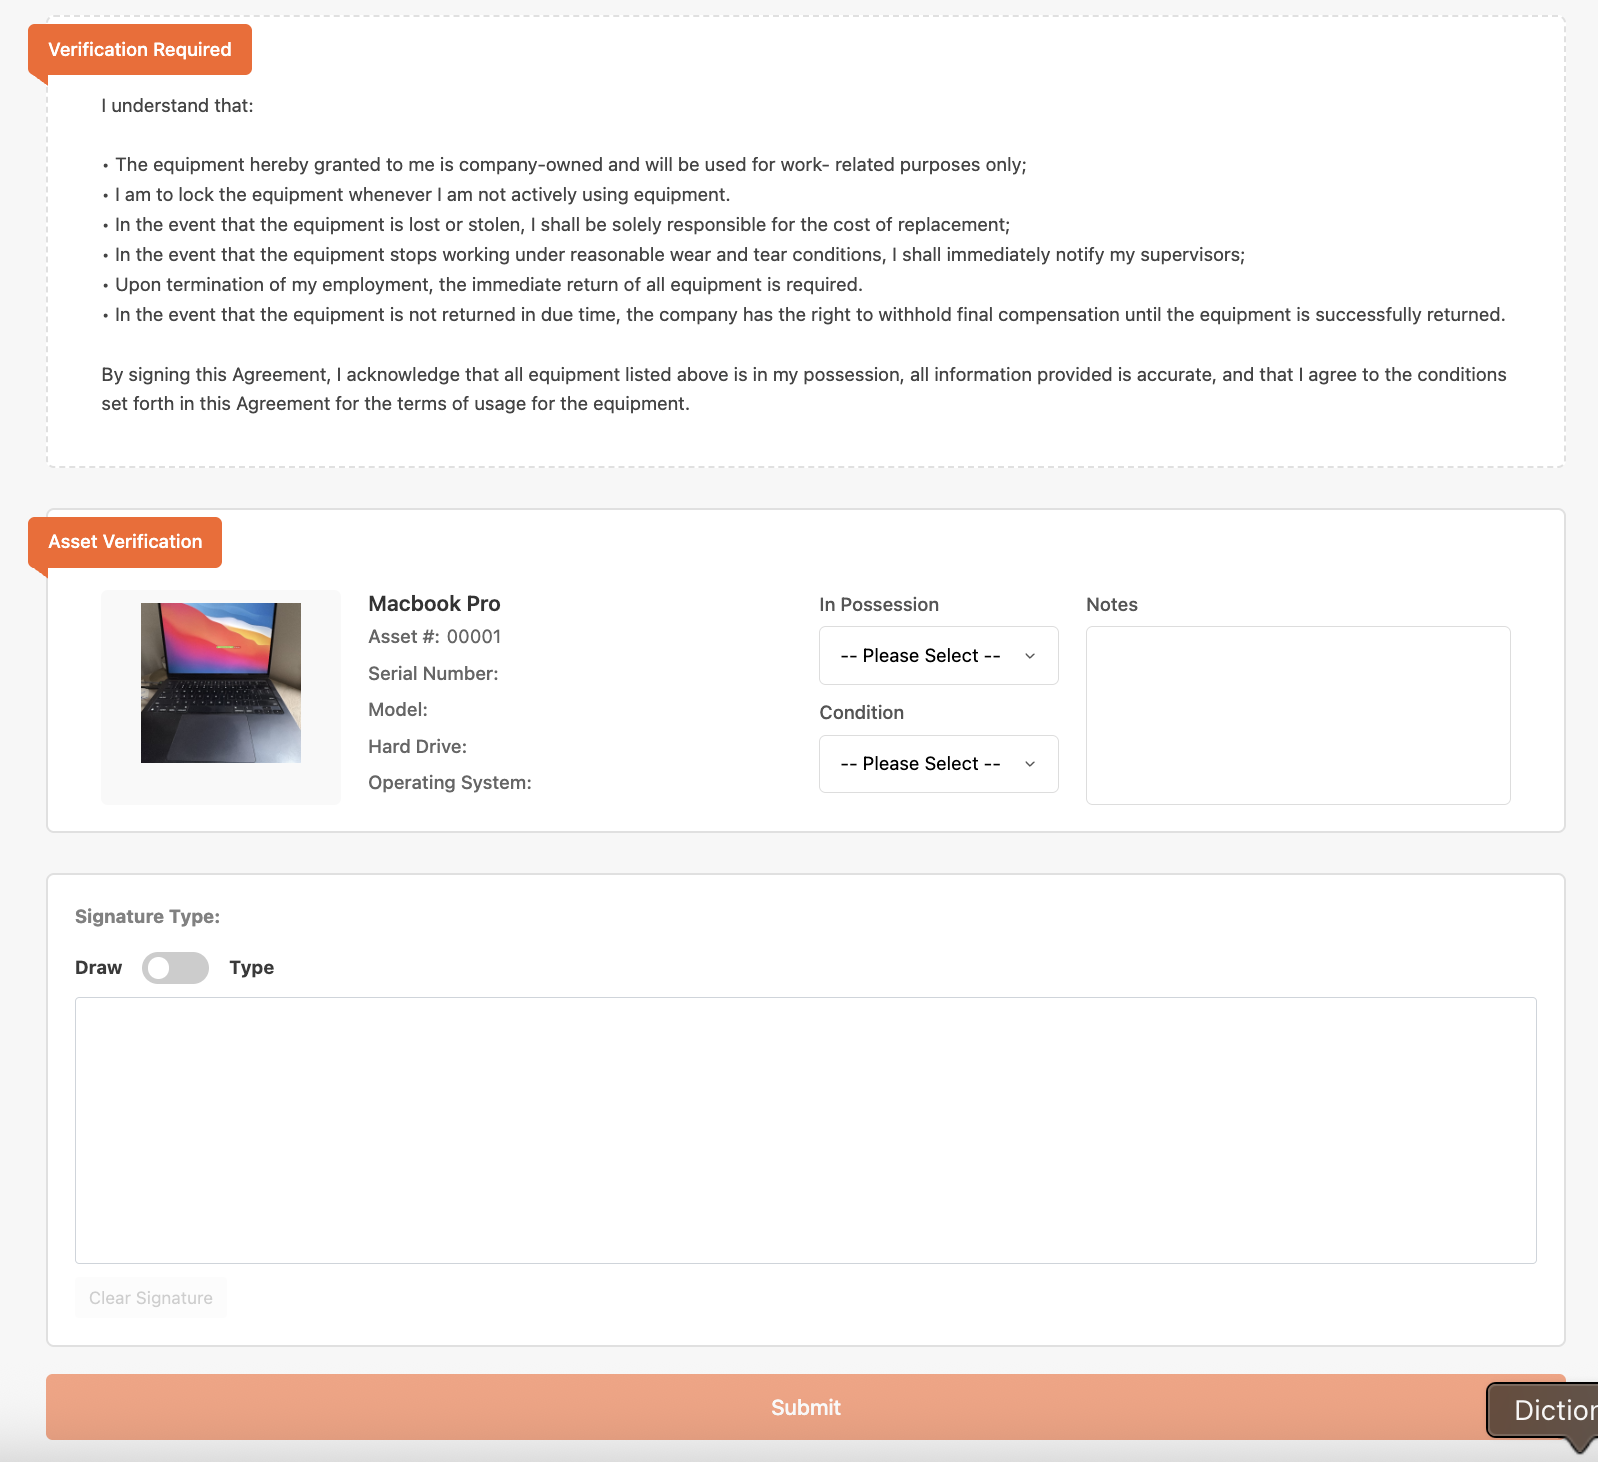
If the Loanee has more than one active verification, all verifications will be available through the same link.
Once submitted, your Reftab account will update with the results
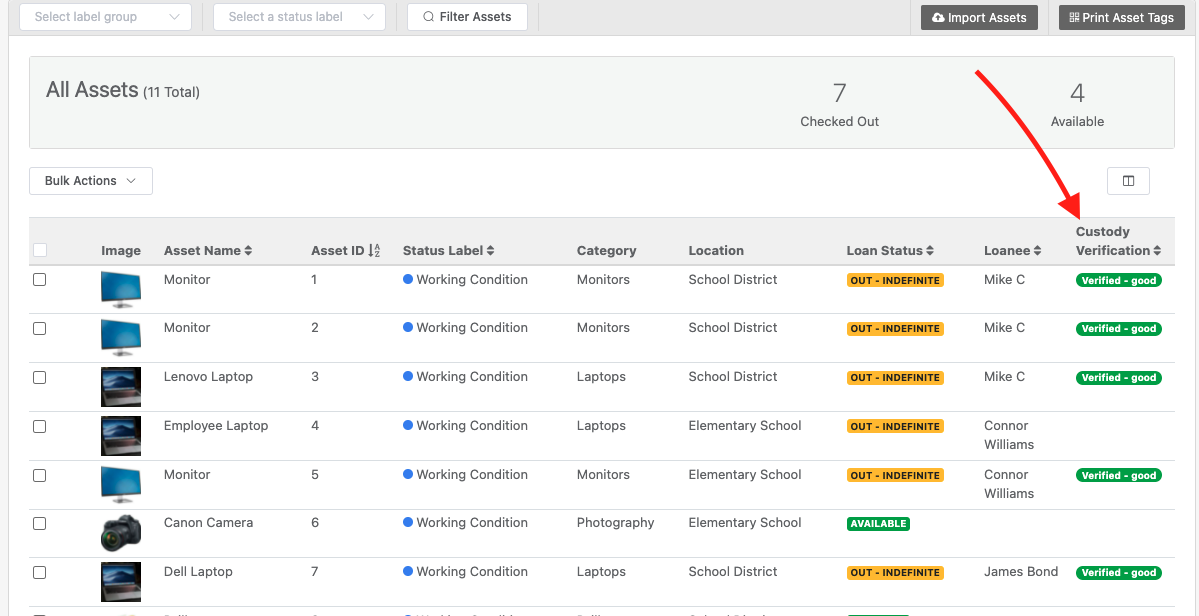
Automatically Request Custody Verification
Reftab can send custody verification emails based upon a schedule. For example 3 days after a user is assigned a laptop, automatically email the user to confirm receipt.
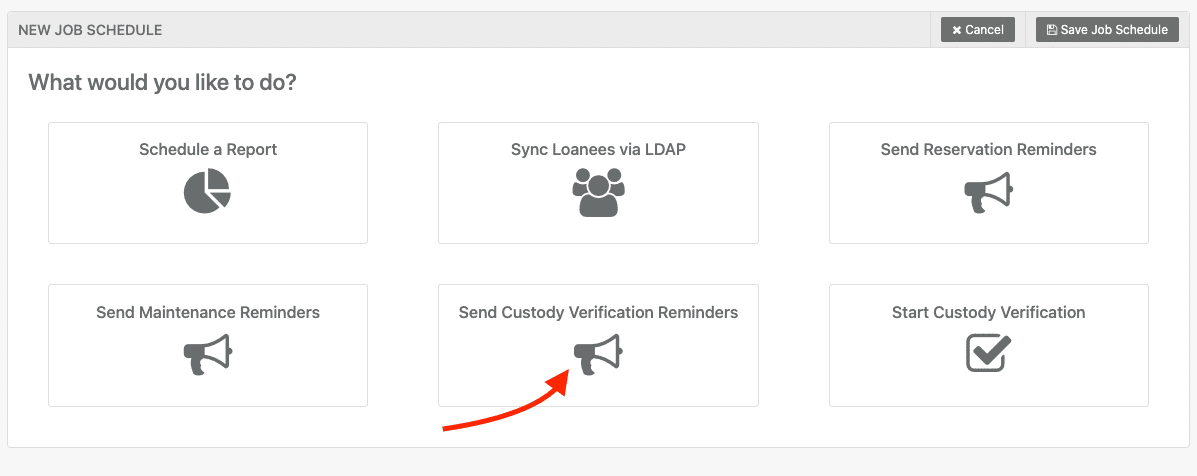
Click “Settings” > “Job Scheduler” > “New Job Schedule” > “Start Custody Verification”
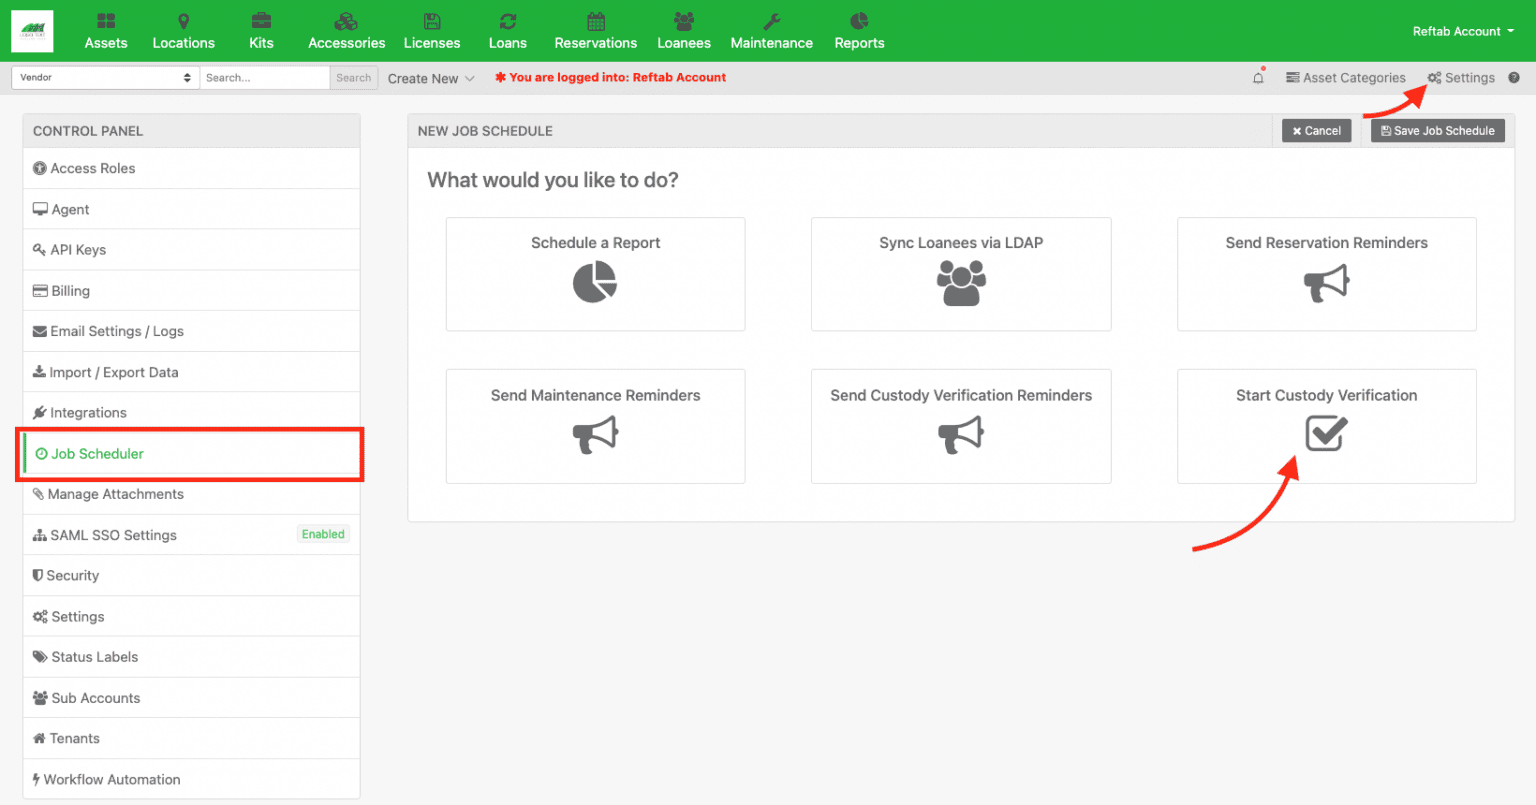
Next, give the job a name such as “Automatically Verify Assets”. You can specify the time-frame and then enable the switch for ‘Recurring Verification’.
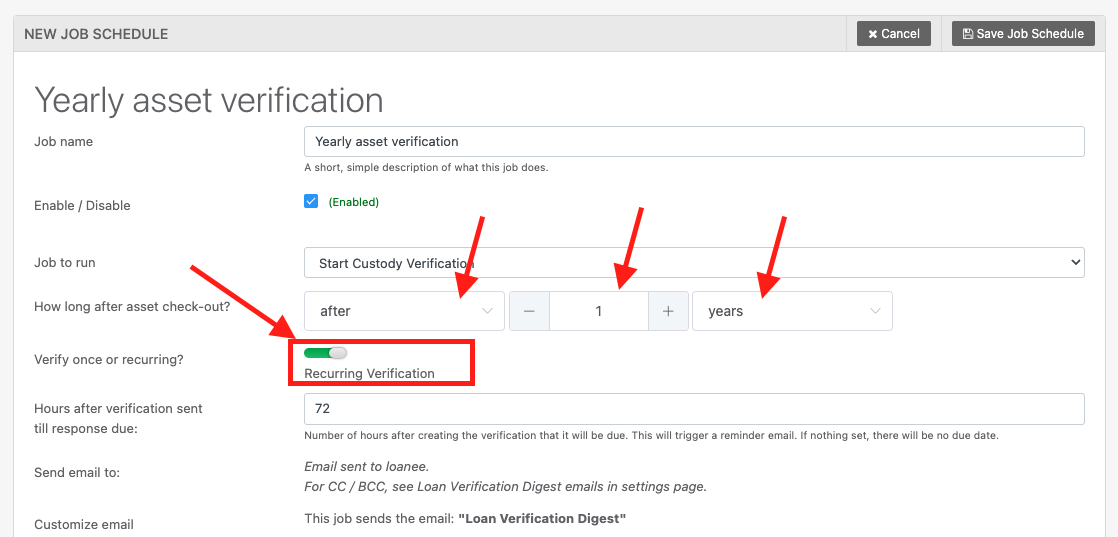
Finally, click “Save Job Schedule“.
That’s it! Reftab will work in the background to automatically email users on a recurring basis to verify custody of their assets.
Next, you should configure an automated report to alert you on the users who do not have custody of items: #verification-reports
Configure Automatic Reminder Alerts
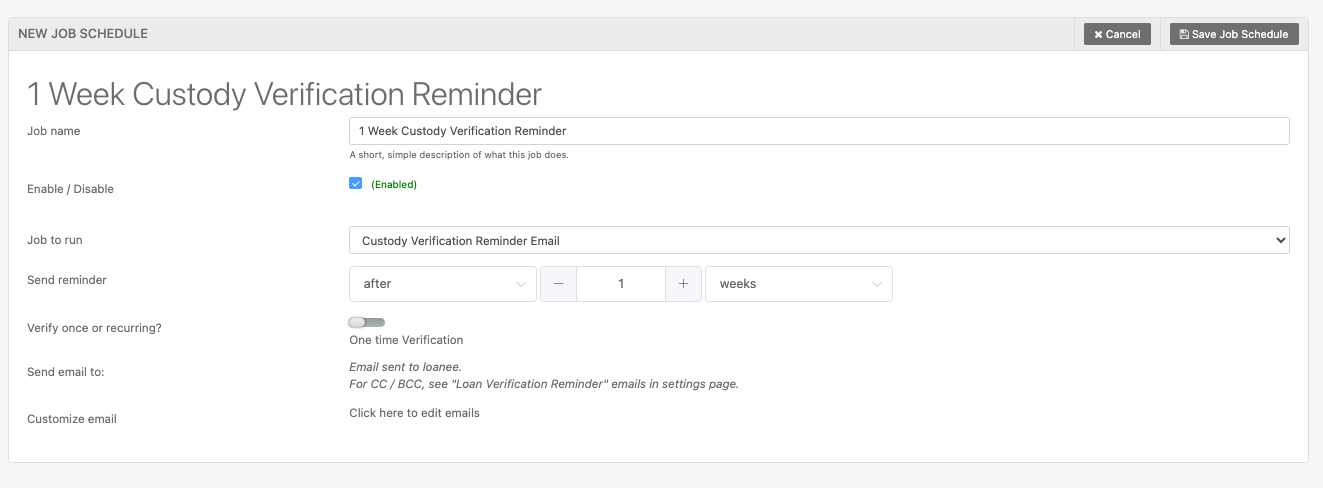
You can automate Reftab to send reminder emails if people do not respond to the original custody verification email. You can send as many as you want by creating multiple job schedules with different hour increments.
Click “Settings” > “Job Scheduler” > “New Scheduled Job” > “Send Custody Verification Reminders“
Then, give the job a name and provide a time after the verification is due:
Hardware Custody Verification Settings
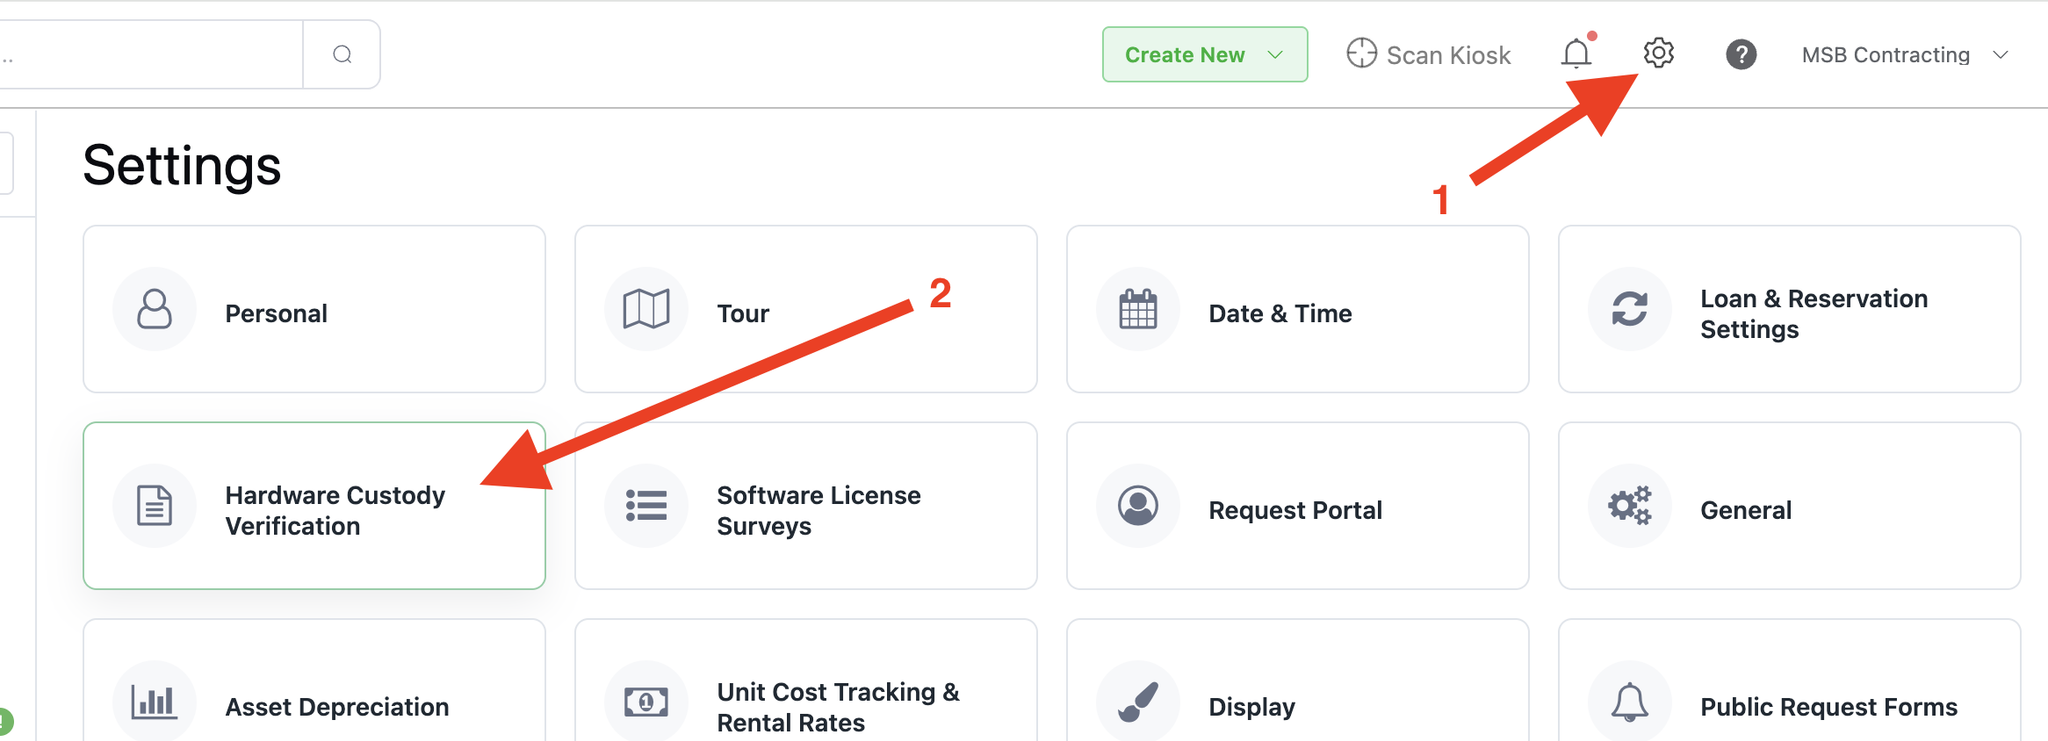
If you need to capture a users electronic signature when verifying custody, you will need to turn on the setting “Require Signature“.
Click “Settings” > “Hardware Custody Verification”
You’ll be able to:
1. Configure fields to display on the user’s verification forms
2. Require signature
3. Generate PDF’s automatically
4. Customize an agreement statement
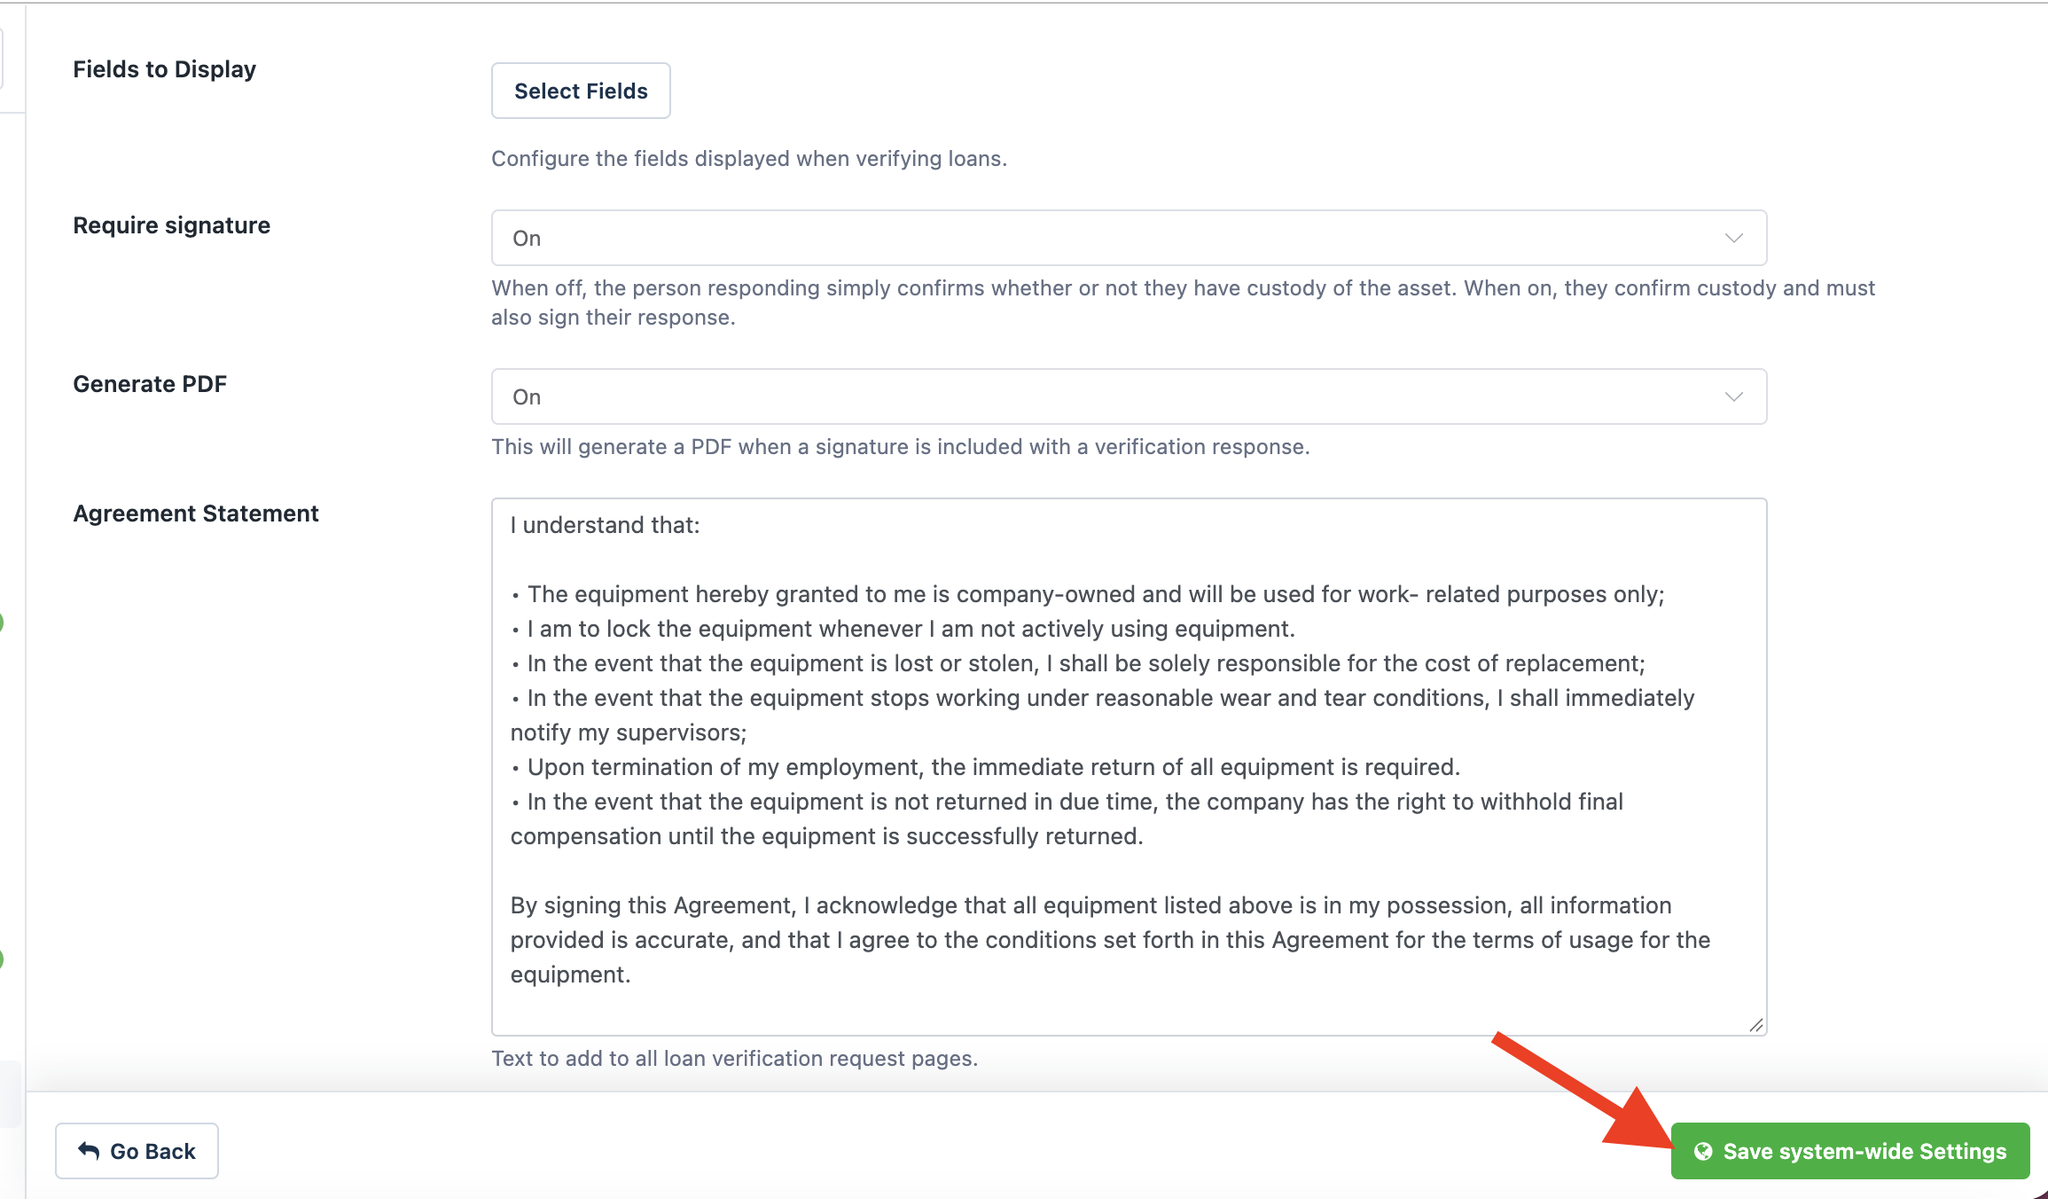
Click “Save system-wide settings” when done.
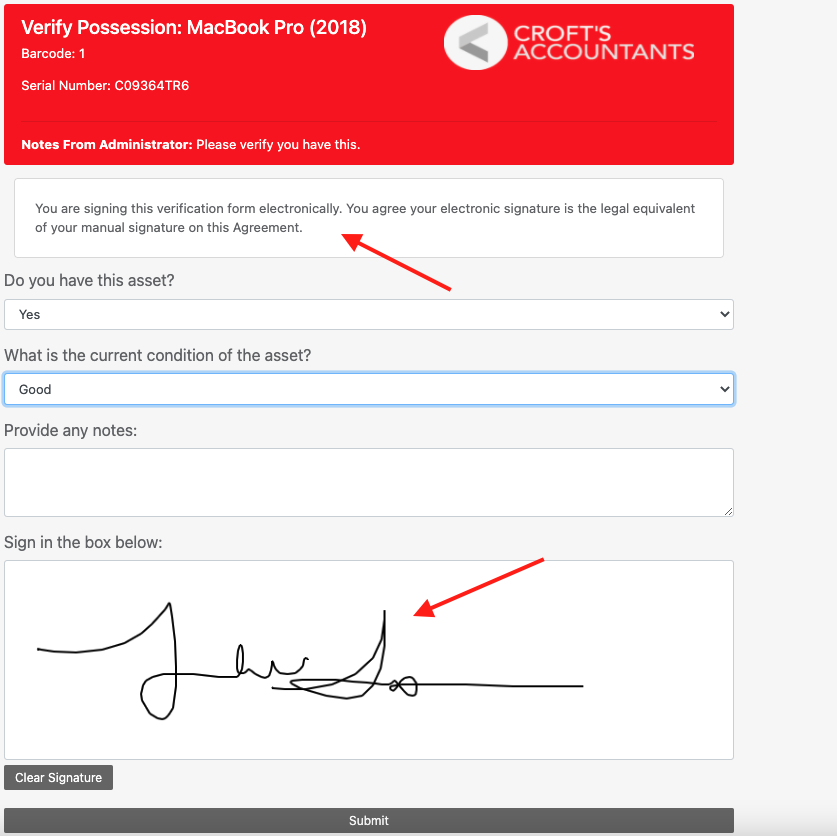
Your verification forms will now include a place for the user to electronically sign and display your response statement:
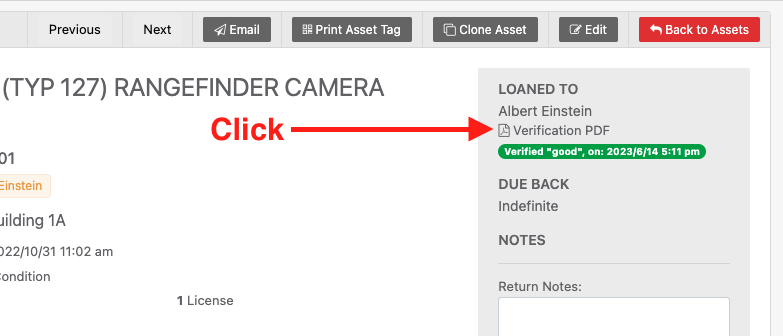
Once a user submits, Reftab administrators can view / download the generated PDF. Visit any asset or a loanee and click “Verification PDF”
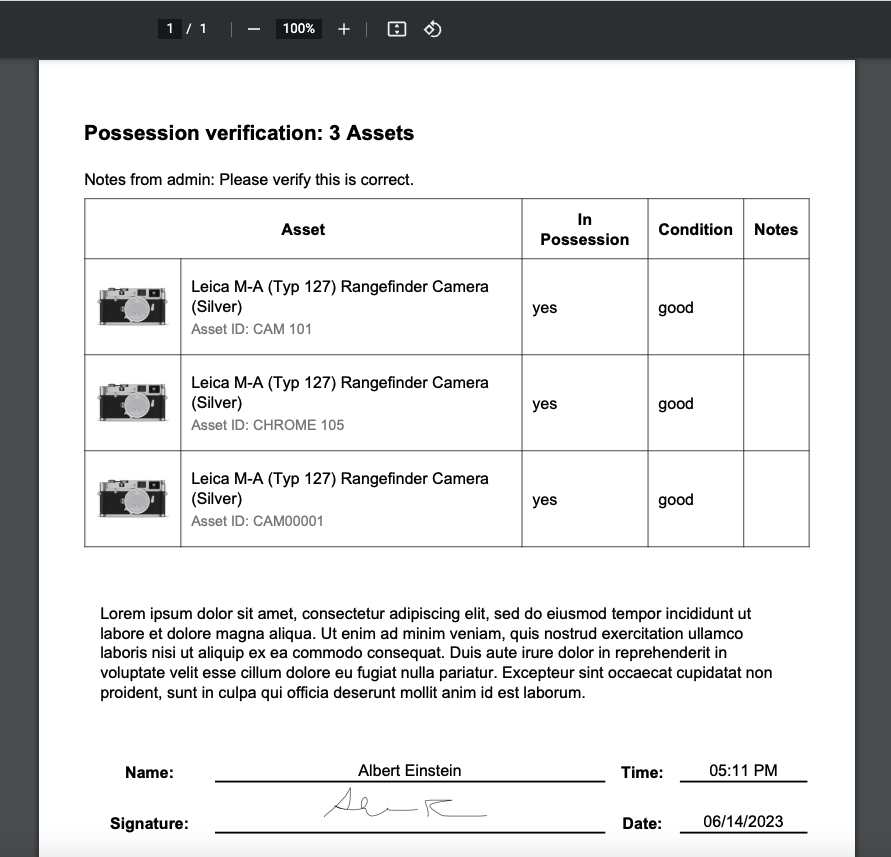
A PDF will open in a new tab for you to download. Otherwise, all PDFs are saved to the historical record of each custody verification.
How to Customize the Verification Form
Adding Custom Branding
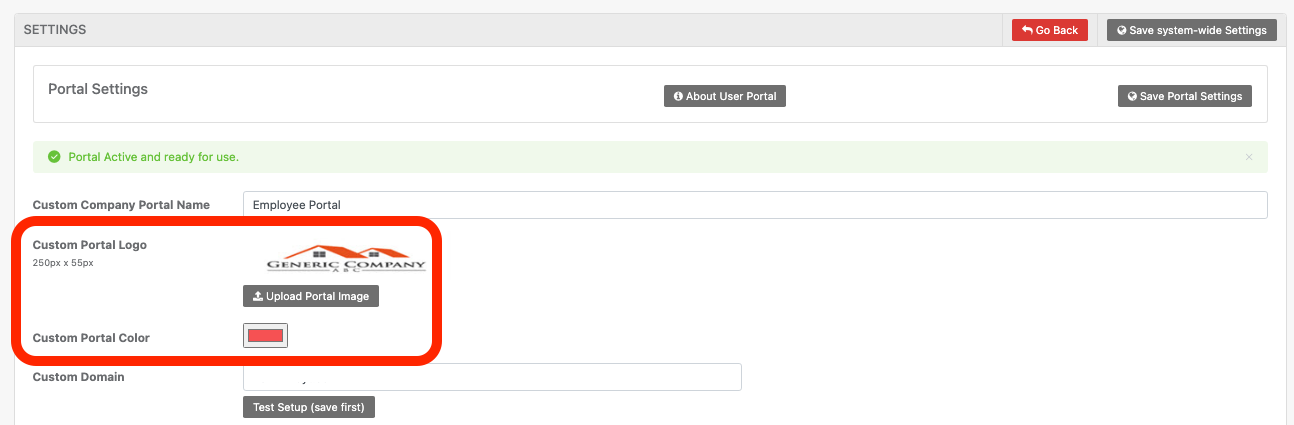
The branding used for the Custody Verification is the same branding used for the Request Portal. To customize this, head to Settings > Request Portal
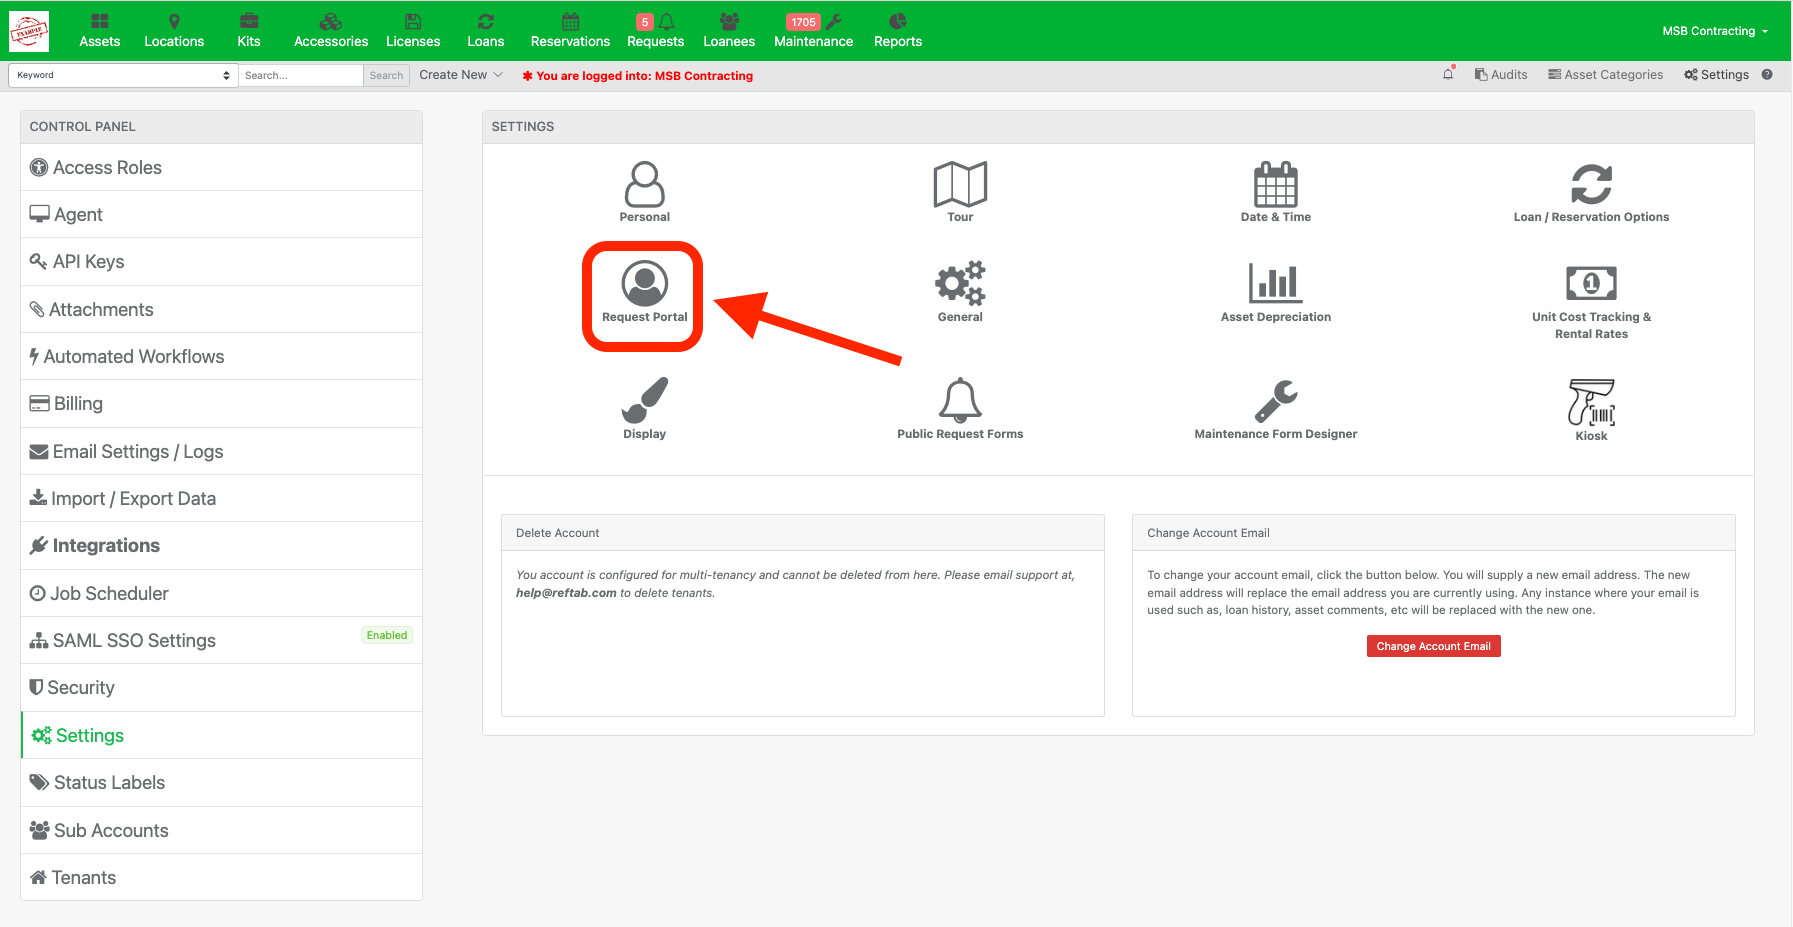
From here, you can upload an image and customize the header color:
Run Reports to See Who Has Not Replied to Verification
Click “Reports” > “New Report”
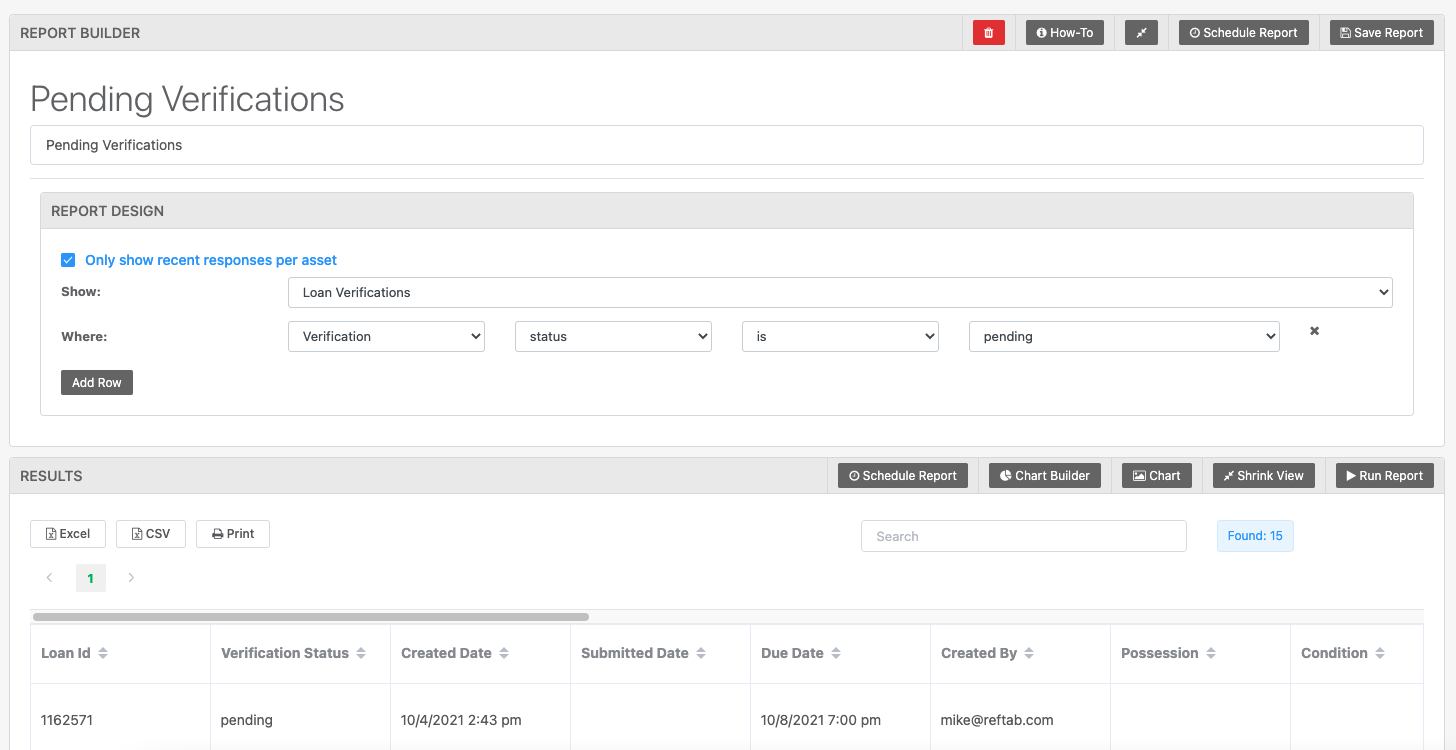
Give the report a name a then build a report like the following:
Show “Loan Verifications“
Where “Verification status is pending“
Check the box for “Only show recent responses per asset” then click “Run Report” and results will appear below.
Need help? We're here for you
For any questions or assistance, feel free to reach out to us.
Ready to simplify IT asset management?
No credit card. No watered-down trial. Create a free account and see firsthand what Reftab can do.