How To: Integrate JAMF with Reftab
You can integrate Jamf with Reftab so that assets are created automatically in Reftab. By doing so, you’ll have an automated way to add data into Reftab and take advantage of your existing infrastructure. This guide will walk you through how to setup the integration in just a few simple steps:
- JAMF Settings
- Finishing the Setup in Reftab
- Field Mappings
- Tagging assets no longer in Jamf
- Viewing Installed Software
Know Before You Start
Before enabling the Jamf integration, confirm that your existing assets that will be managed by Jamf are prepared with the correct fields.
To prevent duplicate assets and ensure updates apply to the correct records, assets must include:
- Serial Number
- Jamf ID
Reftab relies on this combination to uniquely identify Jamf-managed devices during sync.
JAMF Settings
- First log into your JAMF instance as an administrator, and create a new API Role and Client
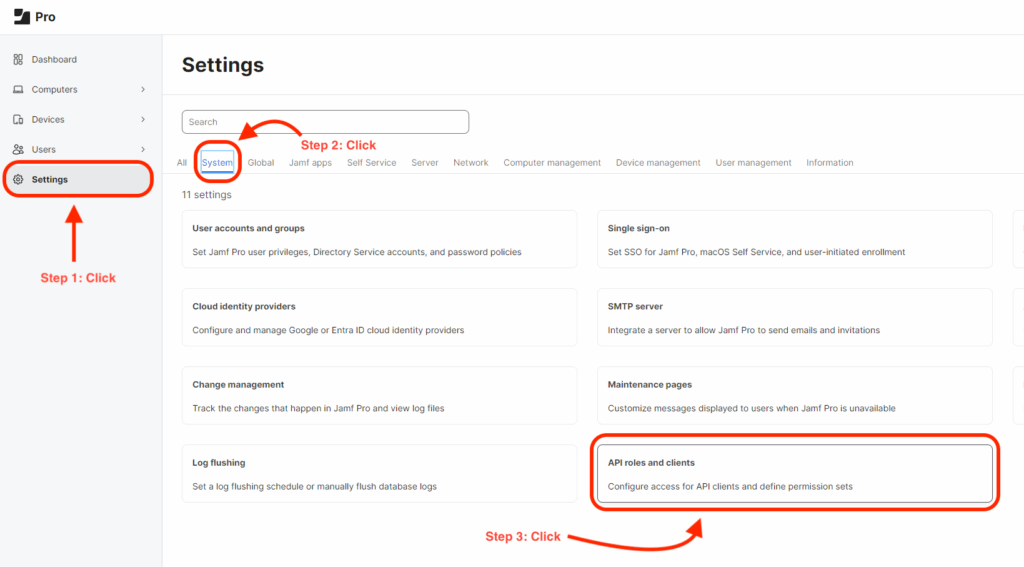
Click “Settings” > “System” > “API roles and clients“
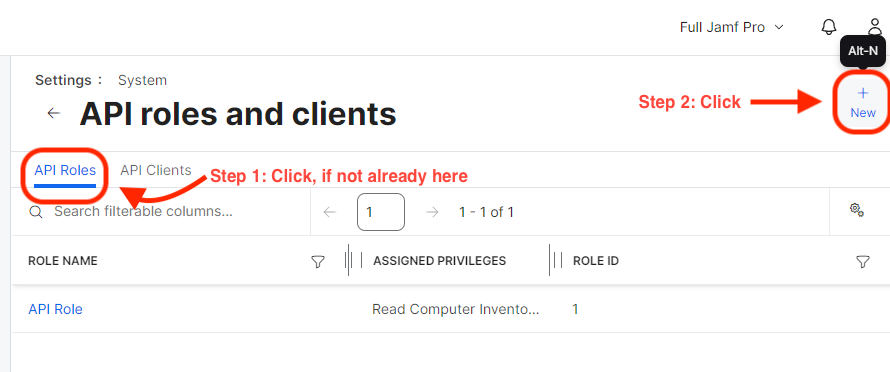
- Next, we will create the API Role
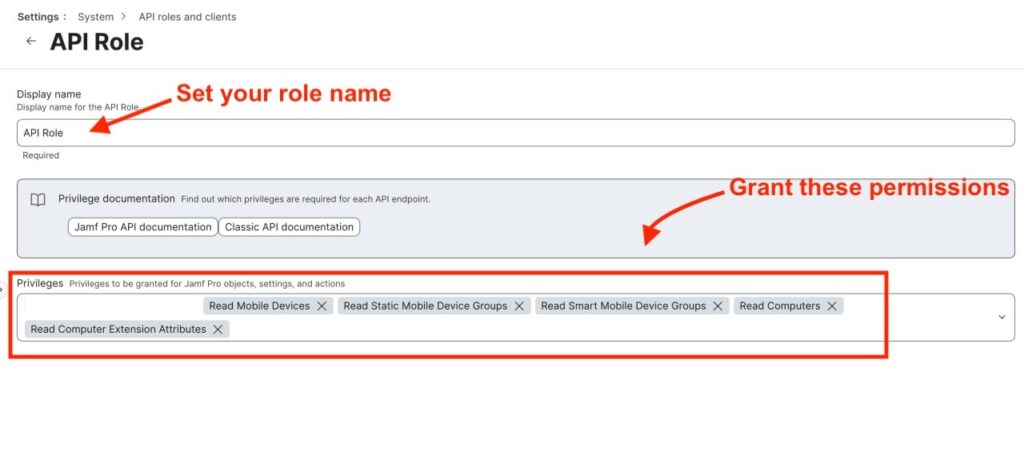
Click “New“, then give the role a name, “Reftab” will suffice. Ensure that they role has privileges as depicted in the screenshot below. The Reftab role should have “Read Mobile Devices” and “Read Computers“.
Grant permissions for:
- Read Mobile Devices
- Read Static Mobile Device Groups
- Read Smart Mobile Device Groups
- Read Computers
- Read Computer Extension Attributes
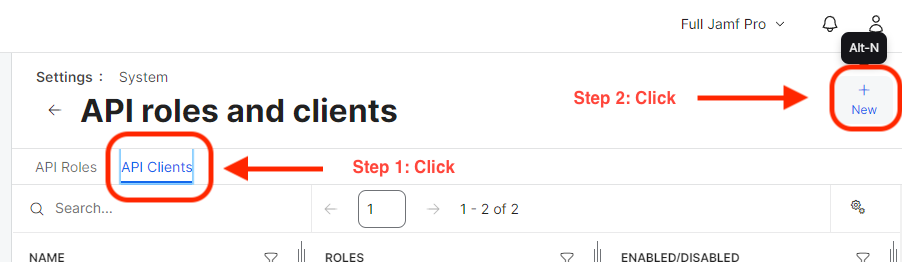
- Next, click the “API Clients” tab
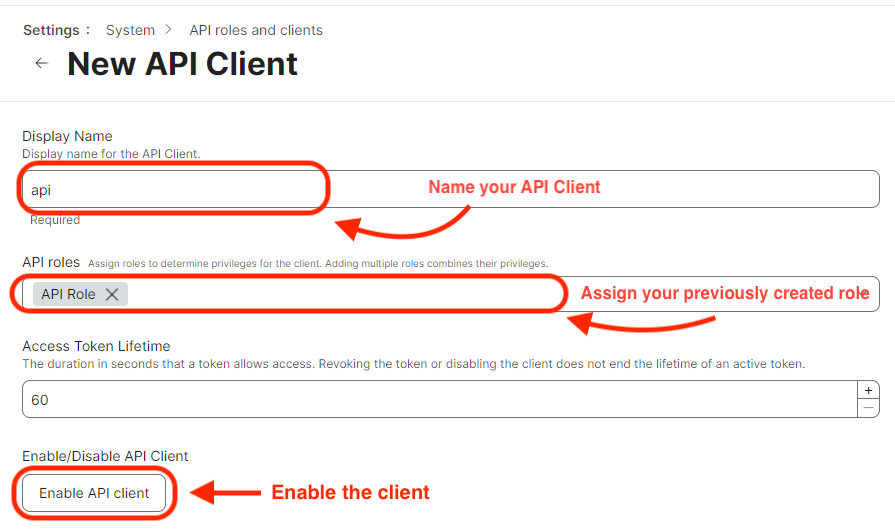
Click “New“, then give the API Client a name, “Reftabapi” will work. Now assign the newly created role to the client. Lastly, ensure you enable the client!
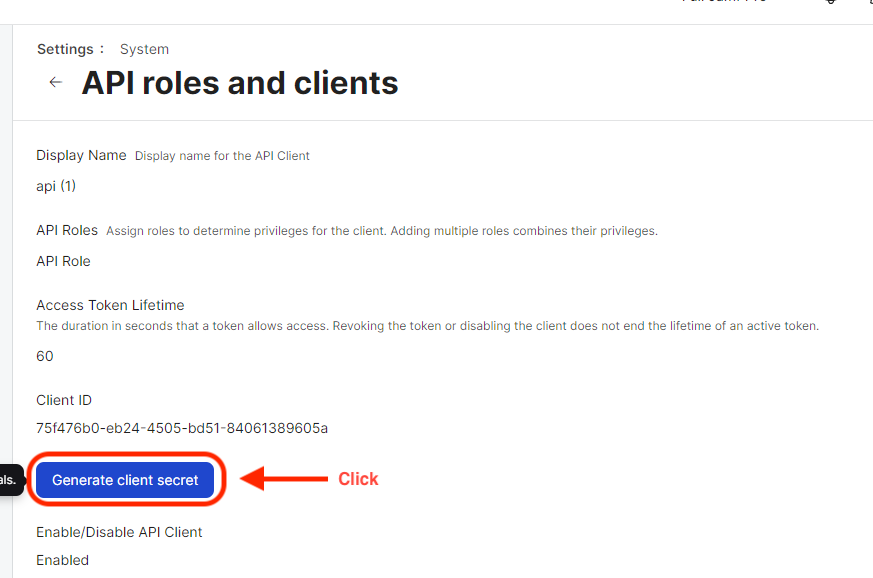
- Now you will want to click “Generate Client Secret“
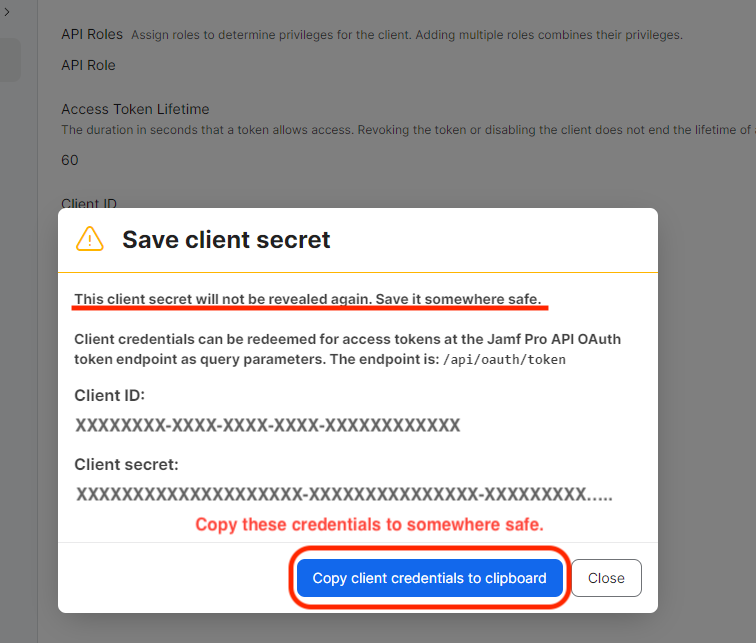
Ensure that you copy the client credentials to a notepad as this will be needed in the next steps.
Finishing the Setup in Reftab
- Sign into Reftab as an administrator: https://www.reftab.com/login
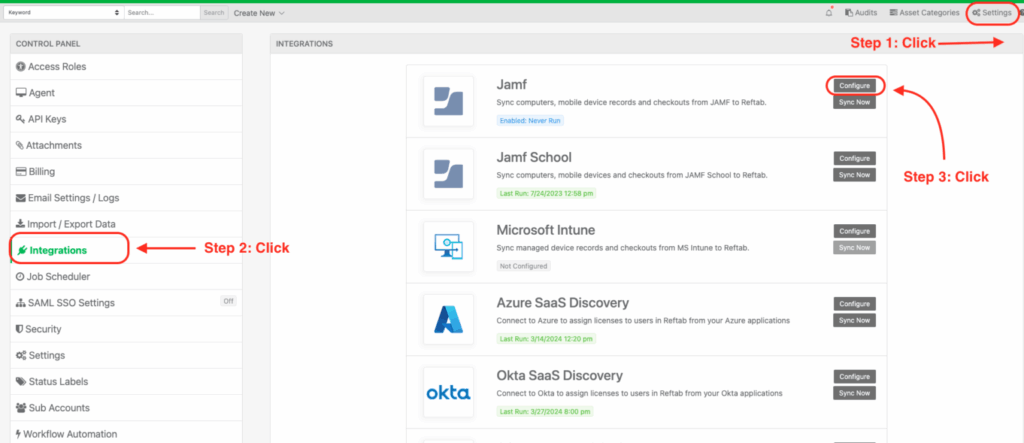
Click “Settings” > “Integrations” > find “Jamf” > click “Configure“
Next fill out your host as your JAMF pro instance. Input both your “Client ID” and “Client Secret” obtained from the previous steps. Select a “Default Location” and choose whether to turn on “Auto Assign Assets” and optionally select an Asset Name Source Field. Click “Test” to test the connection and when successful click, “Save Jamf Settings“.
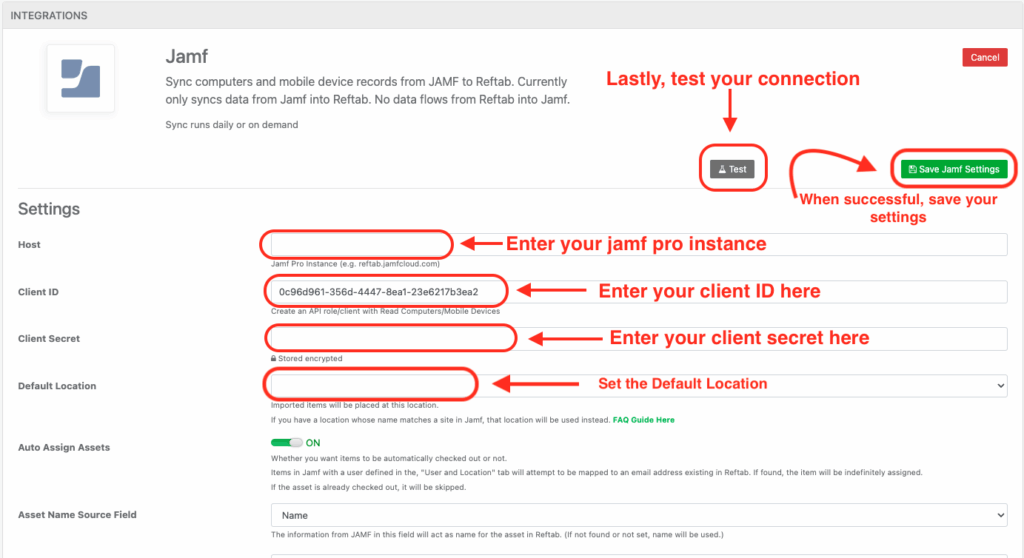
That’s it! The connection between Jamf and Reftab is established. Click the “Sync Now” button on the Jamf section here:

Field Mappings
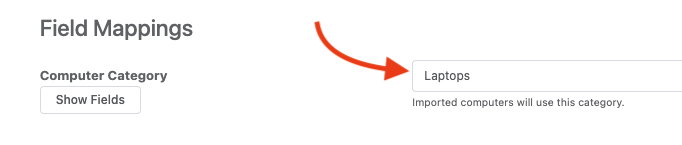
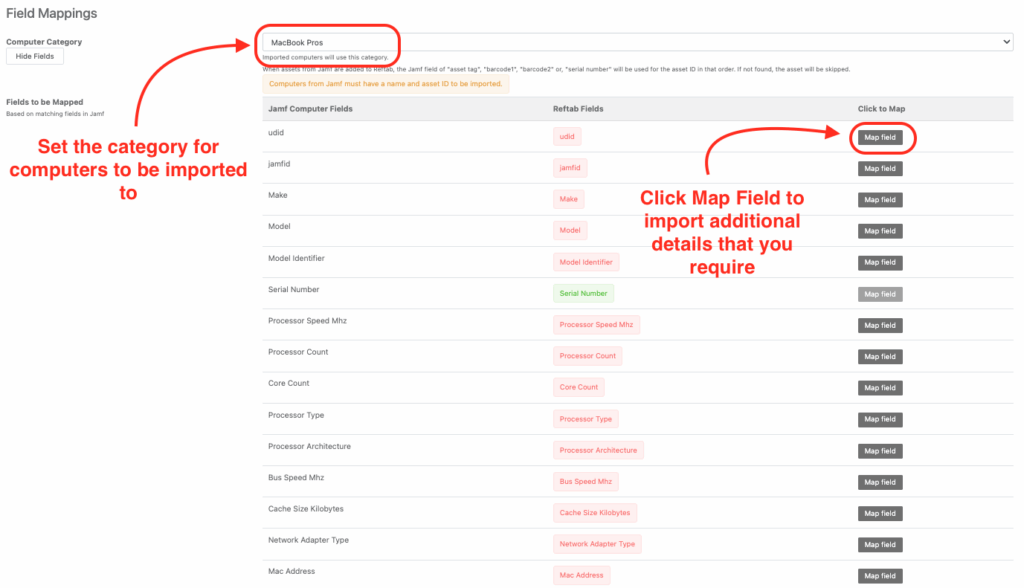
Under the section for field mappings, select a category that you want the integration to save devices to.
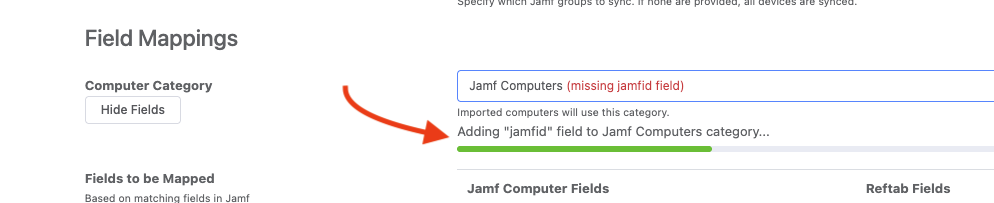
When you select your category, you will see Reftab automatically create a field called JamfID. This field is set up for you, but note that it is required and as such should not be edited or removed.
You will notice additional fields that you can map like vendors, serial number, MAC address, warranty dates, etc. Click the, “Map Field” button on any field listed in the available fields section. The field will be saved to your selected default category. When Jamf syncs, those fields will populate with values from Jamf devices.
Tagging assets no longer in Jamf
The “Jamf Linked” field shows if a device is still in Jamf. It’s useful for tracking devices that were in Jamf but have been removed, like after retiring them. By mapping this field, you can see on the asset if it’s no longer in Jamf, allowing you to automate actions like archiving or running reports to keep Reftab data accurate.

Viewing Installed Software
When viewing an asset synced with Jamf, you can click the tab “Licenses and Software“.

You’ll see a table showing a list of applications installed on the computer. You’ll also see column labeled “Vulnerabilities“. Reftab checks the application and the version against CVE databases. If a vulnerability is found, you’ll see it listed in the “Vulnerabilities” column.
Important Notes
Default system emails for “check out” and “return” do not trigger by default when JAMF assigns or returns assets. If a user wants to use emails or any other actions, workflows can be used to achieve this purpose.
Suggested Next Steps
How to automatically update asset details and fields using workflows
Leverage automated workflows to automatically update fields and details on assets based on things like past maintenance dates, and also chaining workflows together!
How to Auto-Assign Asset Locations via Loanee Fields in Workflows
Utilize automated workflows to update asset locations based on dynamic custom loanee fields.
Suggested Next Integration – Software License Tracking
Enhance your asset management by integrating Reftab with Microsoft Entra or Okta for seamless SaaS discovery and utilization tracking. This setup builds on your current infrastructure, automating the management of both hardware and software assets.
Need help? We're here for you
For any questions or assistance, feel free to reach out to us.
Your assets, simplified. Begin your journey with us!
50 assets free forever with unlimited inventory & software tracking. Includes email alerts, mobile apps, reports, custom asset tags and more.