
How to setup SCIM with Microsoft Entra ID (Azure Active Directory)
Reftab’s SCIM guide explains how IT teams can automate user provisioning, deprovisioning, and user data updates between Microsoft Entra and Reftab. As an IT asset management tool that integrates with Microsoft Intune and Microsoft Entra ID, Reftab helps organizations keep users, devices, software access, and asset assignments accurate without relying on manual updates.
By combining SCIM provisioning with Intune-based asset tracking, IT teams can improve onboarding, offboarding, compliance, and overall visibility across their hardware and software inventory.
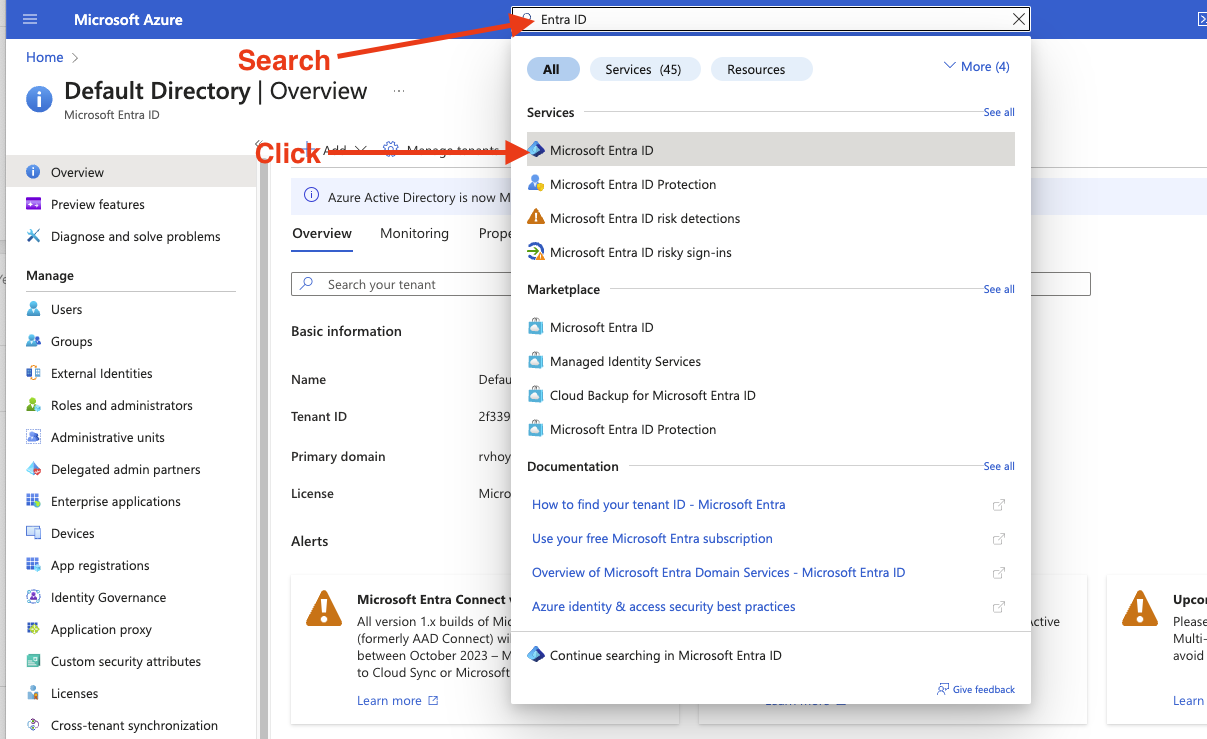
1. Login to Azure and perform a search for “Entra ID” and click “Microsoft Entra ID”
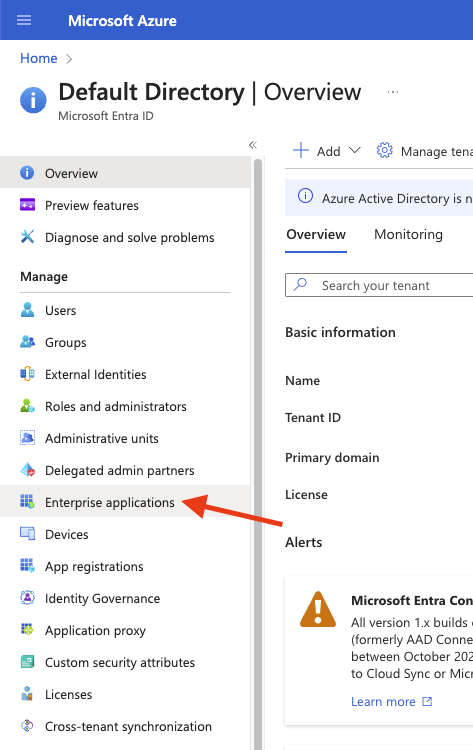
2. Click “Enterprise Applications”
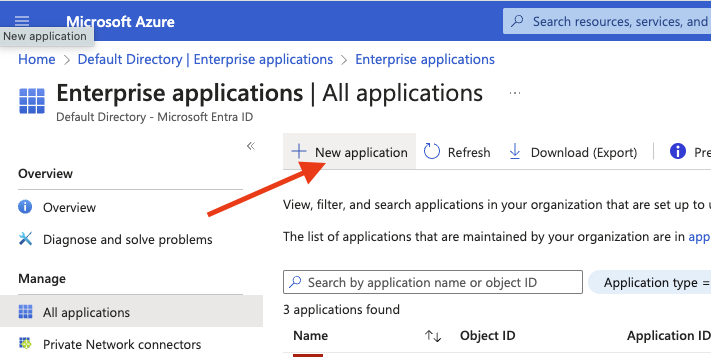
3. Click “New Application”
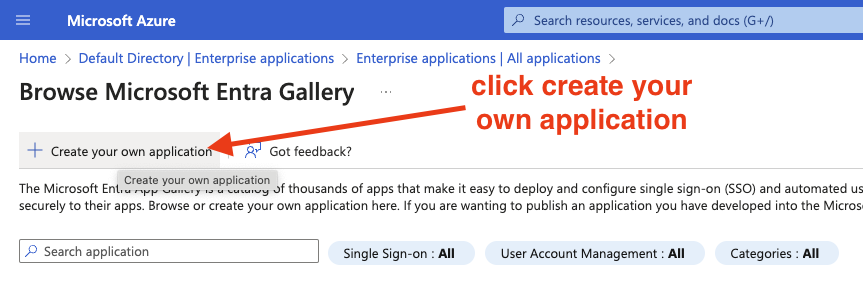
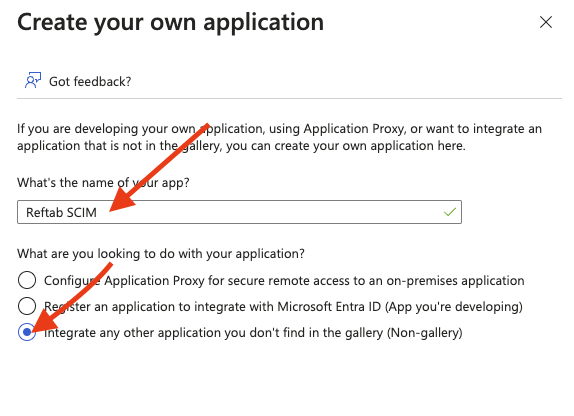
4. “Create your own application”
5. Name your application
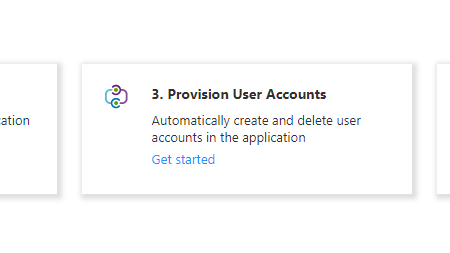
6. In the new app, click Provision User Accounts
7. Click “Connect your application“

On the next page, you’ll see inputs to save your Tenant URL and Secret token.
8. Fill out Tenant URL and secret token from information in your Reftab Account.
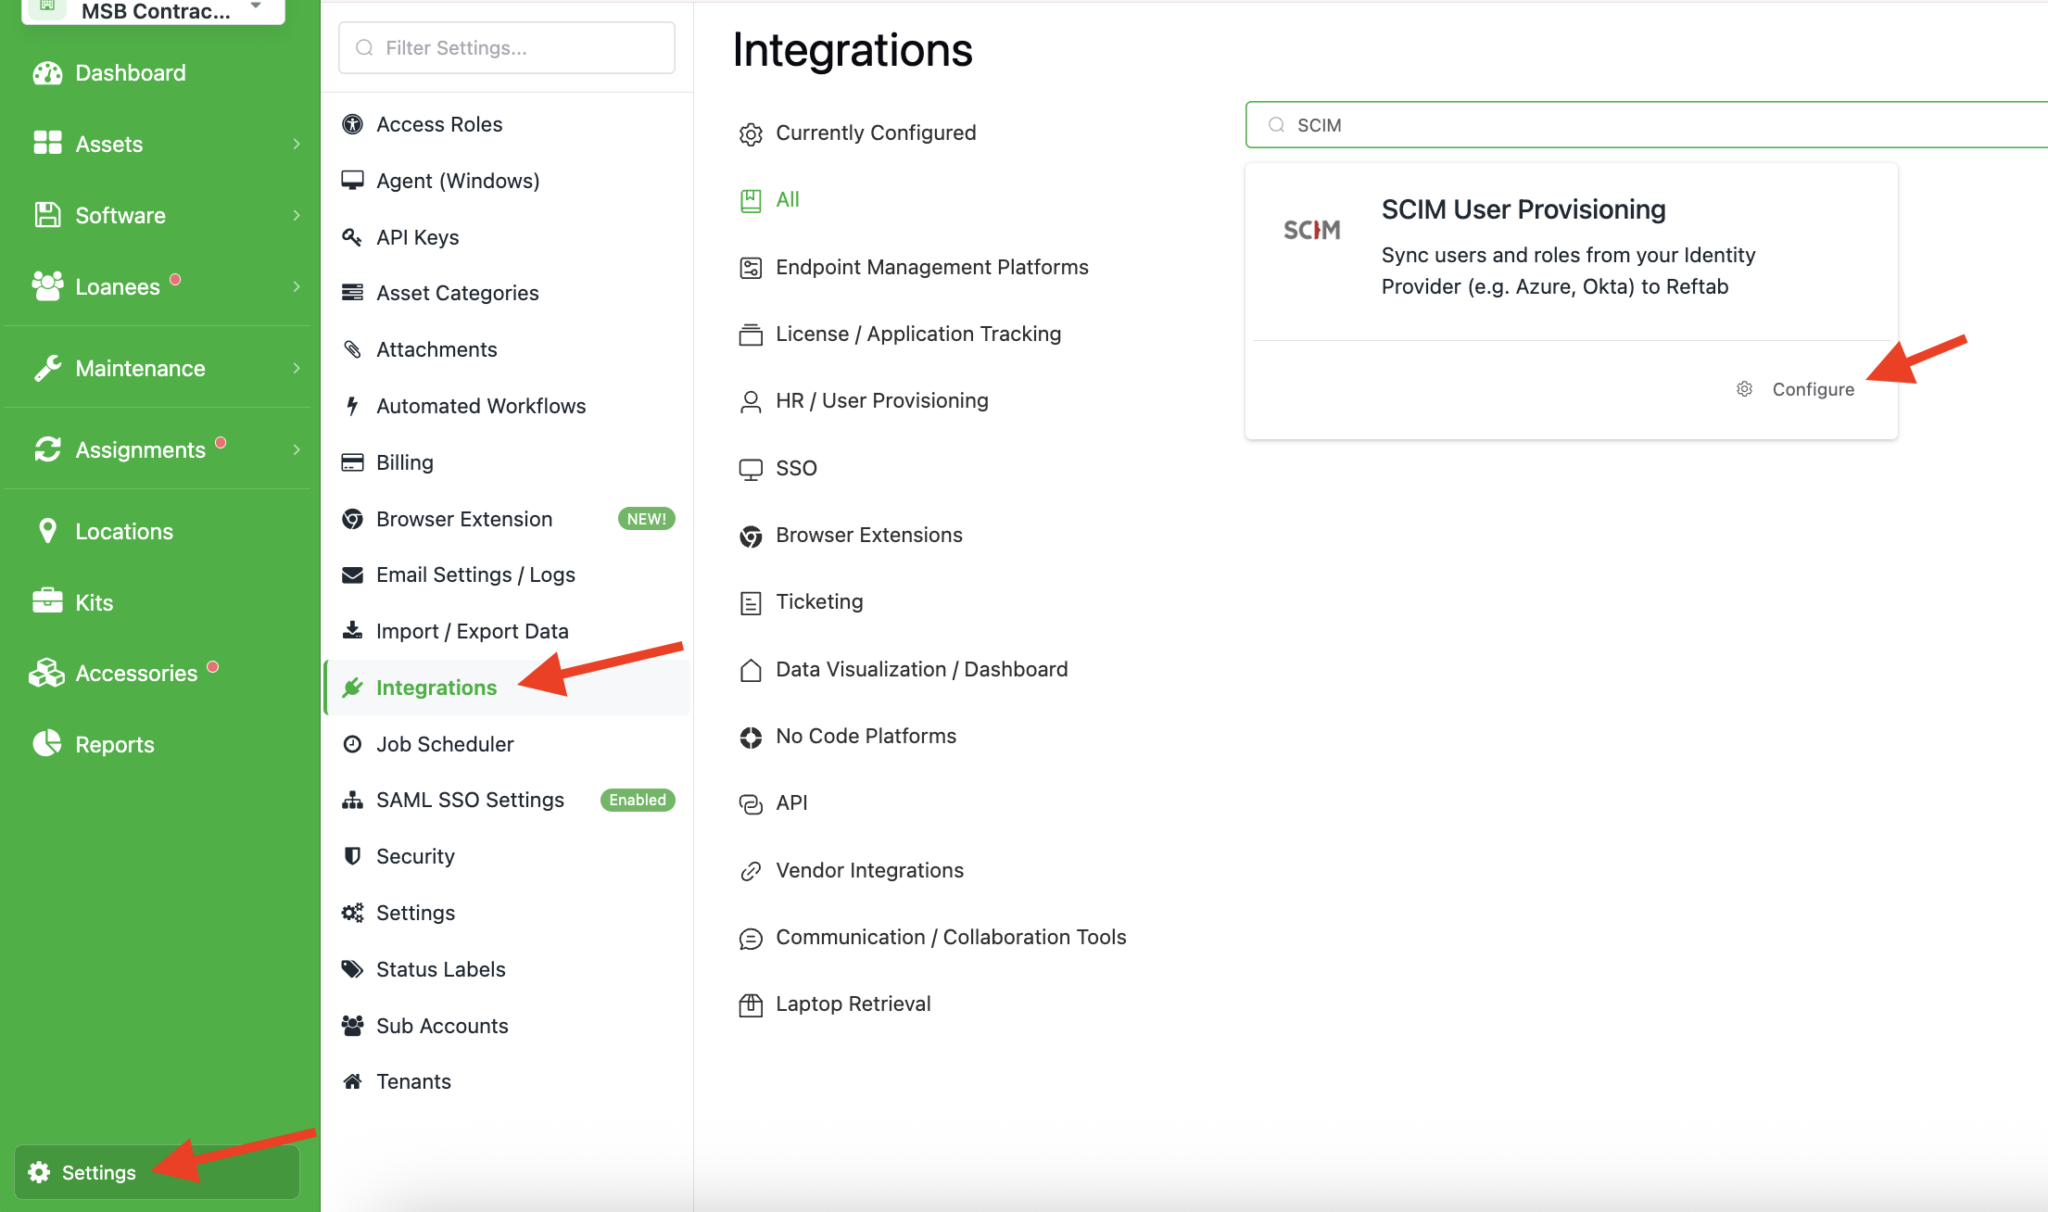
Log into Reftab as an administrator and click, “Settings” > “Integrations” > “Configure” next to SCIM
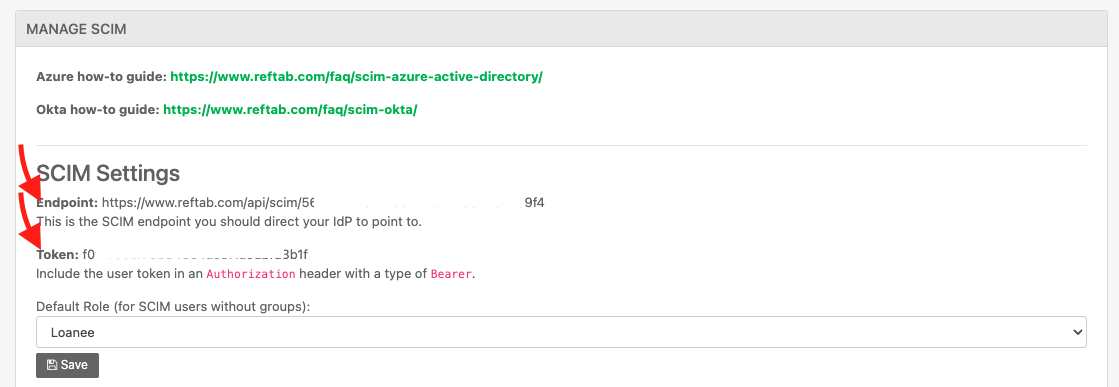
Copy Token and paste it into “Secret Token” in Azure
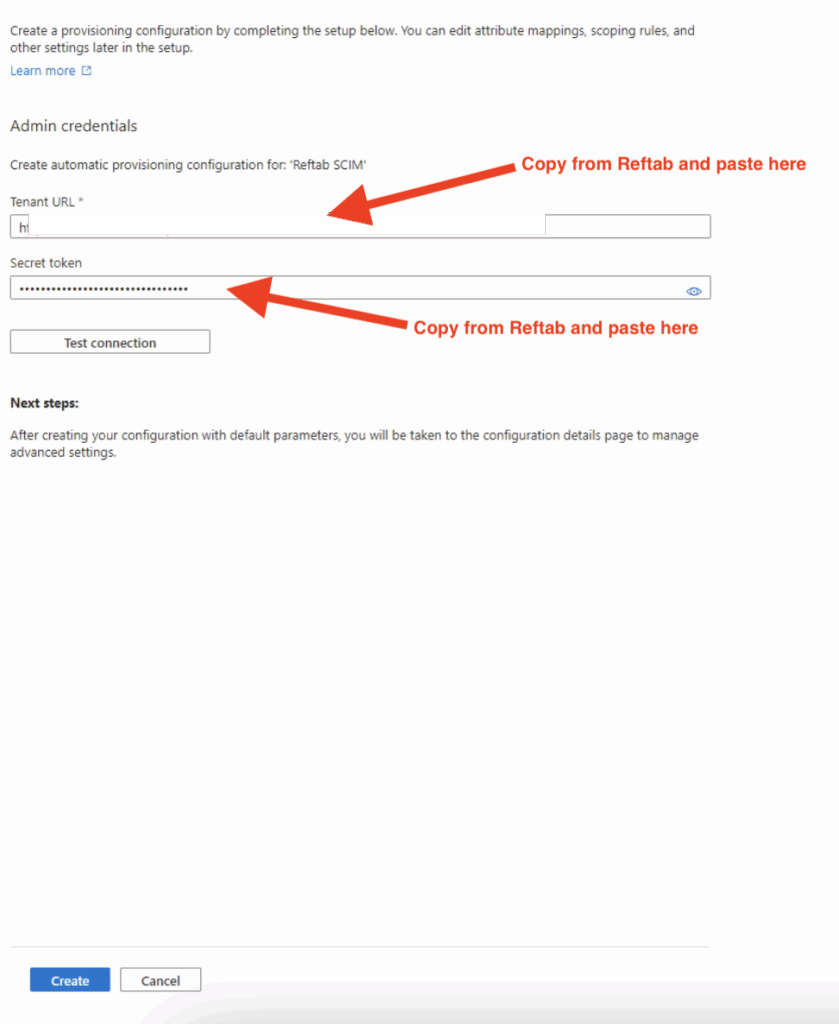
Finally, click “Test Connection” then click “Create” and “Save“.
9. Go to Provision Azure Active Directory User Mappings
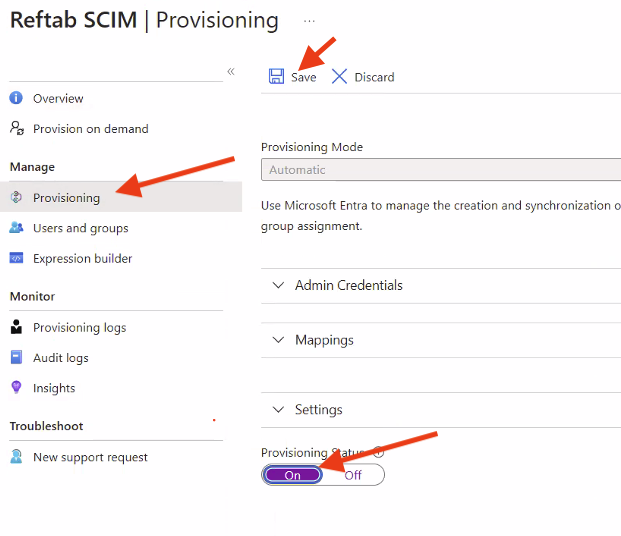
Click on “Provisioning“
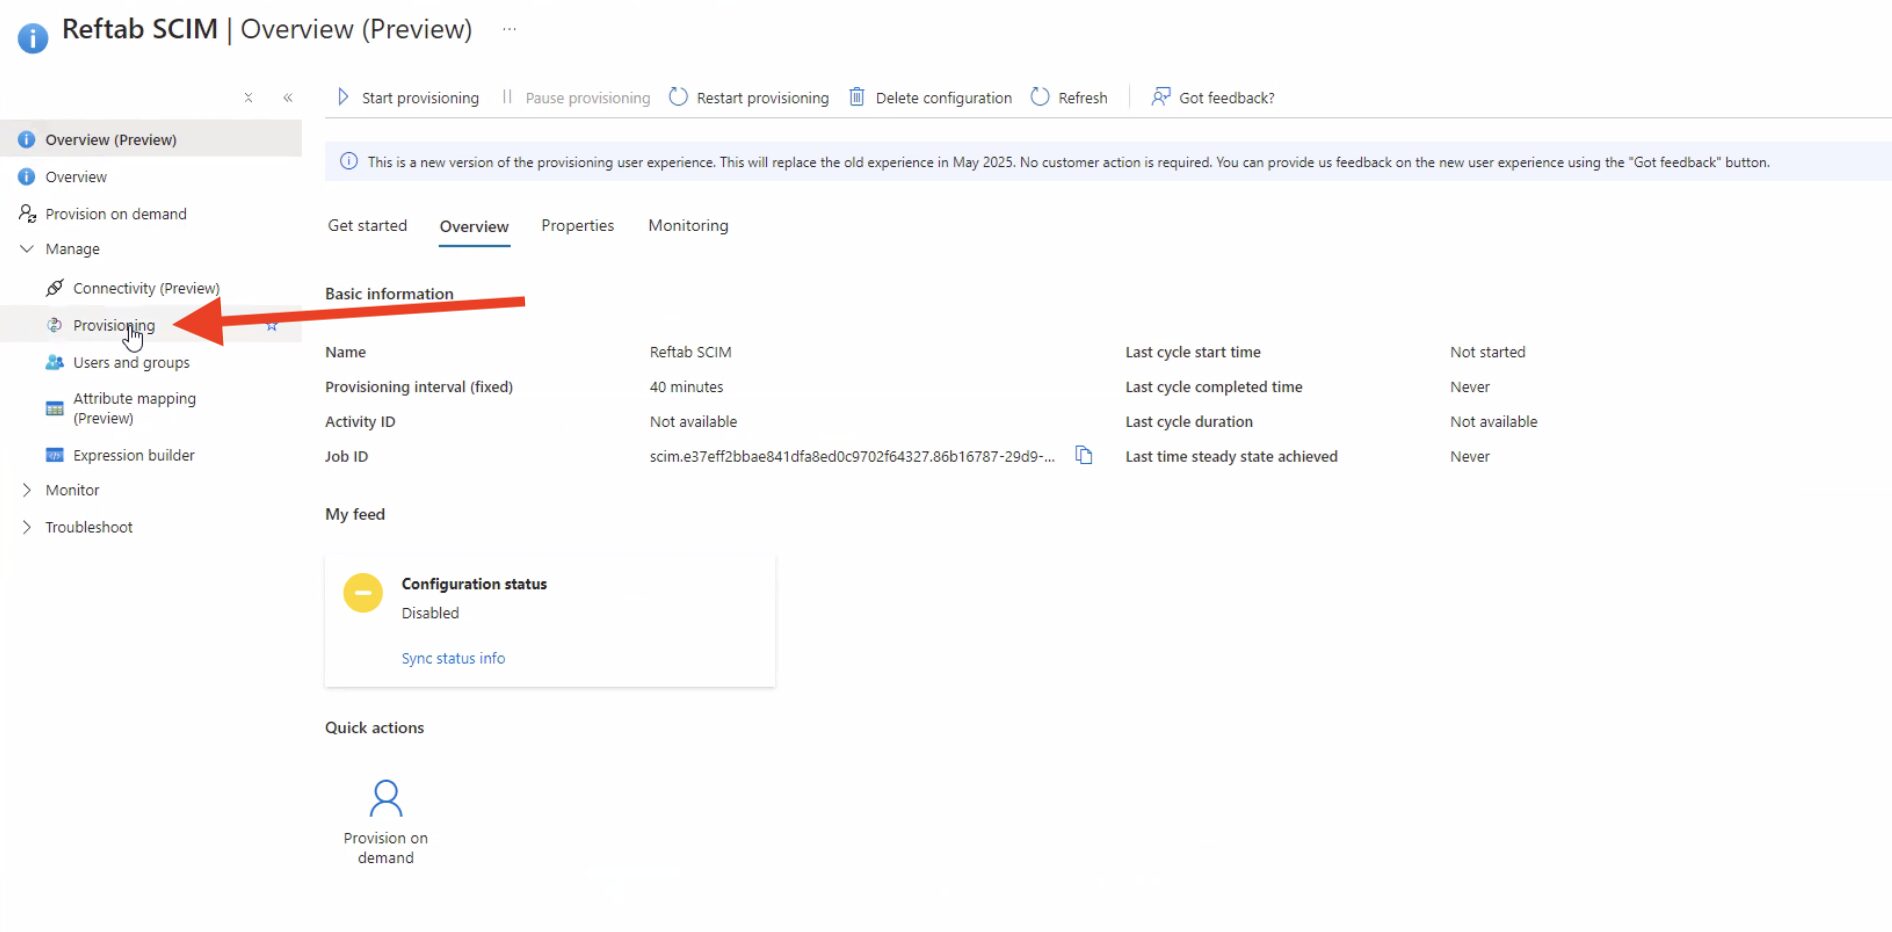
Next expand “Mappings” and click “Provision Microsoft Entra ID Users“
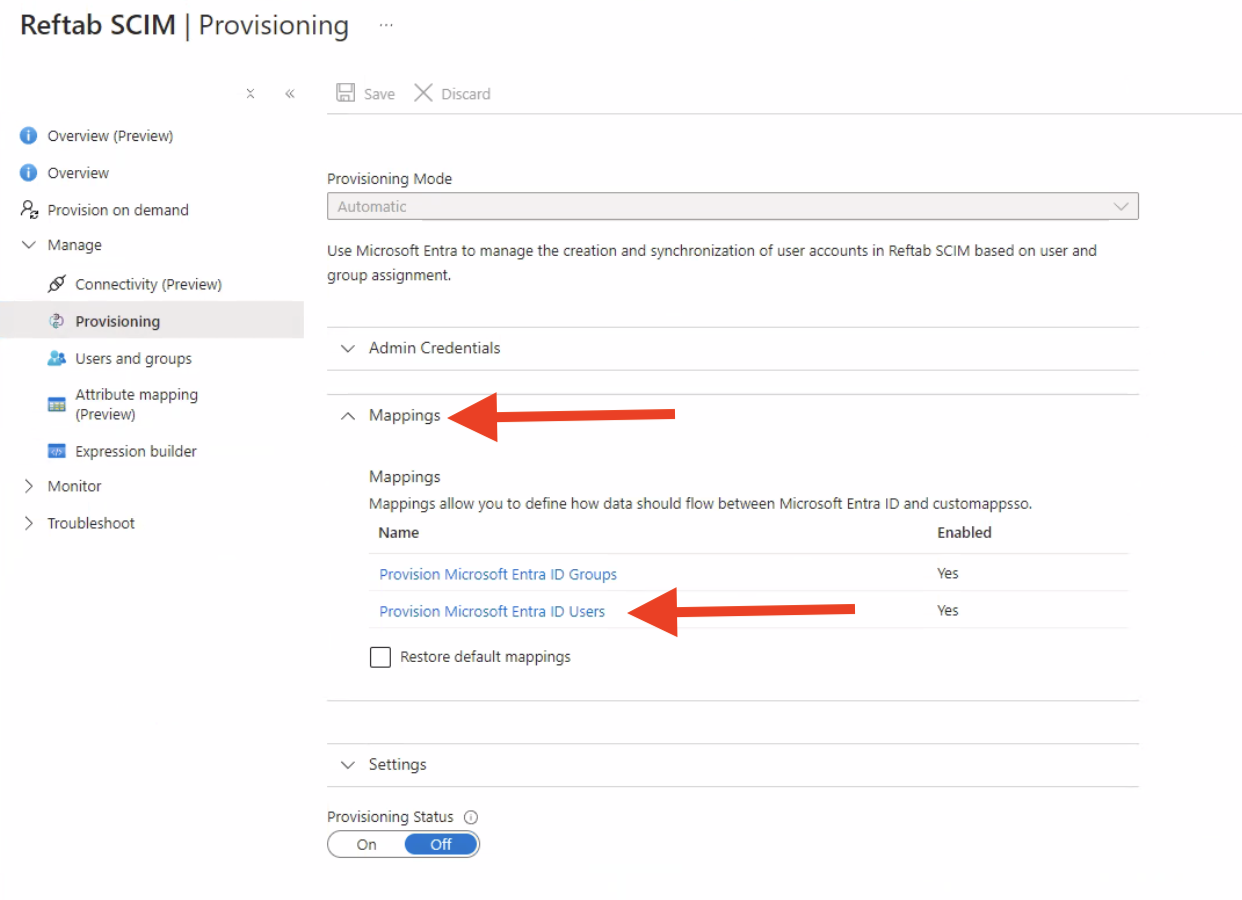
10. Attribute Mapping Table.
The attribute mapping table by default will work with your Reftab SCIM integration. However, if you want to add more fields for Entra to send to Reftab, you may click the button at bottom “Add New Mapping”.
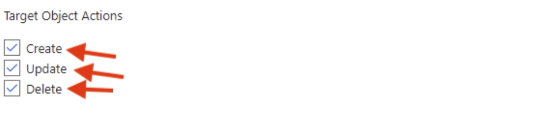
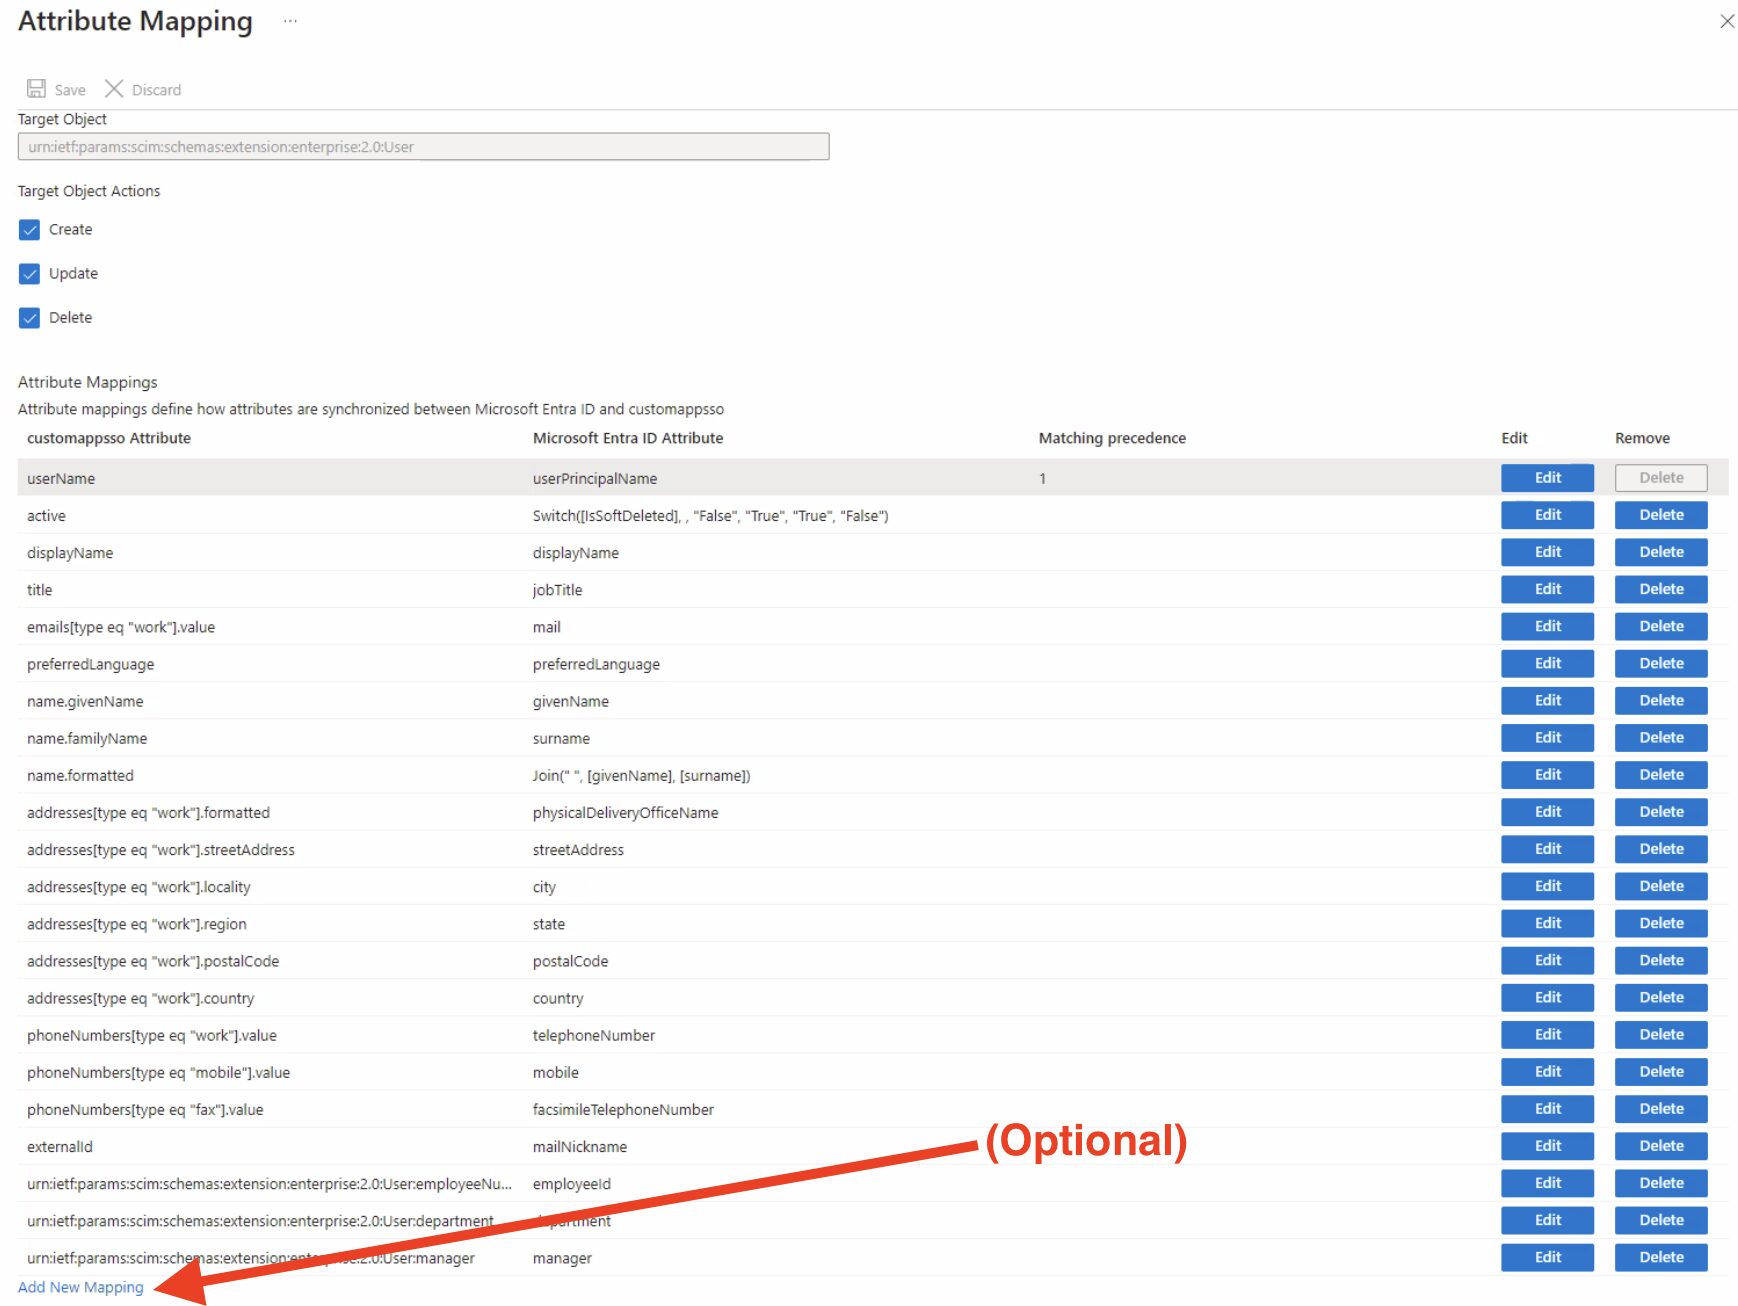
NOTE: Your mapping table must look exactly like the image above. If any of the rows are missing, the SCIM connection will not work.
11. Turn on provisioning status in the app.
11a. Click “Save” at top
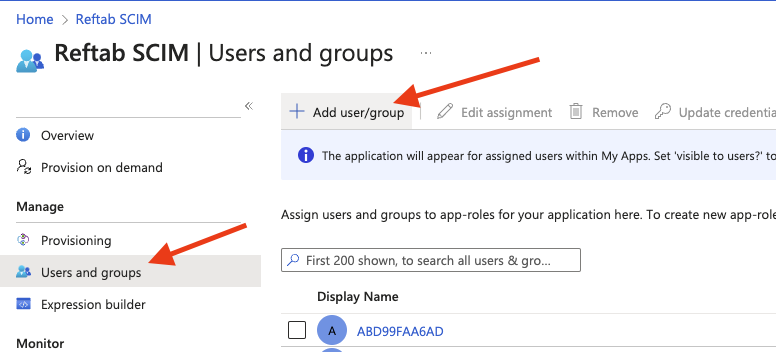
12. Add any users and or groups you want to be sent to Reftab
13. Log into Reftab. Click “Settings” > “Integrations” > “Configure SCIM”
14. Next, configure role assignments.
Default Reftab Access Role: This is the default role users from Entra will be placed into when they do not belong to an Entra group.
Group Mappings (optional): This section is available so that you can see the groups you’re pushing from Entra into Reftab. You can map Reftab access roles to groups. For example if you’re pushing a group called “Employees” into Reftab, every user brought over from that group can be assigned to a Reftab role such as “Loanee”.
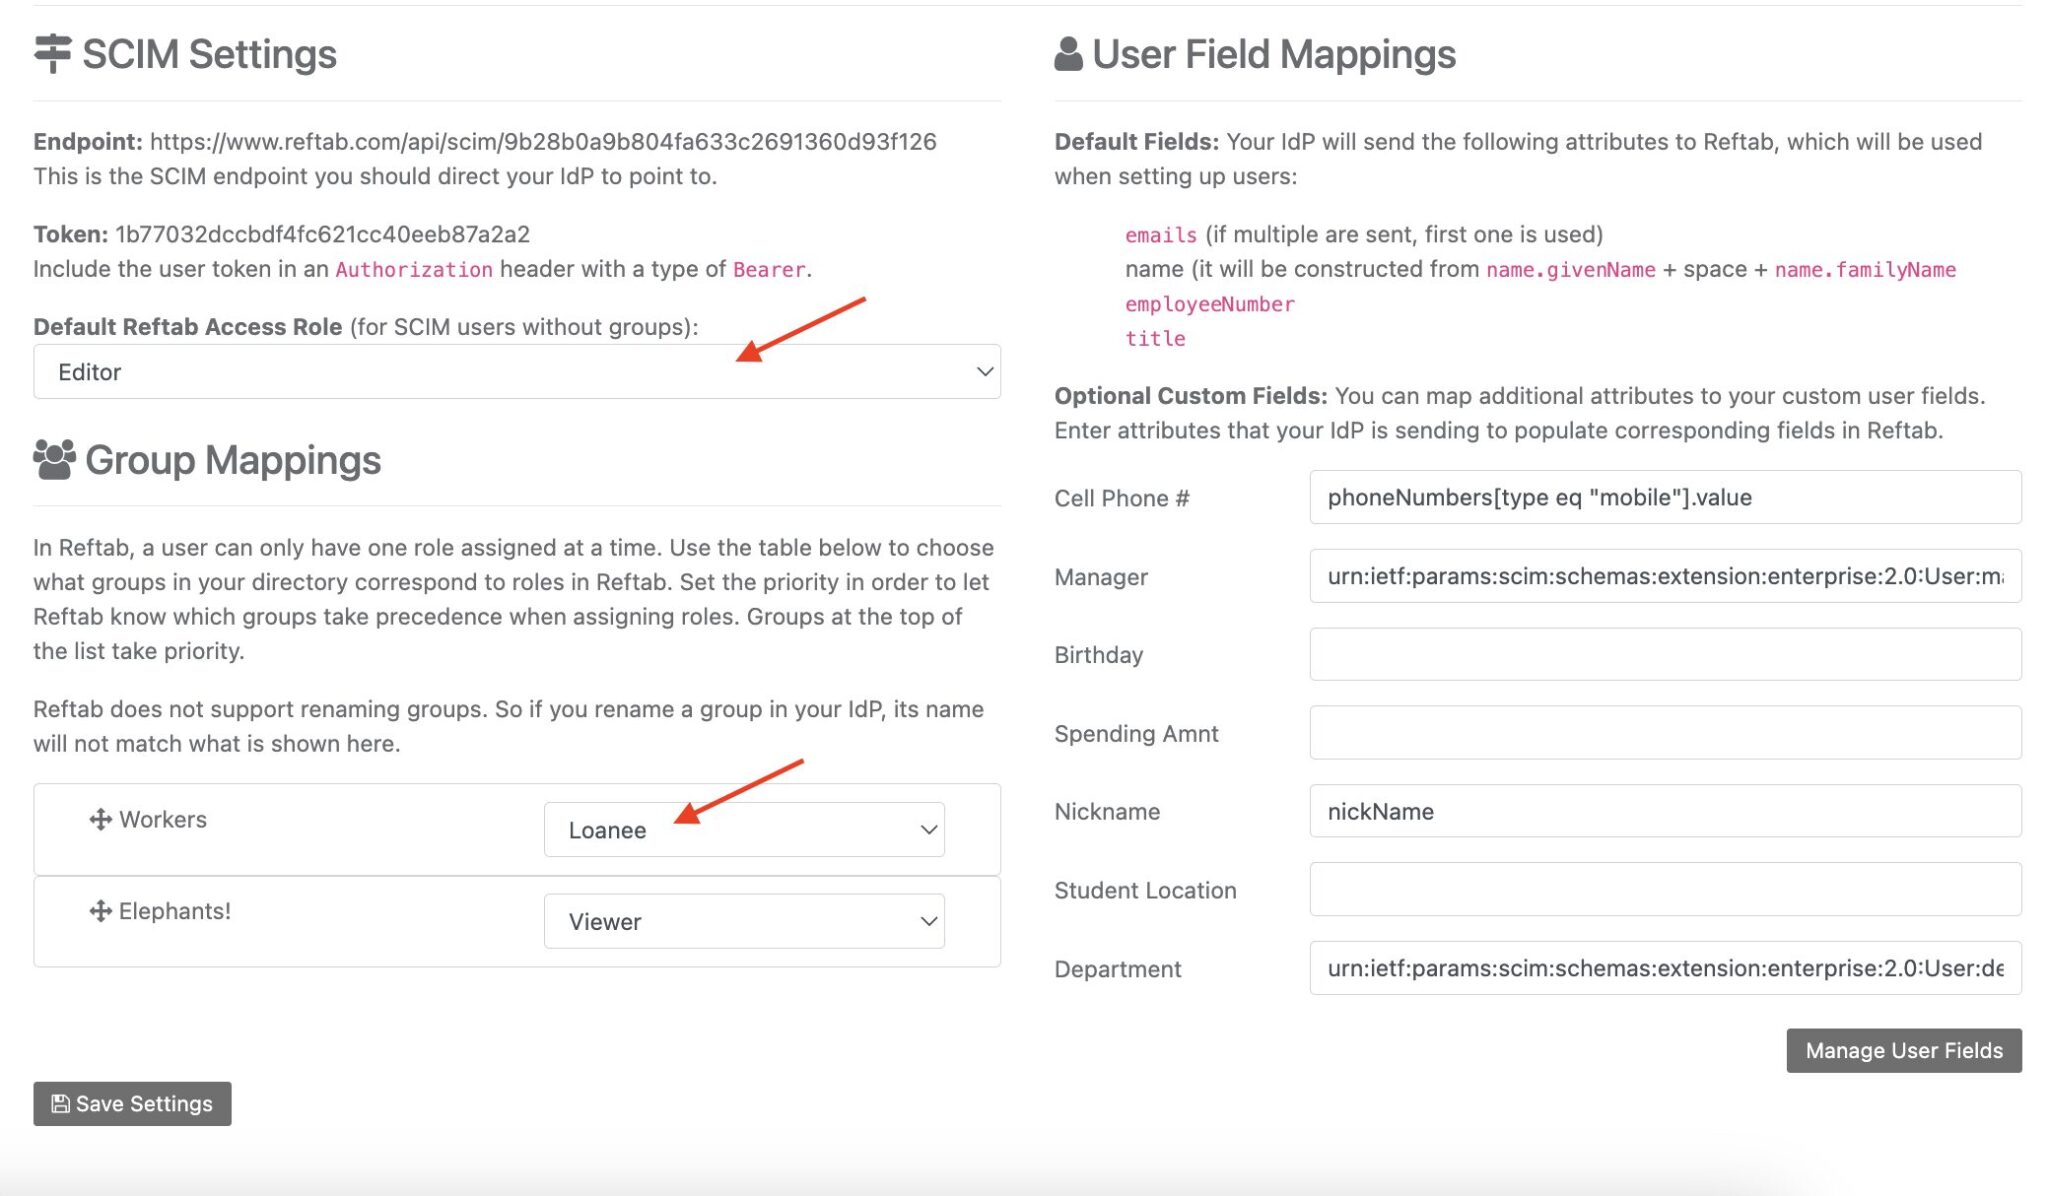
If you want to map other fields such as department, manager, etc. follow this guide: https://www.reftab.com/faq/how-to-reference-another-user-as-a-manager-or-supervisor-in-reftab-from-okta
Next Steps
1. Sync Assets / Devices
- 📘 Intune How to Guide– https://www.reftab.com/faq/ms-intune-integration-guide
2. Sync Applications
📘 How to Guide – https://www.reftab.com/faq/how-to-integrating-azure-saas-discovery-with-reftab
NOTE ON MULTI-TENANCY: If you are using multi-tenancy with Reftab, you can manage users/groups and sync them to their tenants. To do this, configure SCIM at the super tenant level. This allows for a one-to-many relationship, enabling you to push users and groups into separate tenants from the super tenant. You won’t need to log into each individual tenant to set up SCIM. For assistance, please contact Reftab support by emailing “help@reftab.com”.
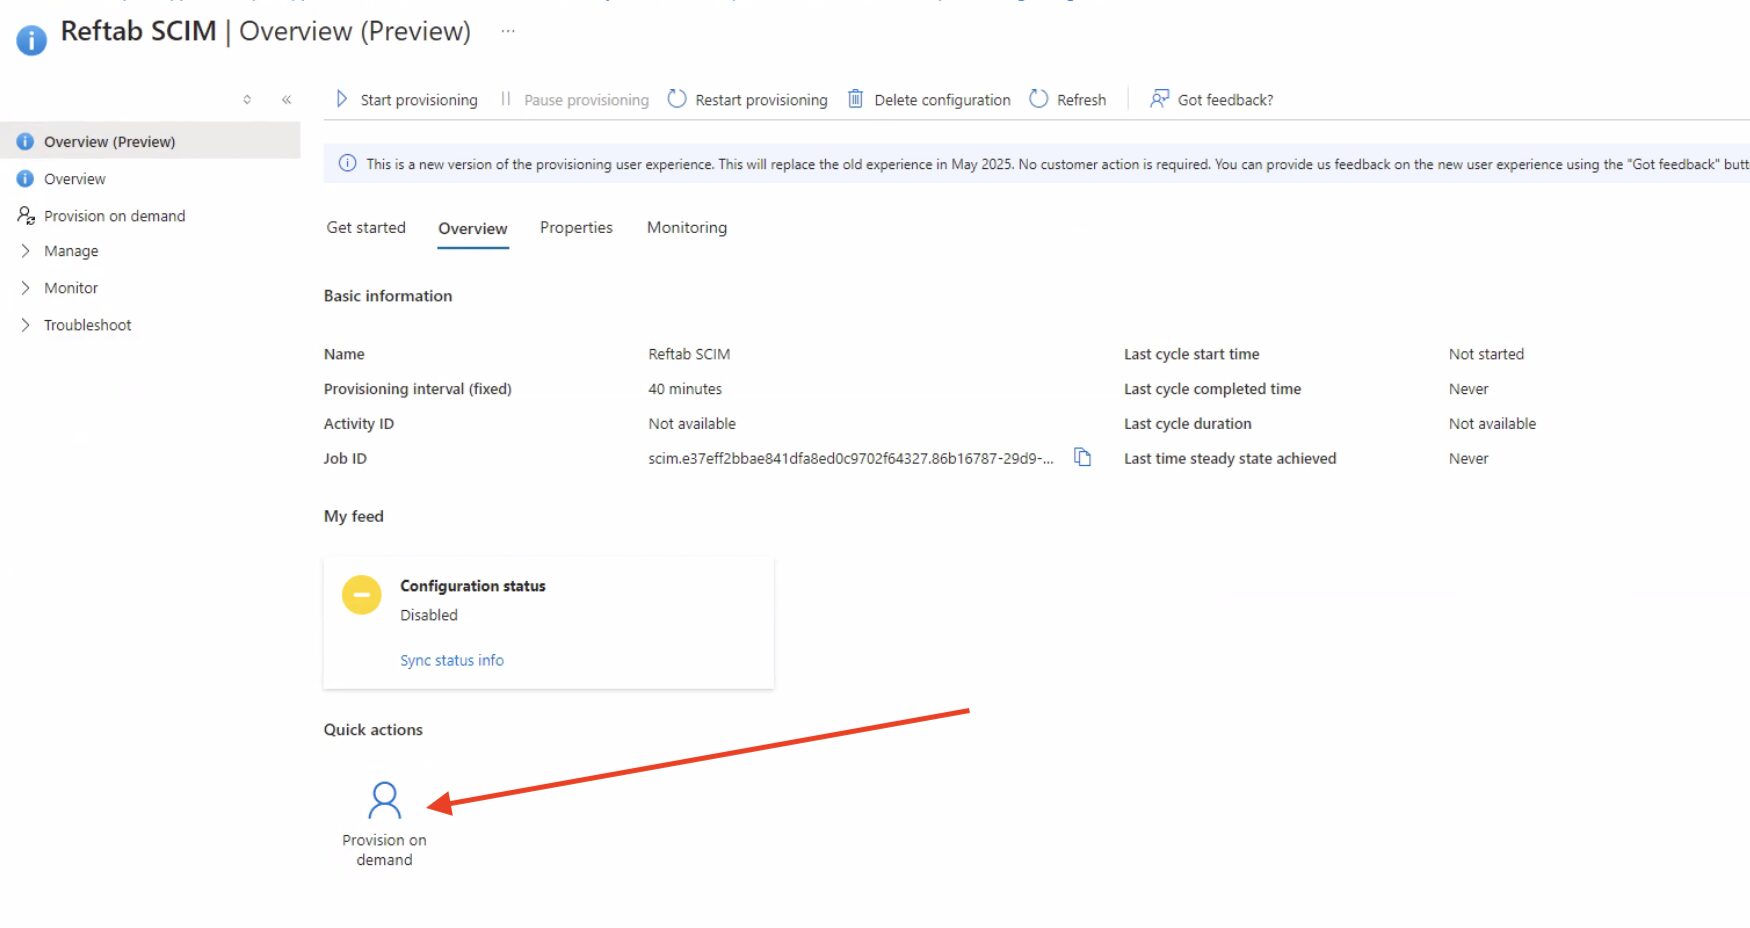
Provision on Demand
Provision on demand in Microsoft Entra (formerly Azure AD) is a powerful feature, especially for testing and troubleshooting SCIM integrations. Here’s what’s useful to know:
What Provision on Demand is:
Very helpful for testing mappings, attribute transformations, and understanding what data Entra sends.
It allows manual provisioning of a user from Entra to your SCIM-enabled app.
Useful for triggering provisioning instantly without waiting for the next sync cycle.
Notes:
Sync Frequency
You should begin to see users appear under the “Sub Accounts” page in Reftab. Subsequent syncs are triggered every 20-40 minutes.
Disabled Users
If a user was a member of a group pushed to Reftab but then taken out of that group, during the next sync, they will be set to the “Default Role (for SCIM users without groups) set on the Manage SCIM page. Otherwise, it’s possible for the source to also send a ‘disable’ user, if the user is disabled in MS Azure then Reftab will know this and set their role in Reftab to ‘Disabled’.
Role Lock:
To lock users into a Reftab access role, (for example, those who should be Reftab administrators), you’ll want to turn on “role-lock” in Reftab. This locks the user into whatever access role they are currently in. This is helpful so that when a sync occurs, the user’s access role will not change if their group changes in MS Entra or if role assignment rules change in Reftab. In other words, enabling this setting bypasses role assignments and locks the user into a role.

Need help? We're here for you
For any questions or assistance, feel free to reach out to us.
Ready to simplify IT asset management?
No credit card. No watered-down trial. Create a free account and see firsthand what Reftab can do.